Fuel lines in boot and tank service
The car had developped a strong smell of fuel in the boot all the time and not-so-strong in the cabin while driving. This seems to be a common problem, and rumours says it’s hard to solve.
In the winter 2016-2017 at KM 96370 I decided to go all the way in first go and remove the tank, have it repaired if it was leaking, replace the rubber/neoprene mat under the tank and not least change all fuel hoses in boot.
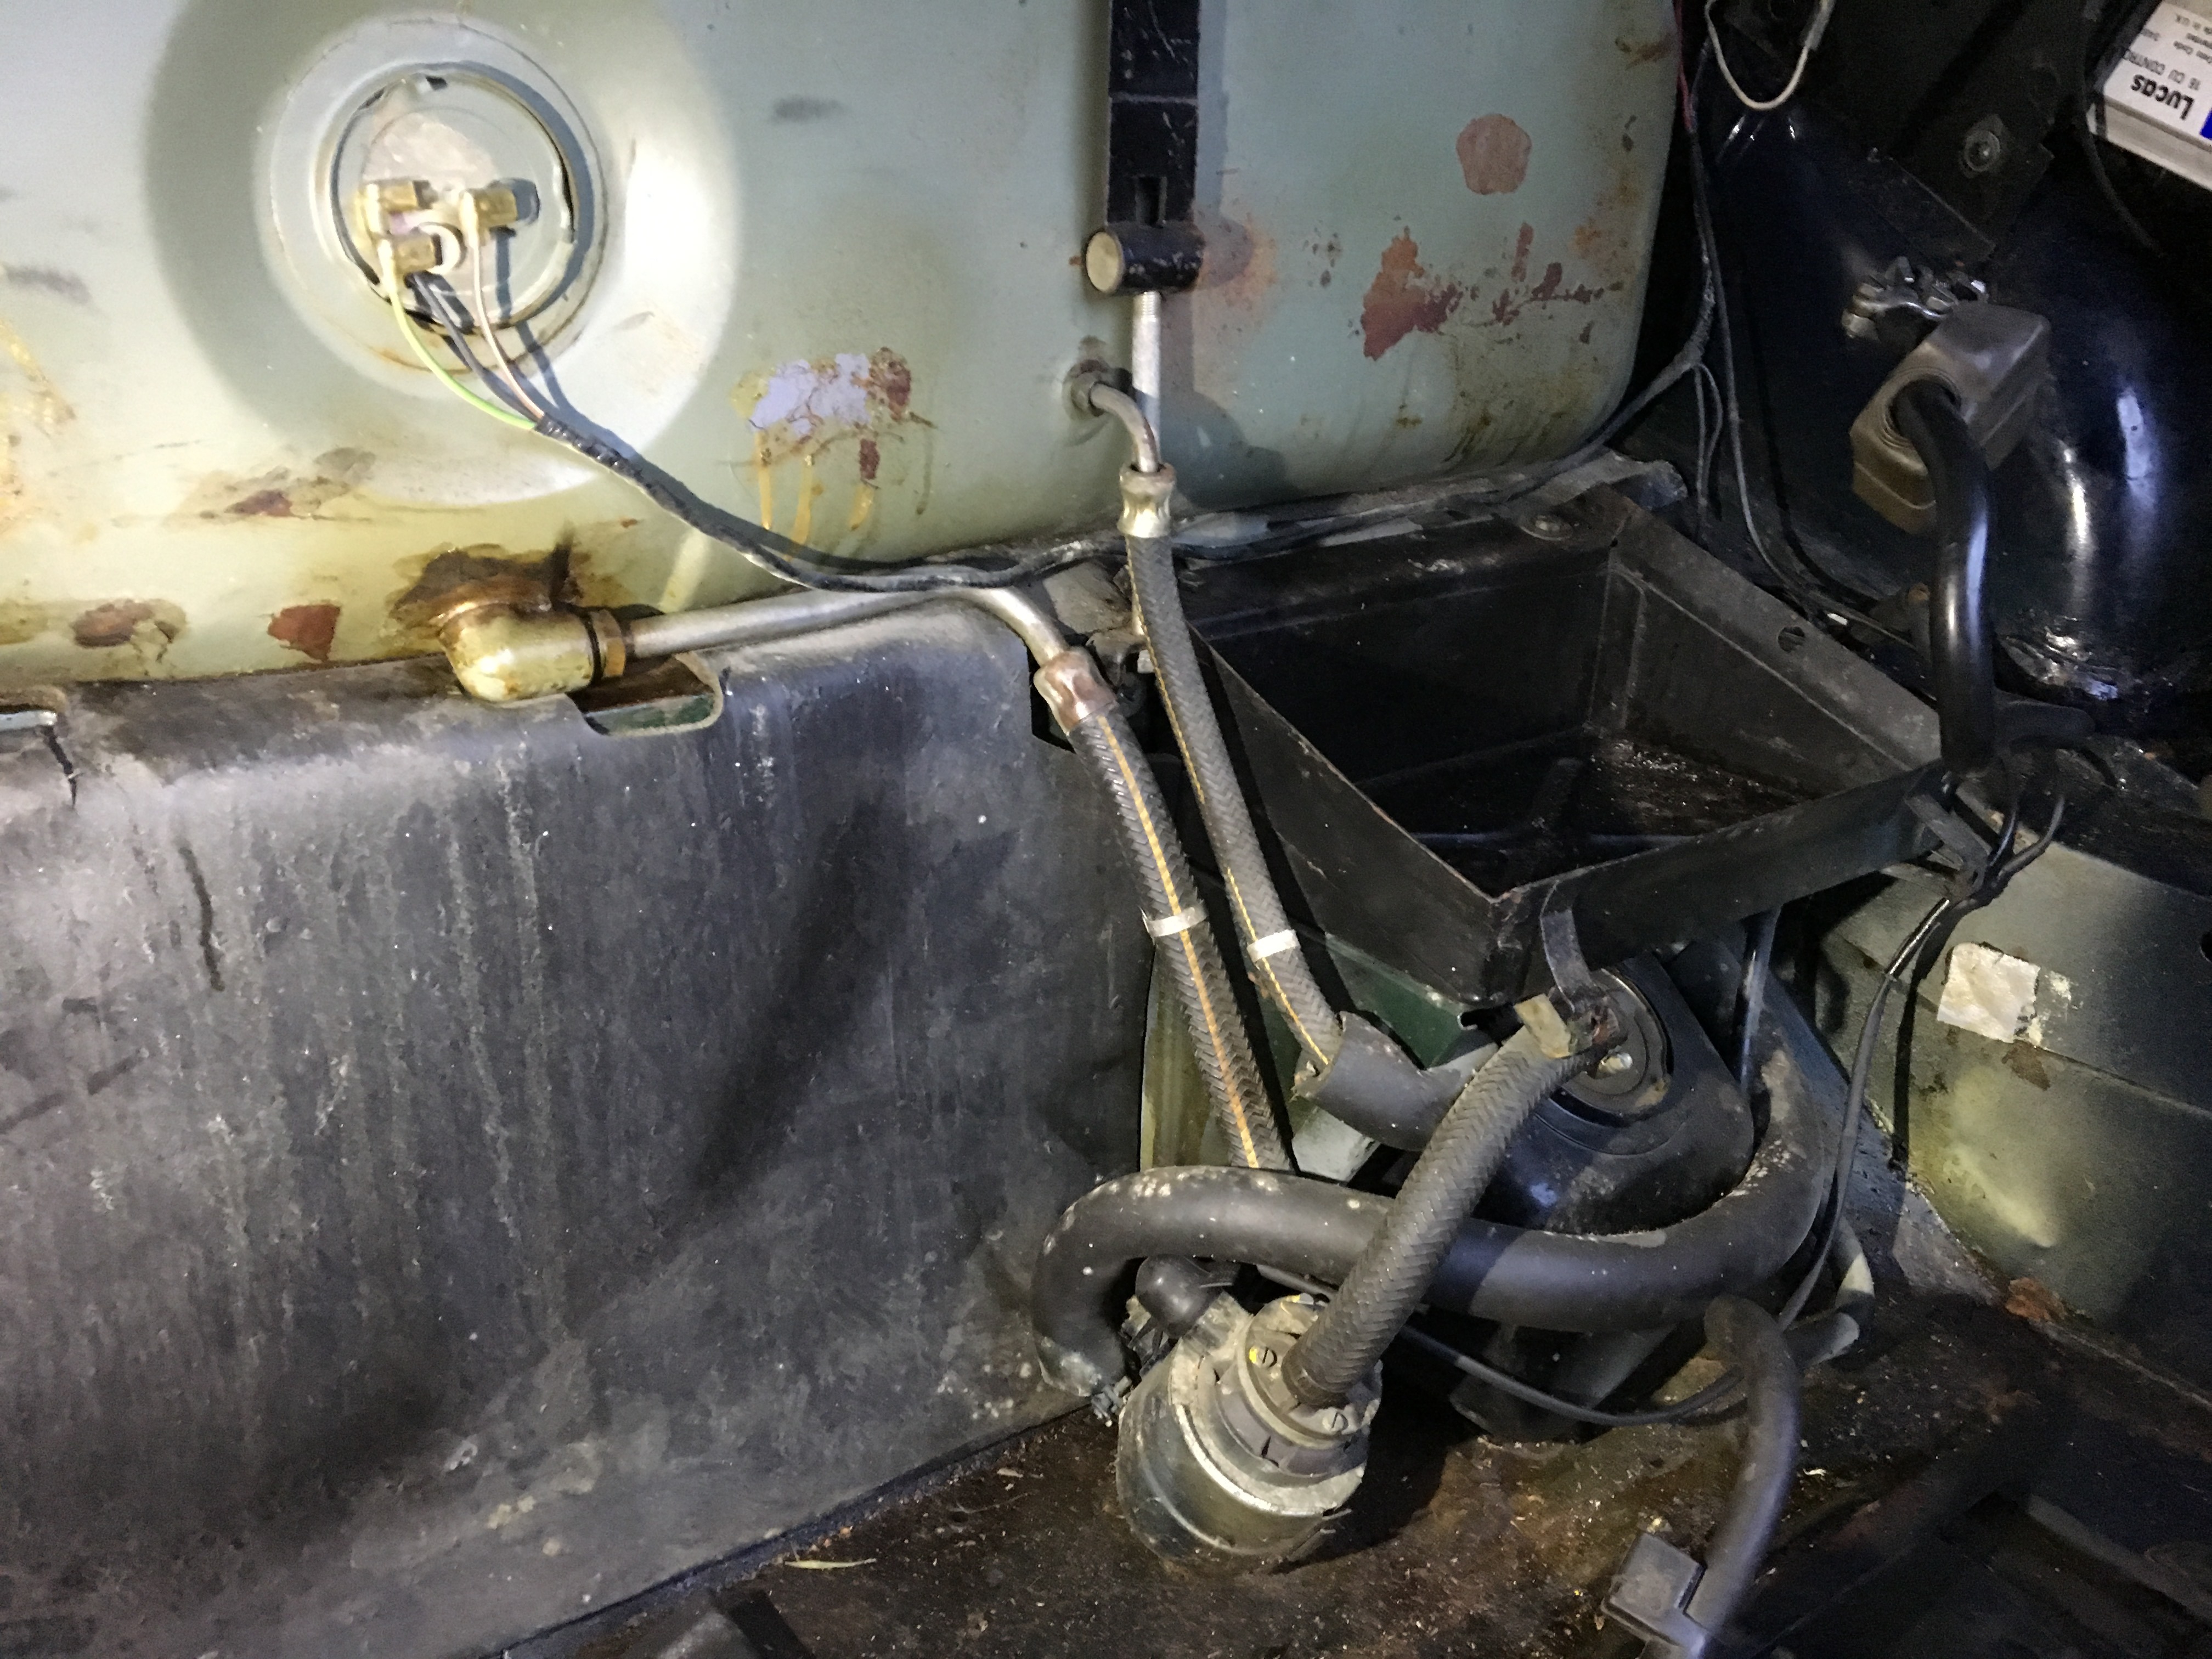
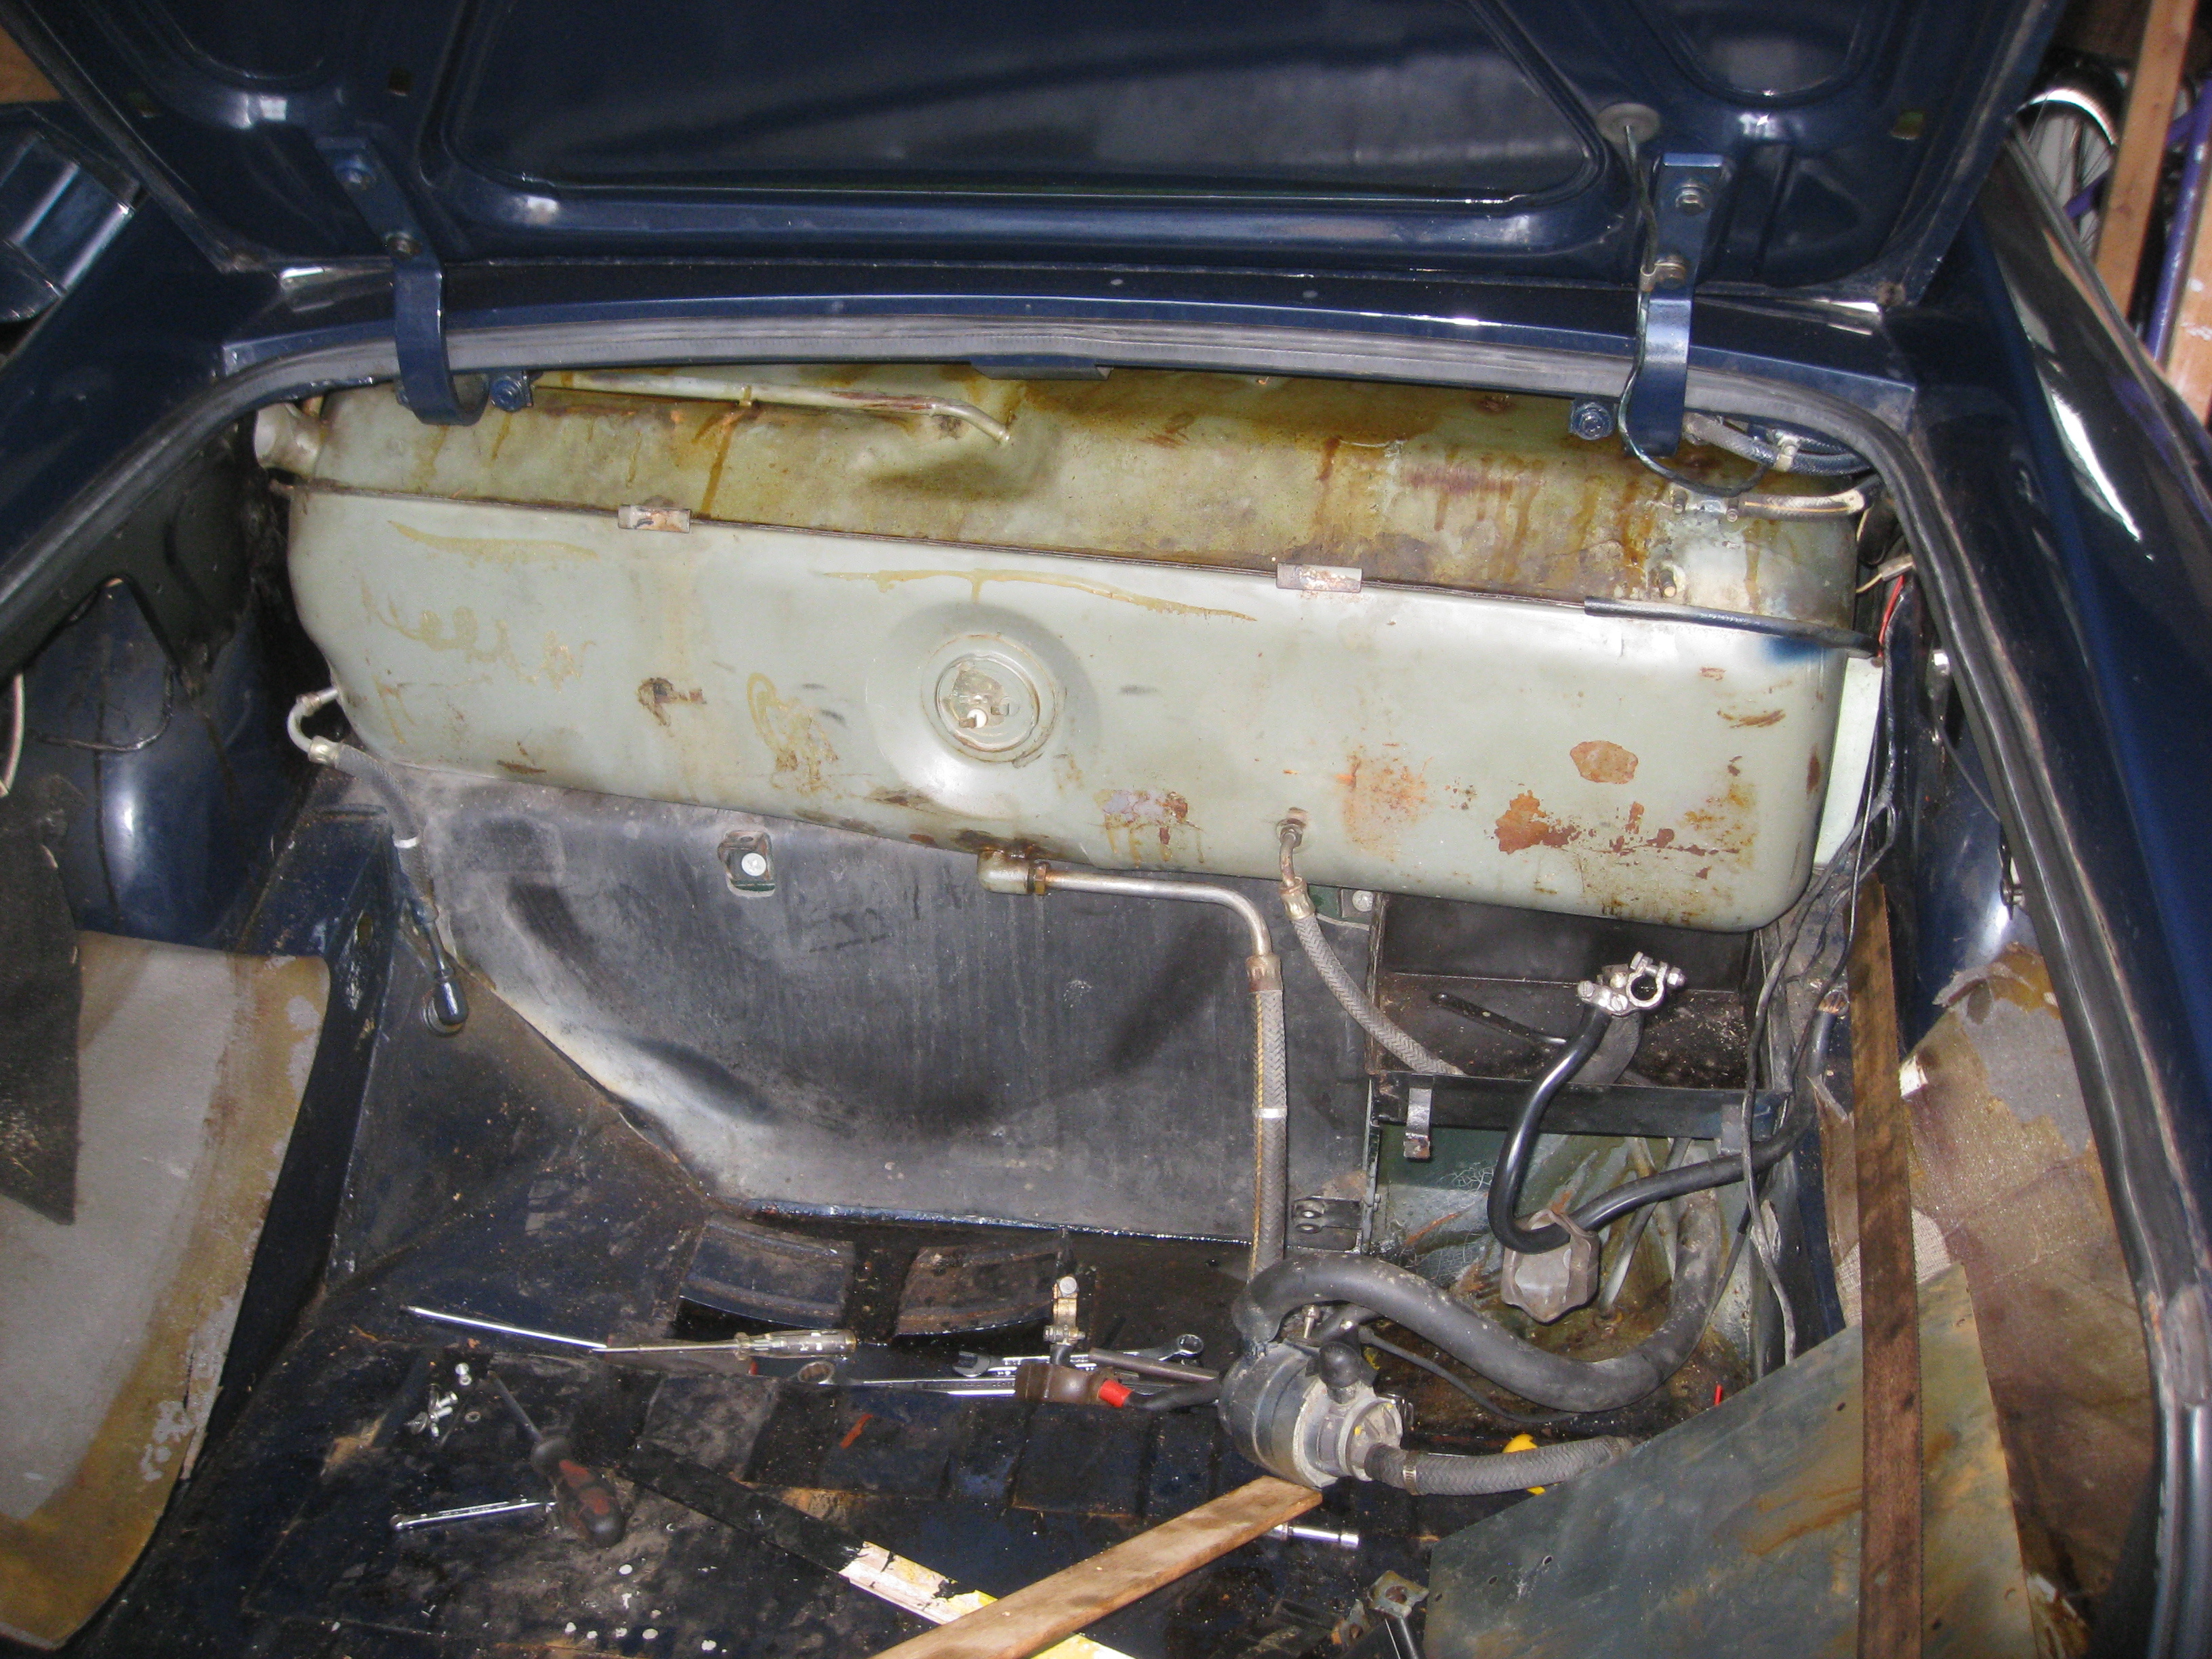
The main fuel tank is 90 liters and placed transversely over the rear axle. The main tank feeds a small sump tank, which is where the fuel pump picks up fuel. The fuel is then directed forward in the RH fuel line to the fuel filter, which in MY 1977 is placed in the engine bay. Later cars has the filter in the boot and thereby a few more connections, that can potentially leak. Not to mention the obvious risk of spilling fuel on boot carpets while changing the filter. I suppose there must have been a really good reason for moving the filter from engine bay to boot…
After the filter in the engine bay the fuel line passes a fuel pressure regulator before entering the fuel rail.
After the fuel rail is another fuel pressure regulator placed on the front of left bank. This is the important one, which is keeping the correct pressure for the fuel injection.
From this regulator the fuel line takes a funny route under the LH inlet manifold before entering the fuel cooler, where the A/C reduces fuel temperature before returning it to the tank through the LH fuel line. The fuel cooler on the 1977 is placed directly on the A/C compressor, and the combination of a 1989 HE engine and a preHE A/C compressor probably makes the routing more complicated than normally.
Additional to the main flow is several ventilation lines and of course the huge filler hose. Simple ? Not so much…
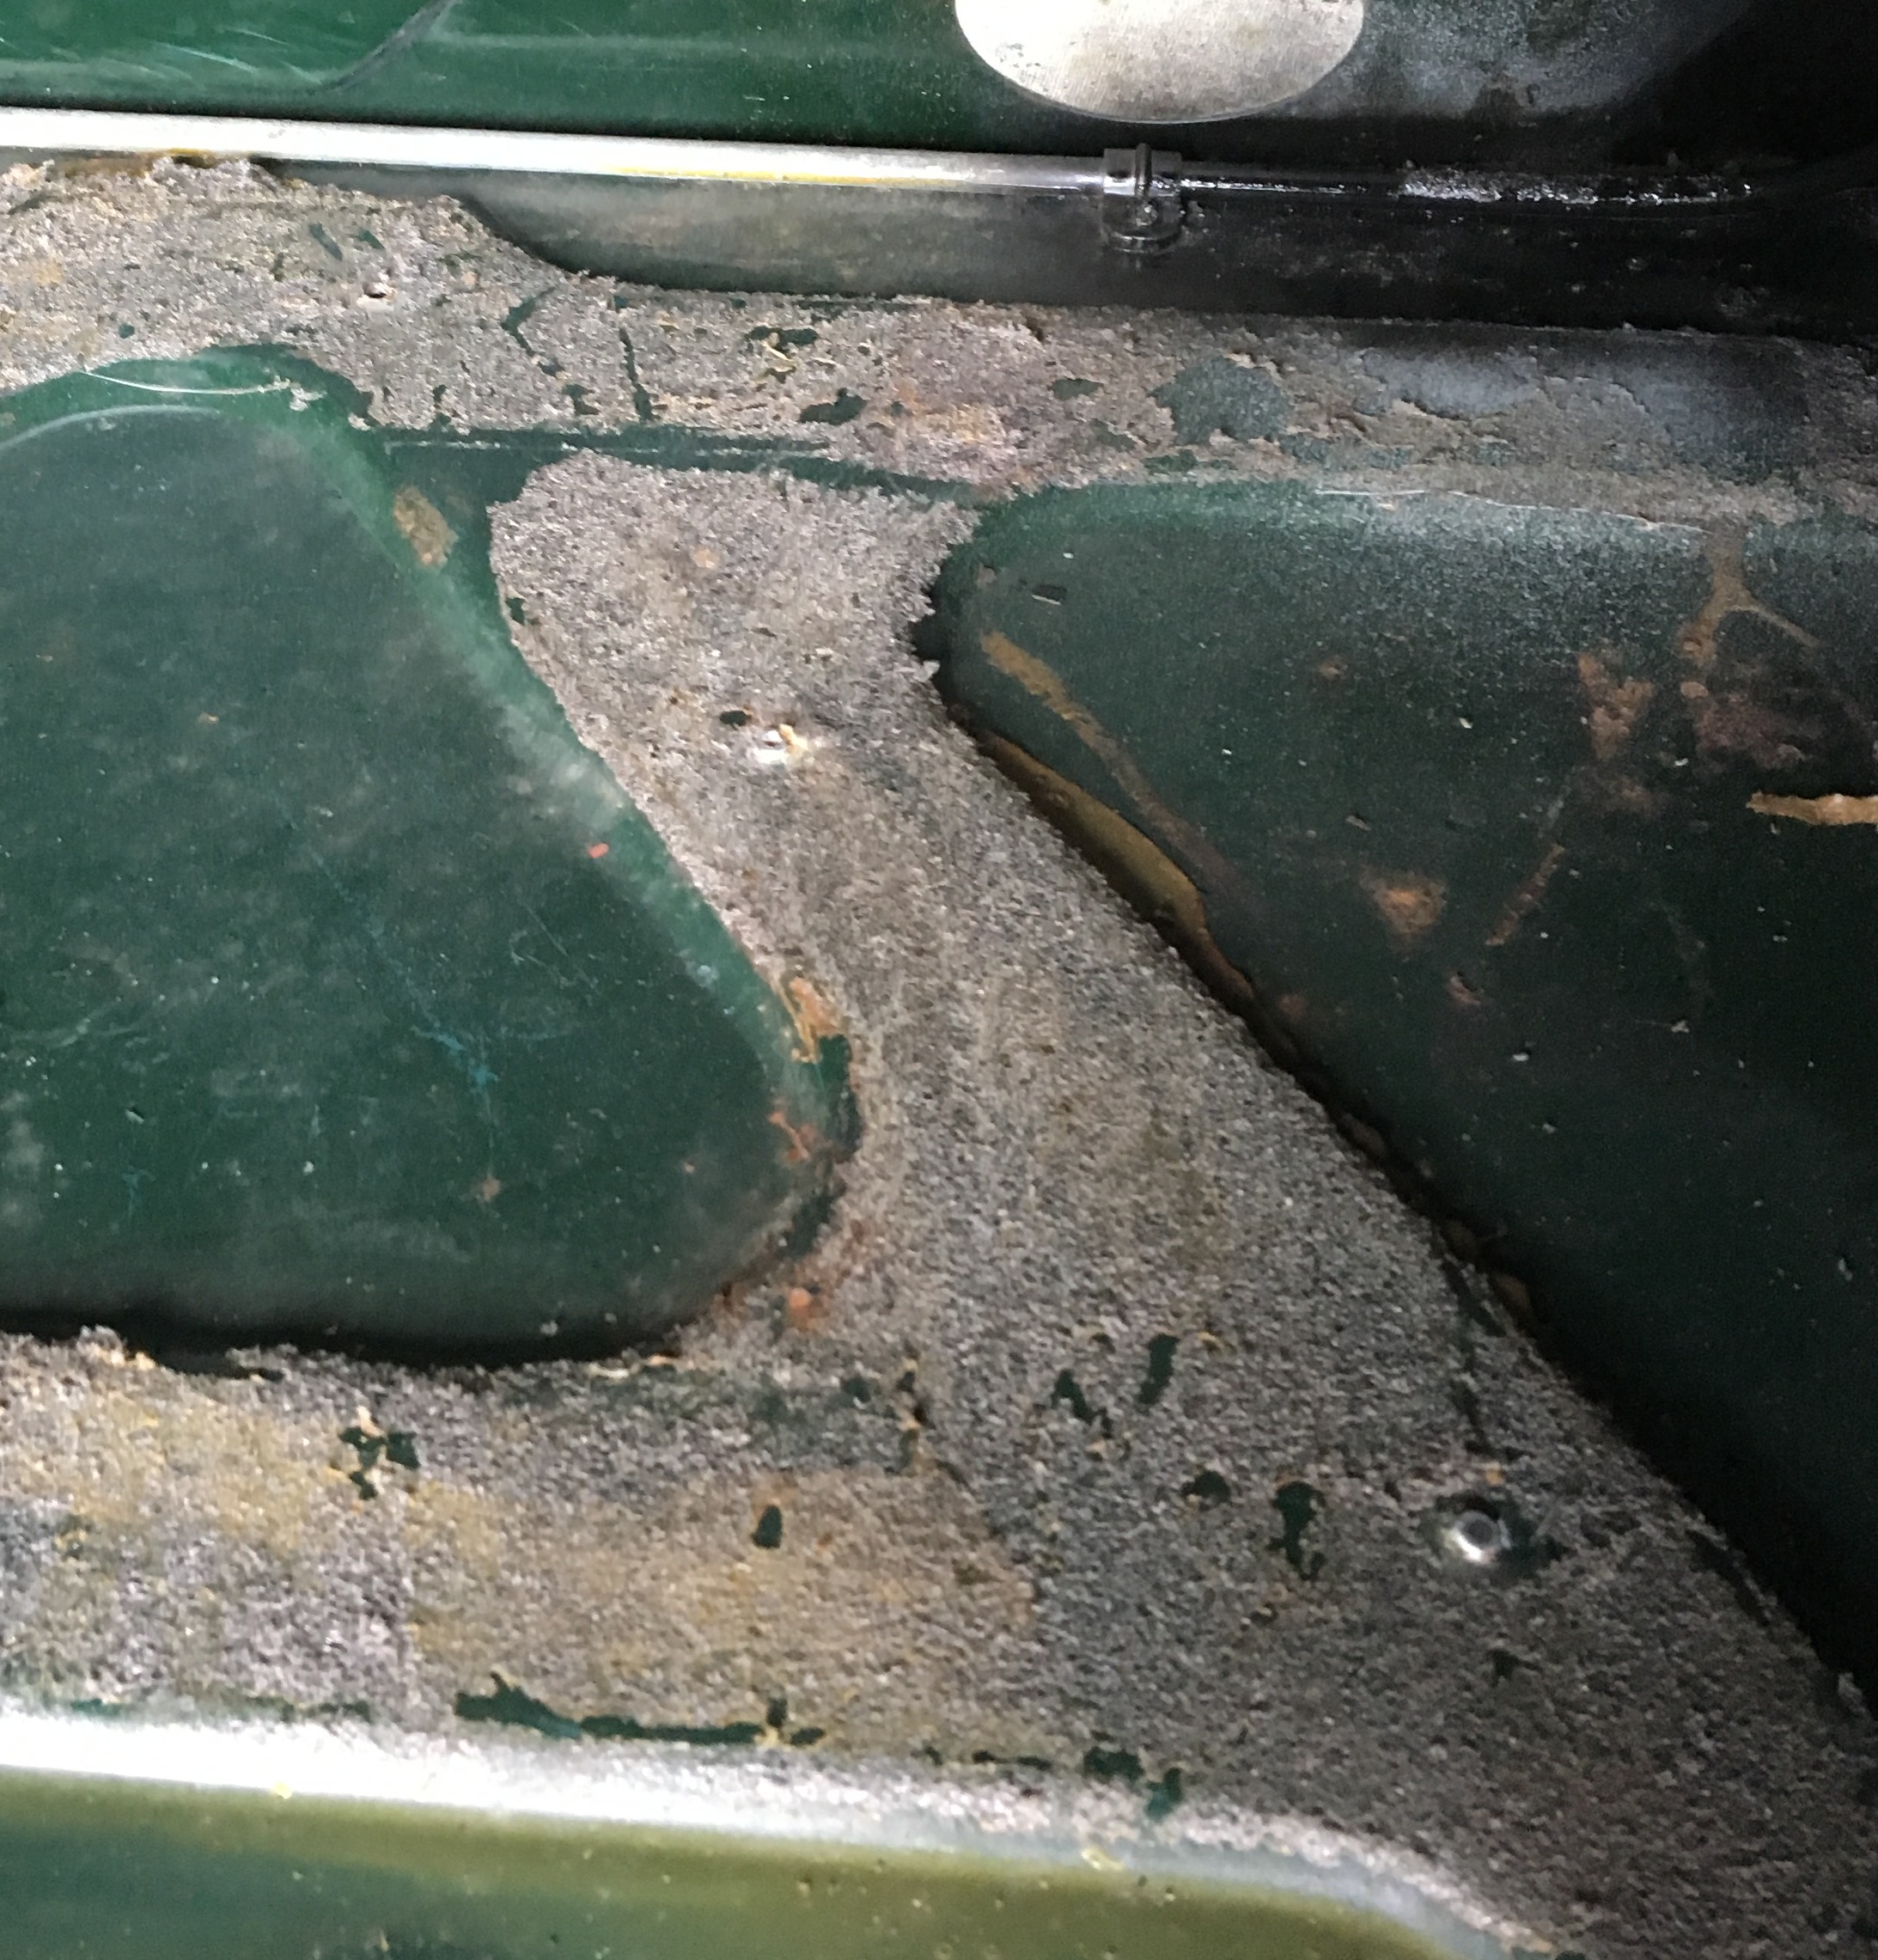
Getting the tank out is on the other hand simple, but not exactly easy. First step is to remove spare wheel and battery, then all carpets and insulation are stripped out.
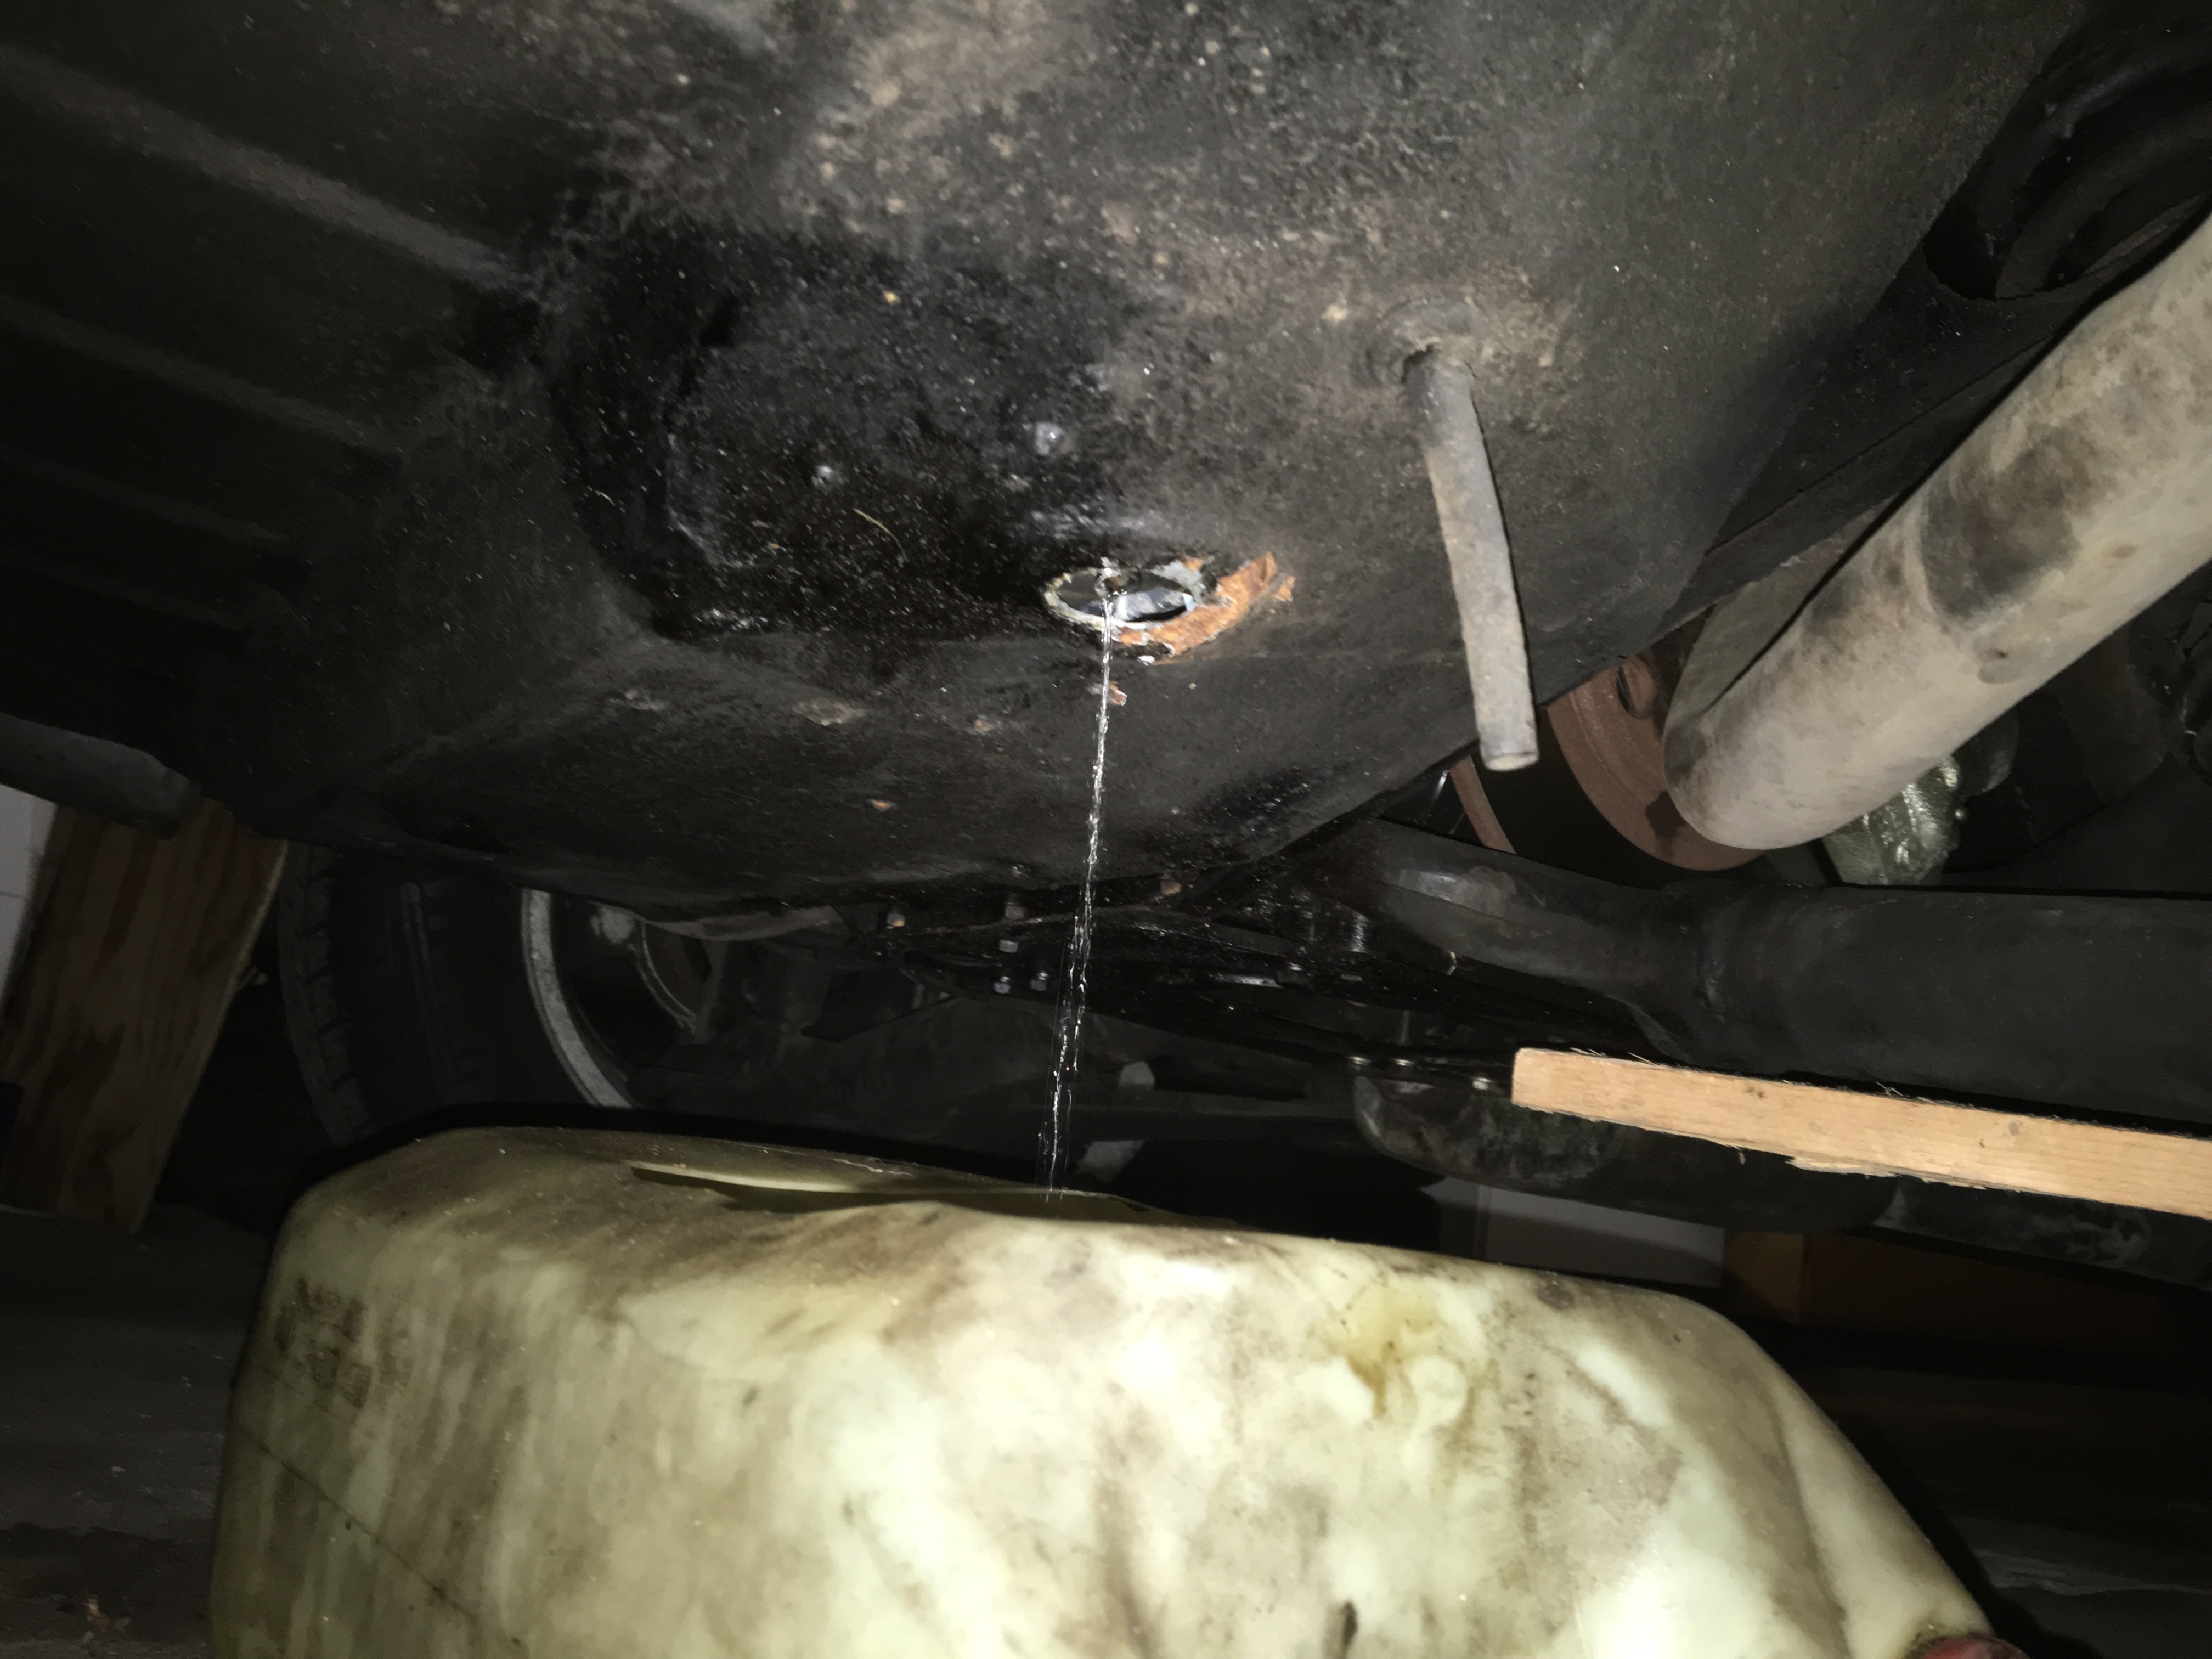
Next step is to empty the tank using the drain plug in the sump tank. The hole in the boot floor and the drain didn’t align well, so I had to loosen the 2 bolts fixing the sump tank before being able to access the plug from below. Spanner width is 11/16, and it’s easier to get to the plug from under the car than from inside the boot.
After the tank is emptied all fuel hoses obviously restricting removal shall be seperated form the tank.
The tank was stuck to the neoprene mat and had to be released using a piece of sheet metal to cut it free. This destroys the mat, but as it was both rusty and smelly the loss was not big.
When the tank was free to move I thought the tank could be pulled out in RH side first, but the fit is too tight: It has to come straight out without angling it. This meant that the sheet metal cover at the top LH side of the boot had to be removed for the filler neck to clear the body. On the photo below I’m trying to get the tank out right side first, but without succes.
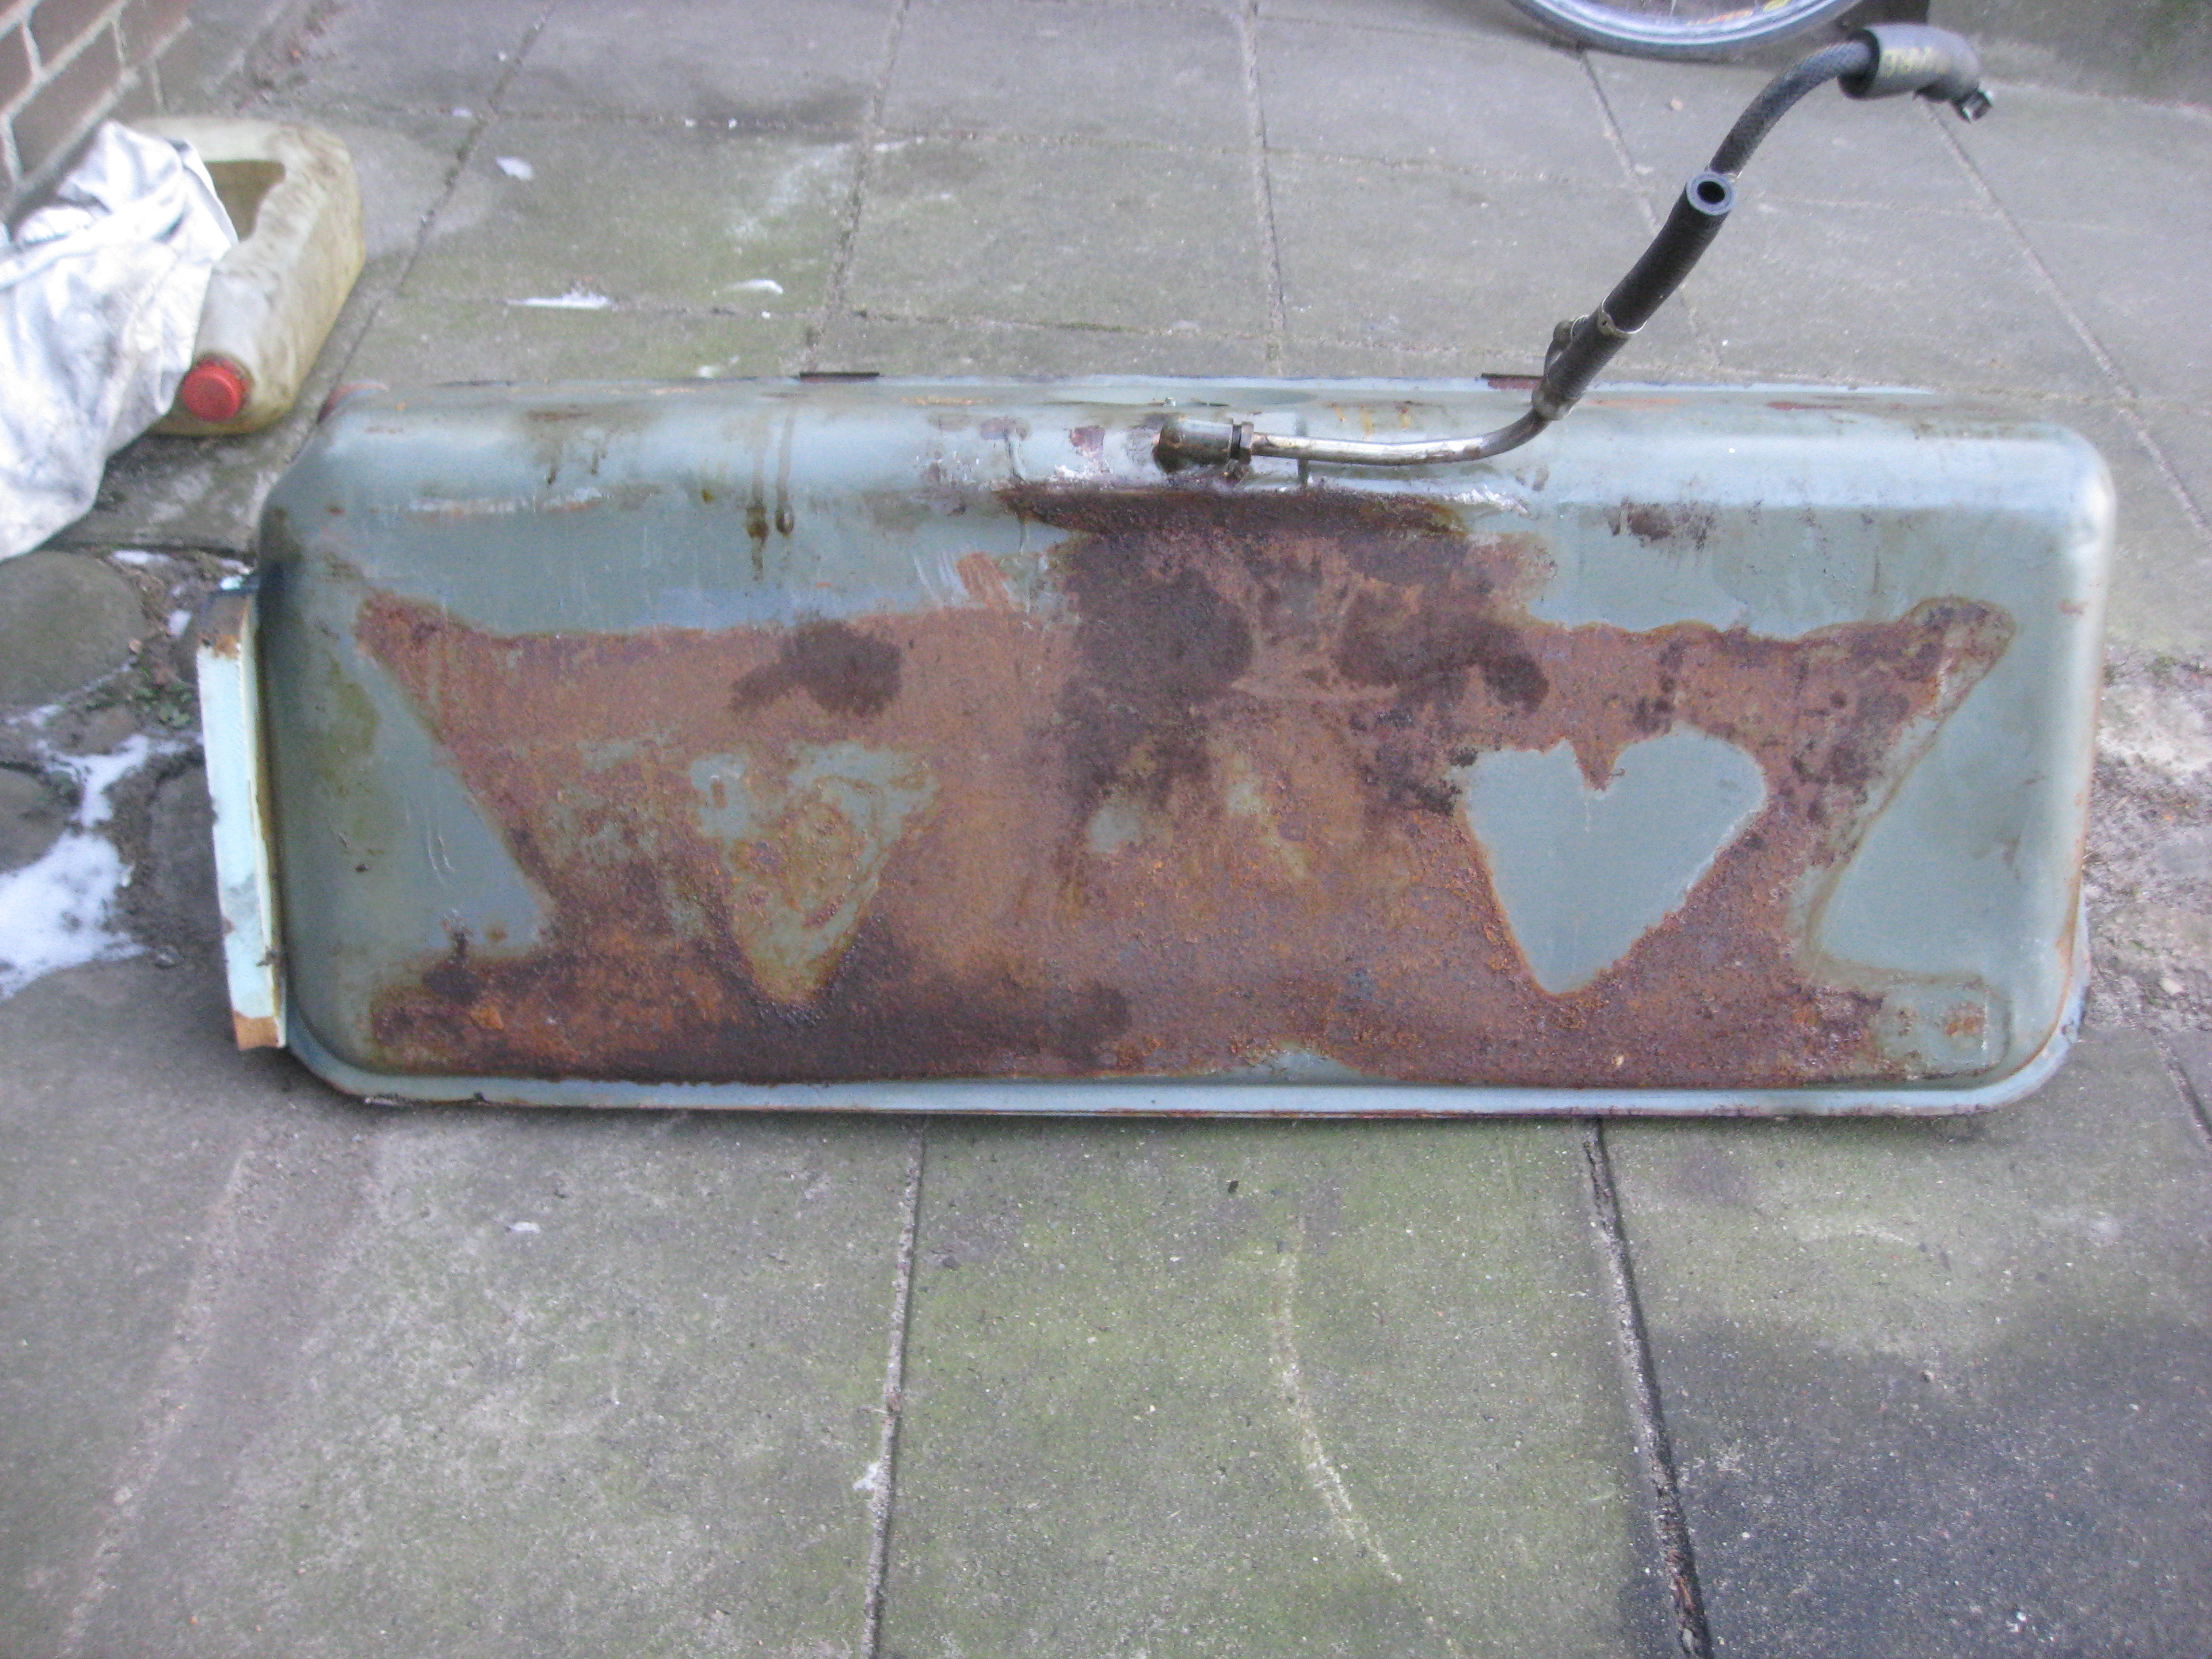
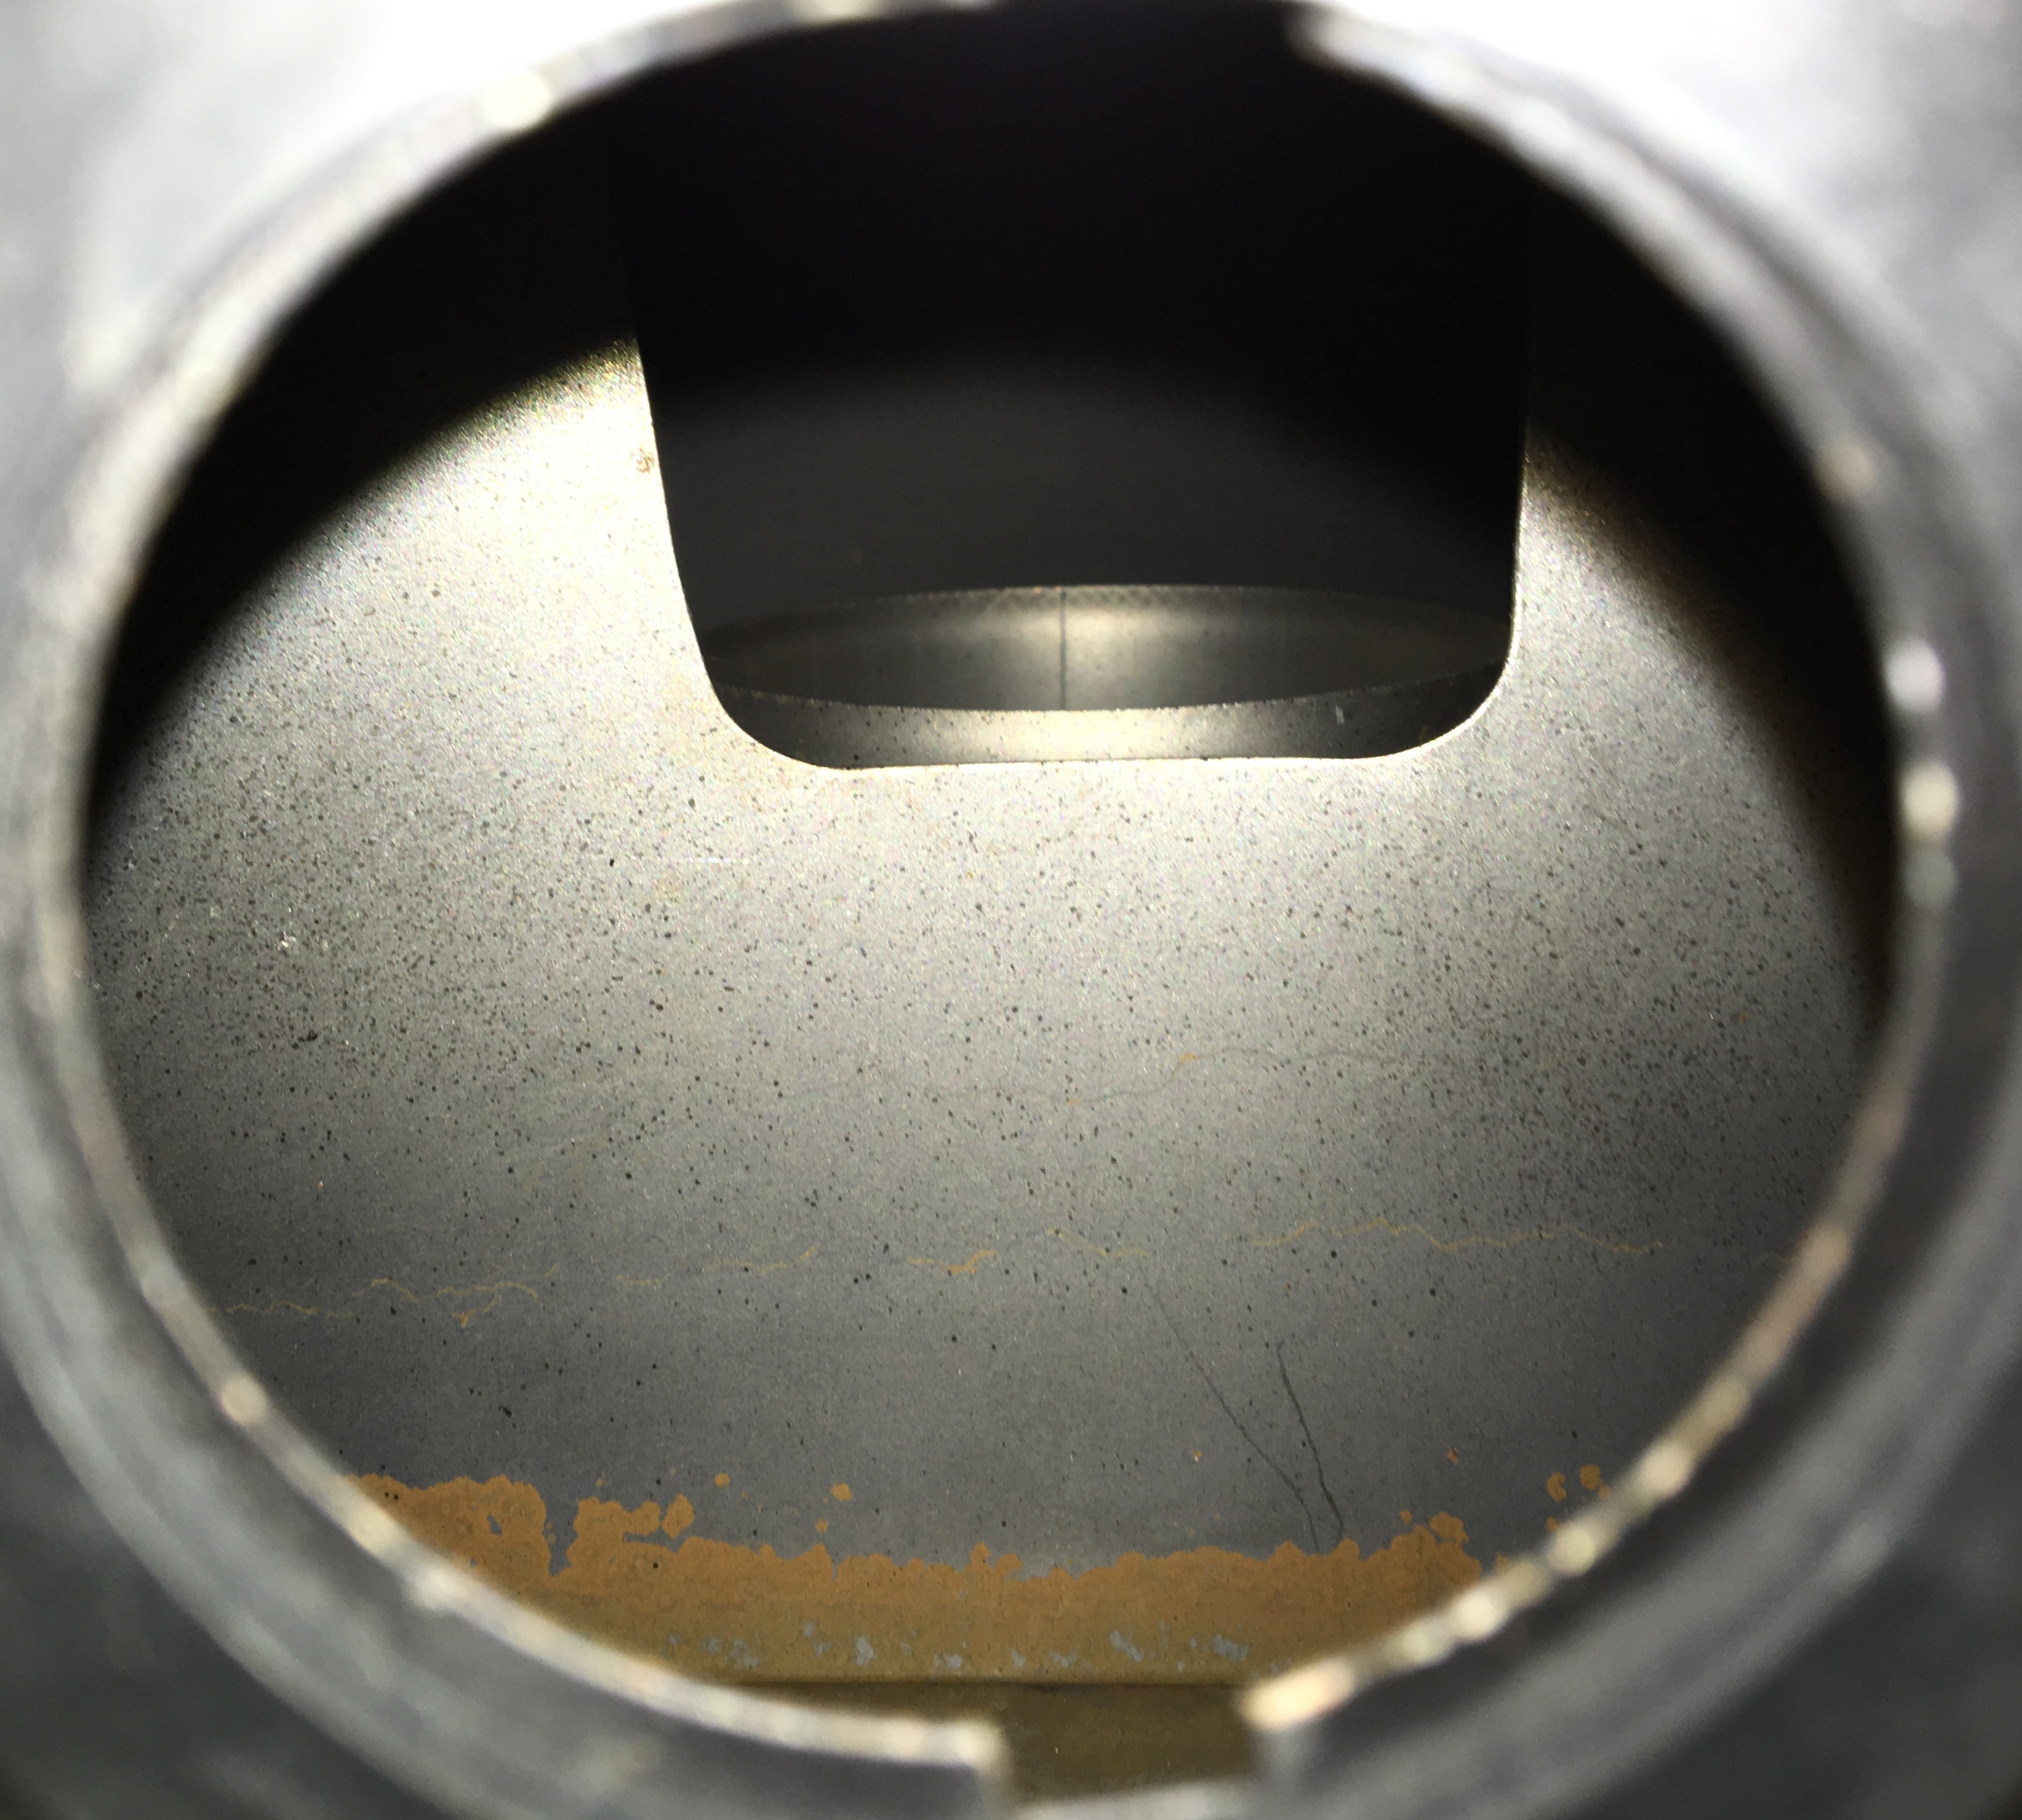
I had both main and sump fuel tanks pressure tested and found tight. The bottom of the main tank was stripped down and epoxy treated at BMP Kølerservice in Odense. The owner (Mogens) told me that the tank was in very good condition for its age, especially the inside was nice.
The photo below into the main tank at the fuel gauge opening shows some of the complex baffling structure and the rather nice condition of the tank internals after 40 years
Meanwhile I had made a list of the fuel hoses needed. Excel file: Fuel lines XJ-S
The sizes ranges from 1/4″ to 1/2″ + 2 1/4″ for the filler. It turned out to be hard to find a supplier having all these in stock in proper quality regarding pressure rating and modern fuel compatibility. I ended up ordering from Demon Tweeks in UK. The hose delivered was Codan SAE30 R6 rated 12 bar WP.
I also replaced a few ventilation and fuel lines in the engine bay as I had a lot of tubing apart to get access for the ignition service
Many original fuel lines was assembled using crimped metal collars, but also worm drive hose clamps were used. These are not recommended use in small sizes if proper tightness is wanted, so these were changed to new fuel injection hose clamps. The worm drive hose clamps used at larger hoses were replaced with new of same type.
The crimped metal collars were sliced open using a grinder after making sure no fuel was left and replaced with fuel injection clamps during assembly.
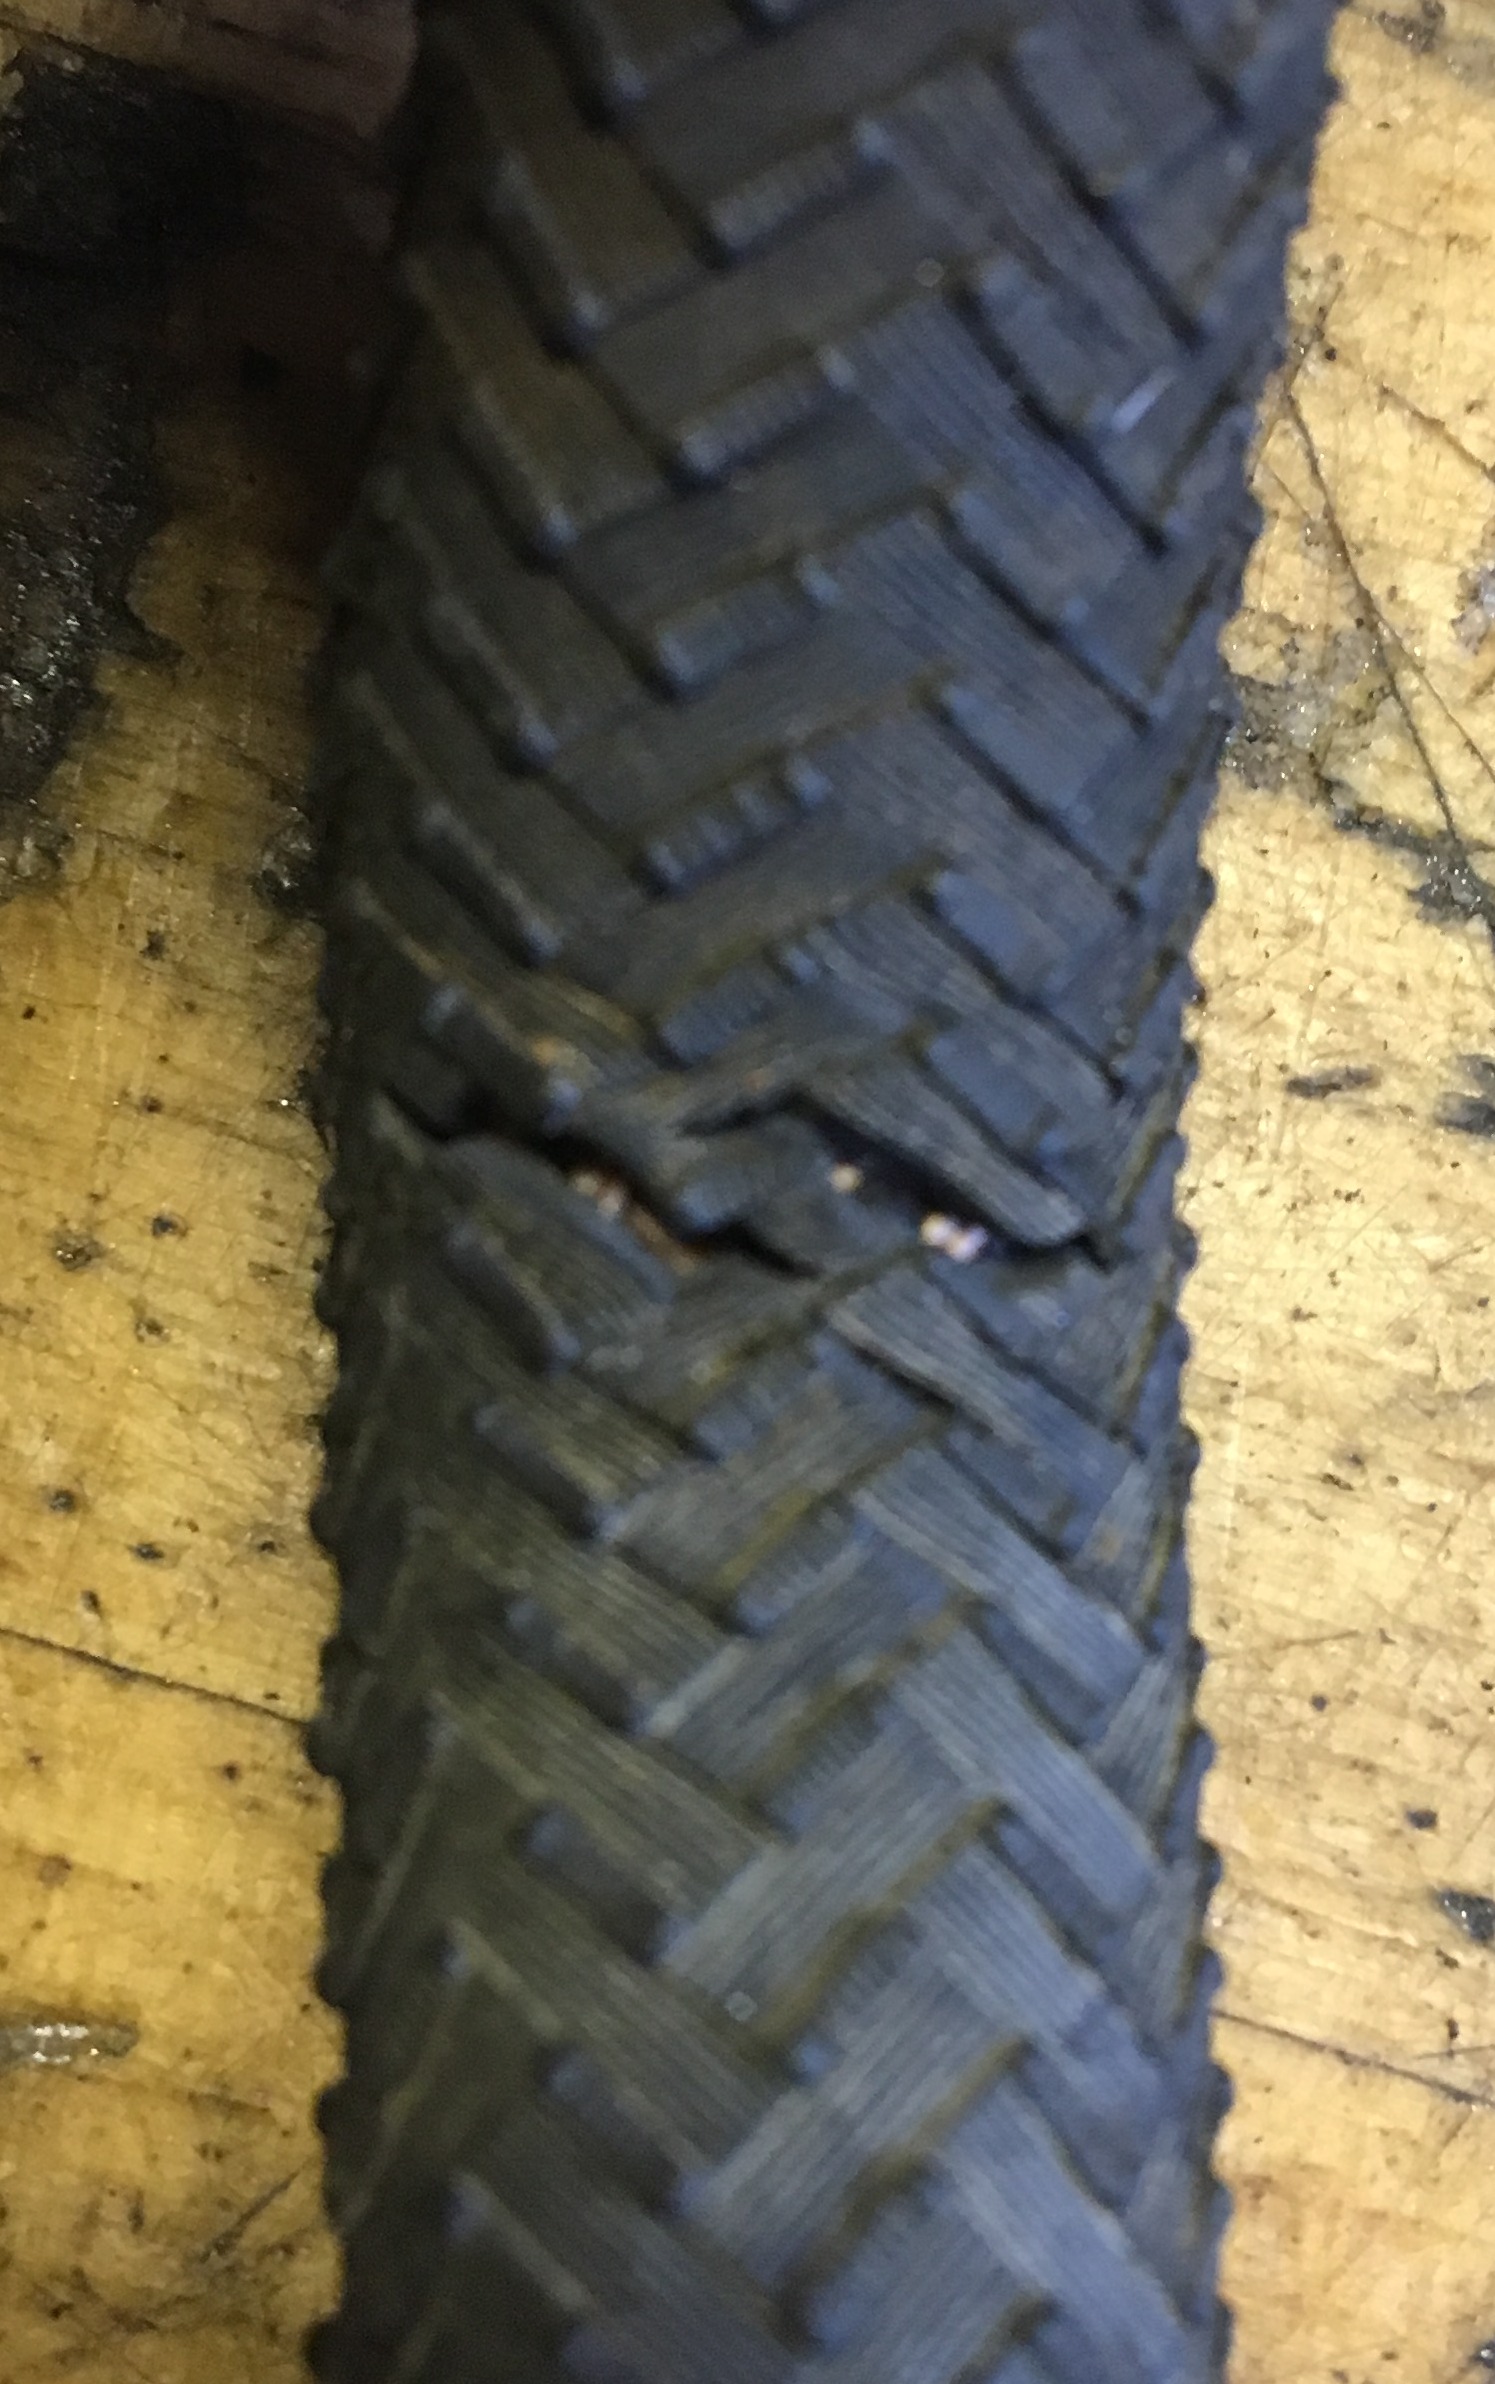
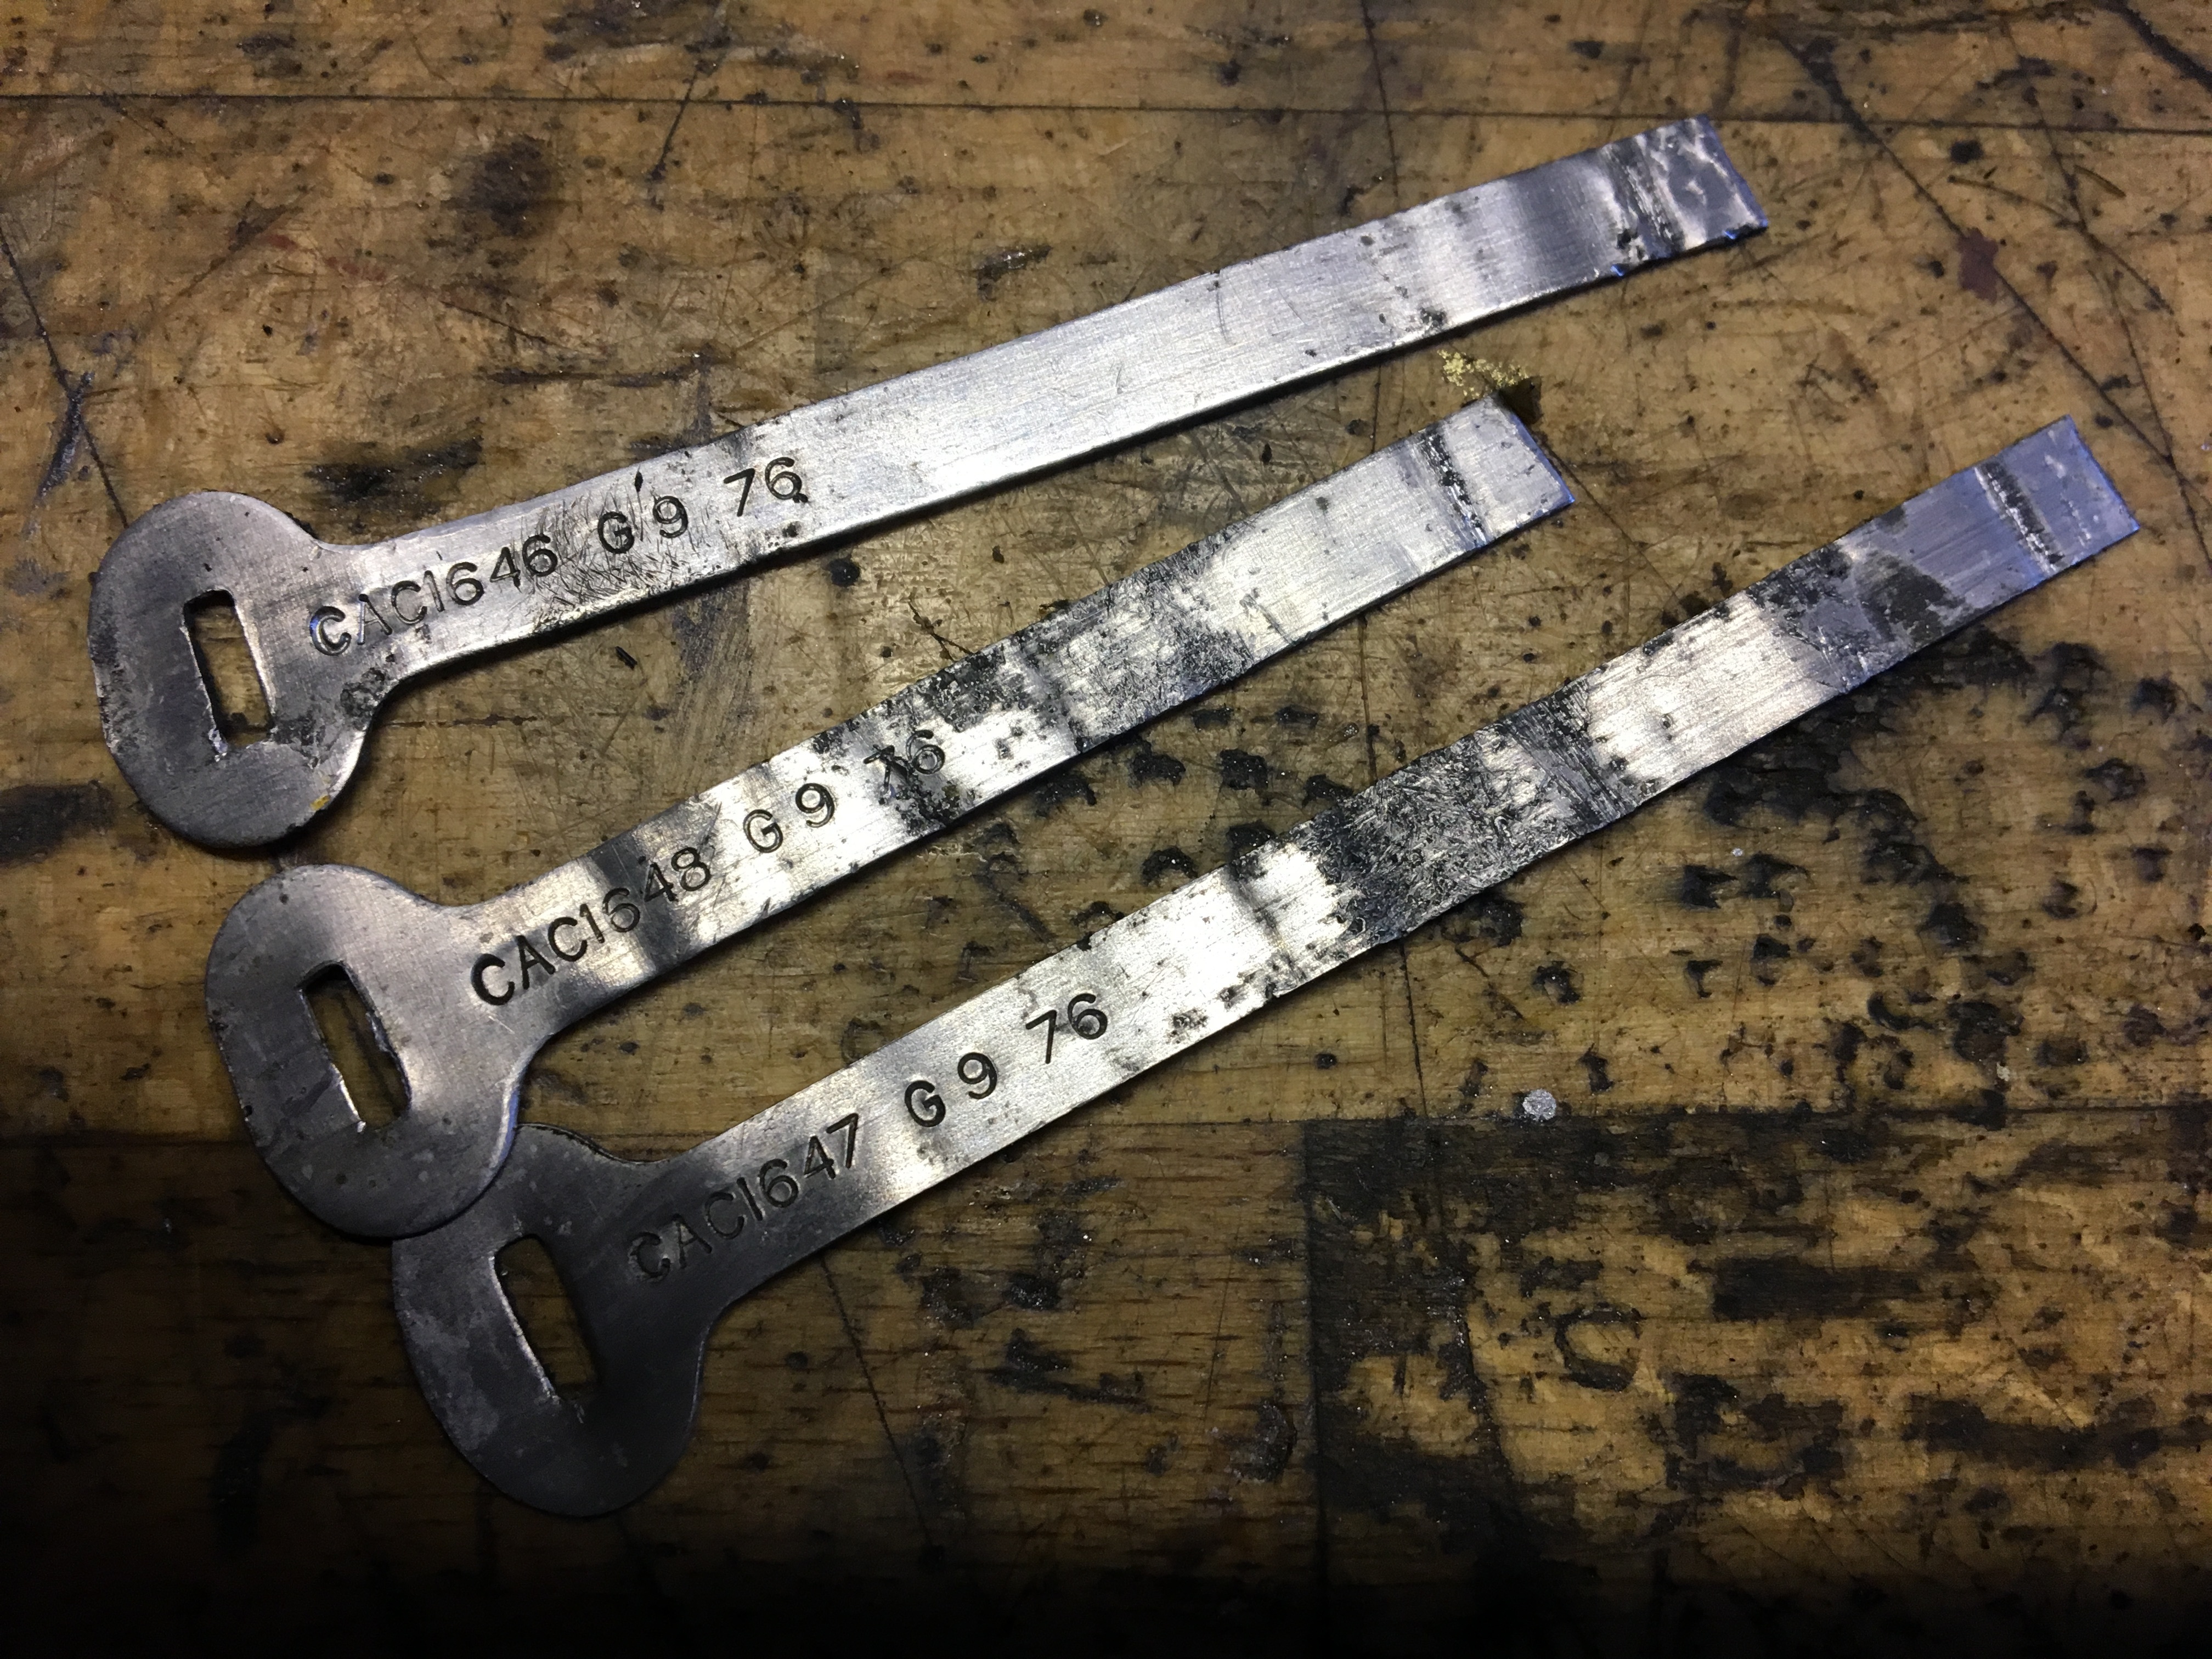
The photo below shows cracks in a fuel line and some of the ID ‘bracelets’ mounted on the original fuel lines. I suppose 76 indicates production year
Rubber seal at pick up tube and fuel gauge were replaced. Part no ARA1502J
The neoprene mat was replaced by a new cut from a 1×2 m plate in 8mm thickness found on Ebay. I will recommend finding a 6-7mm thick mat as 8mm turned out to be a tight fit…
Before glueing the new mat to the body I grinded off the 3 rivet ends protruding under the tank in front of the battery tray. These are known to sometimes perforate the tank bottom. It was not a problem in my car, but better safe than sorry…
The fuel pick up filter was replaced by the new and larger type (CBC5649), which is less prone to clogging. Here a photo of the old filter still mounted on the 1/2″ suction tube. It’s quite dirty.
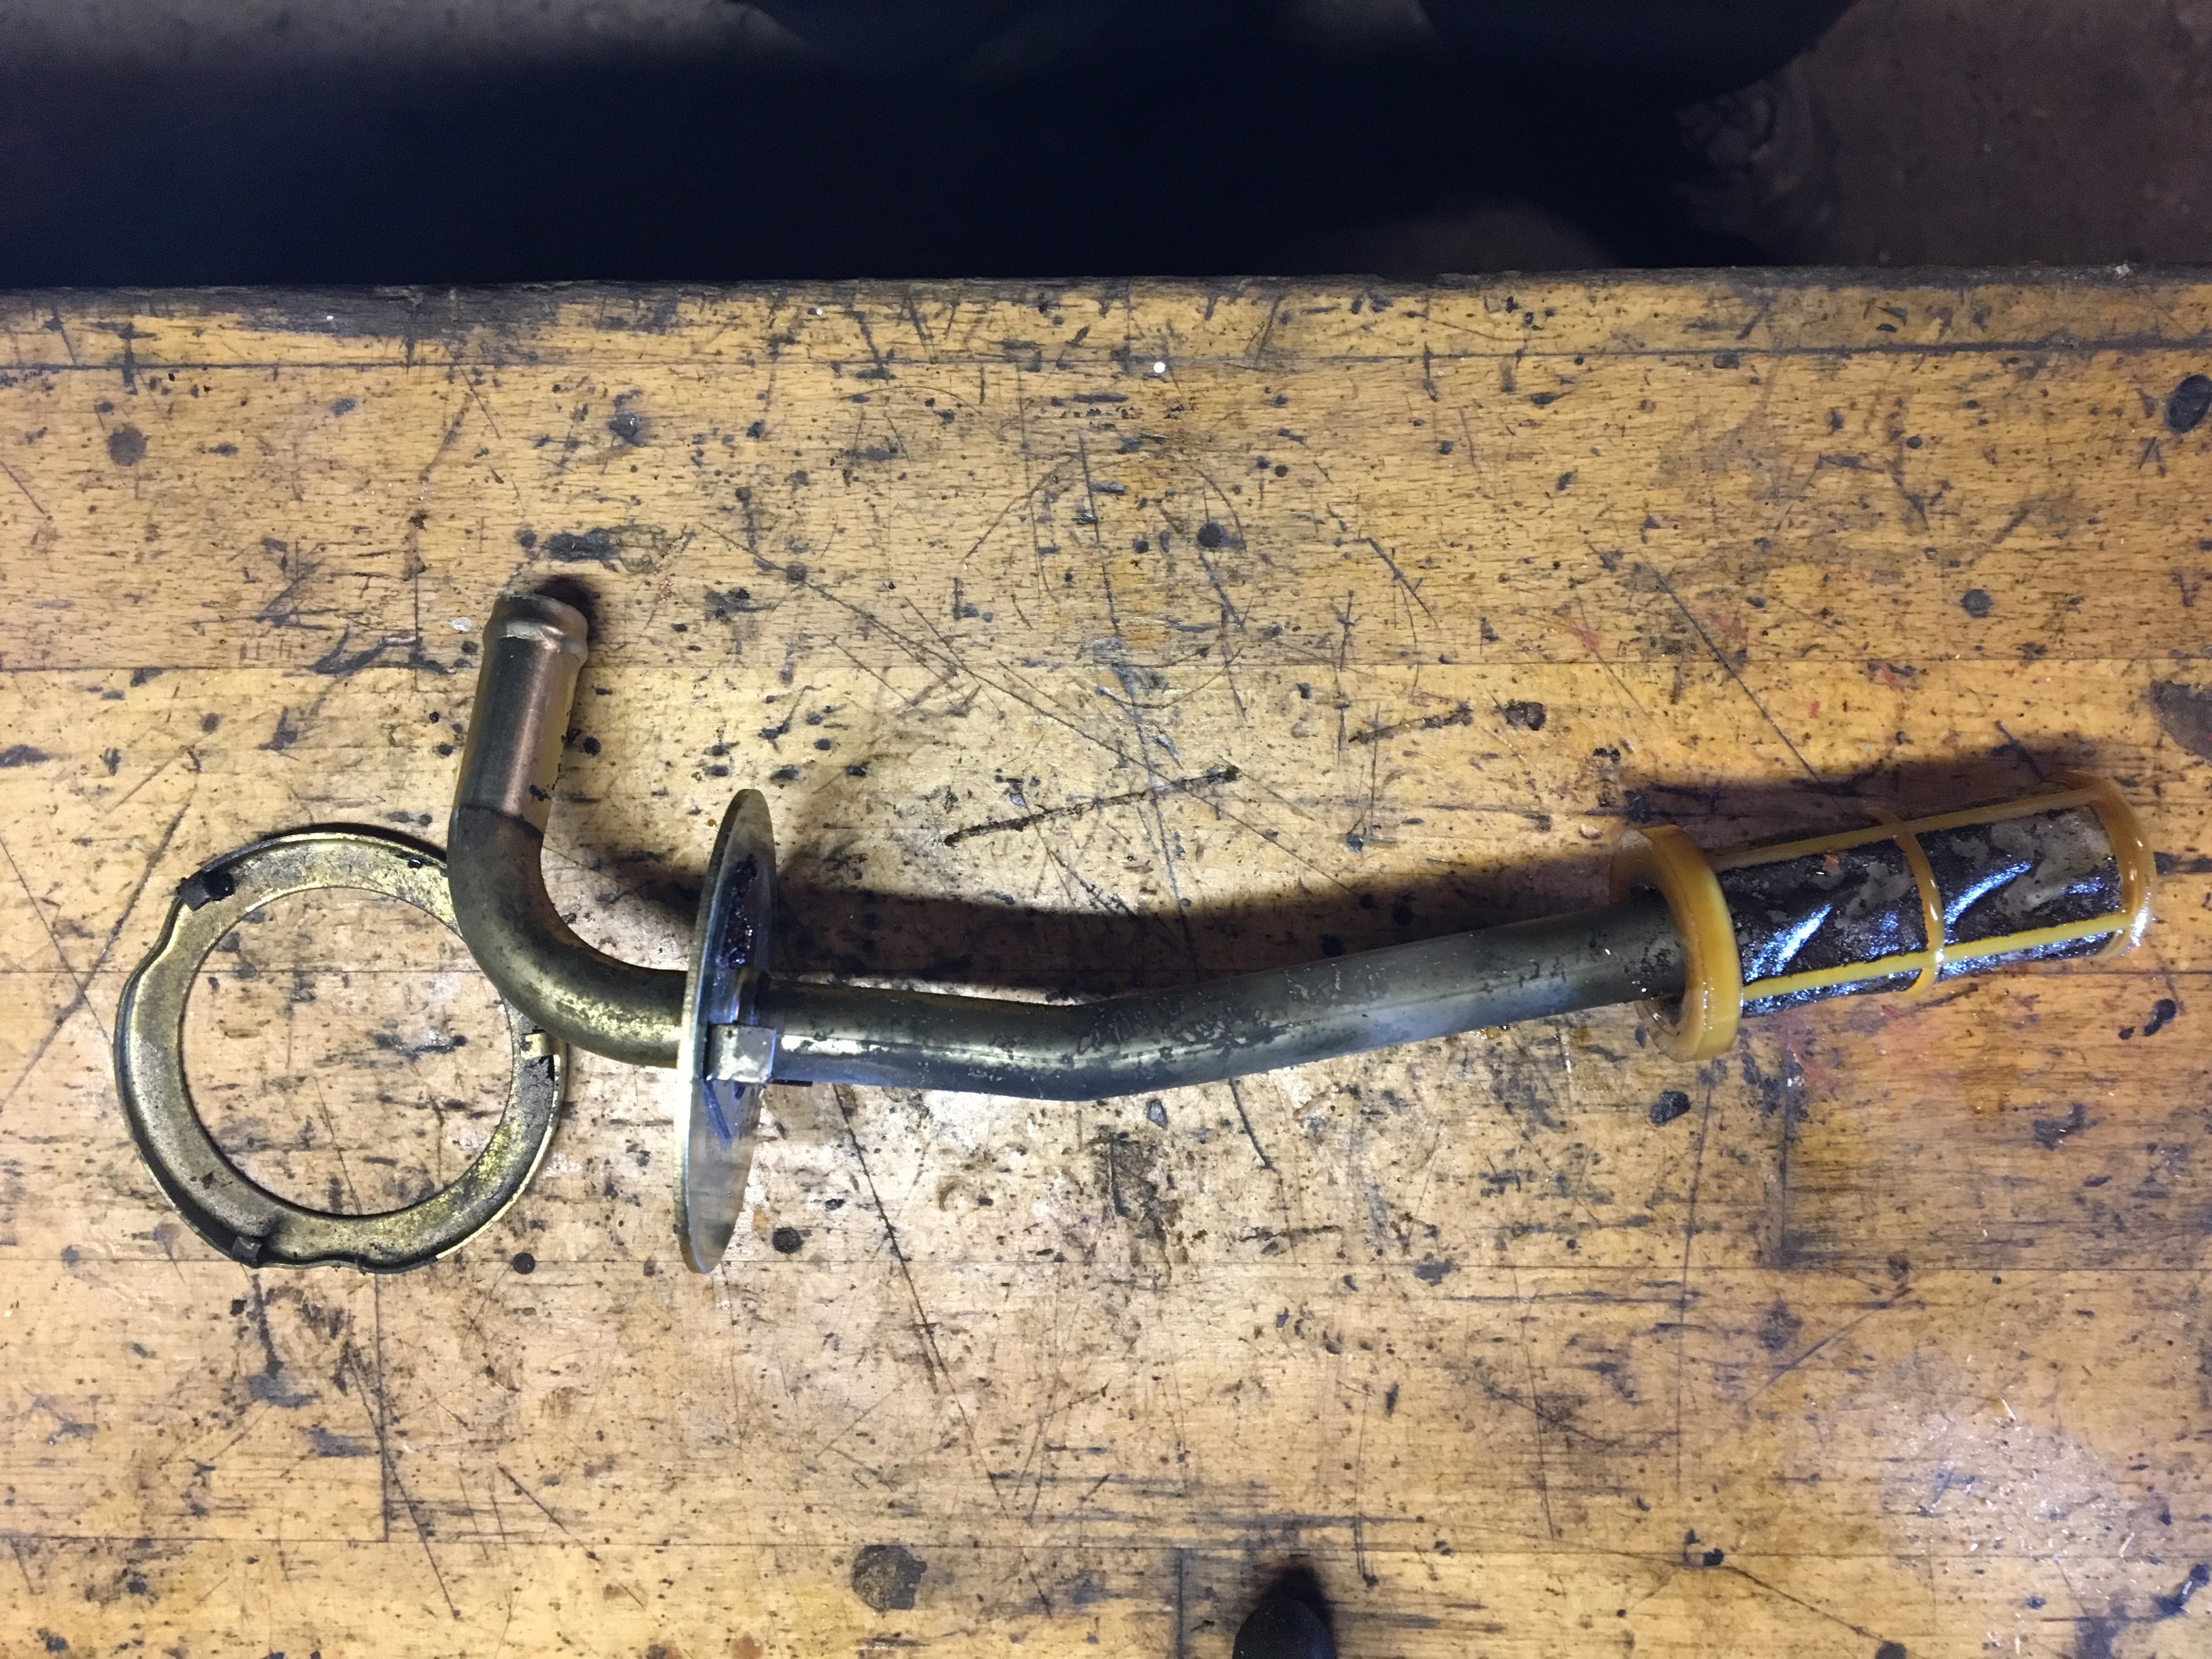
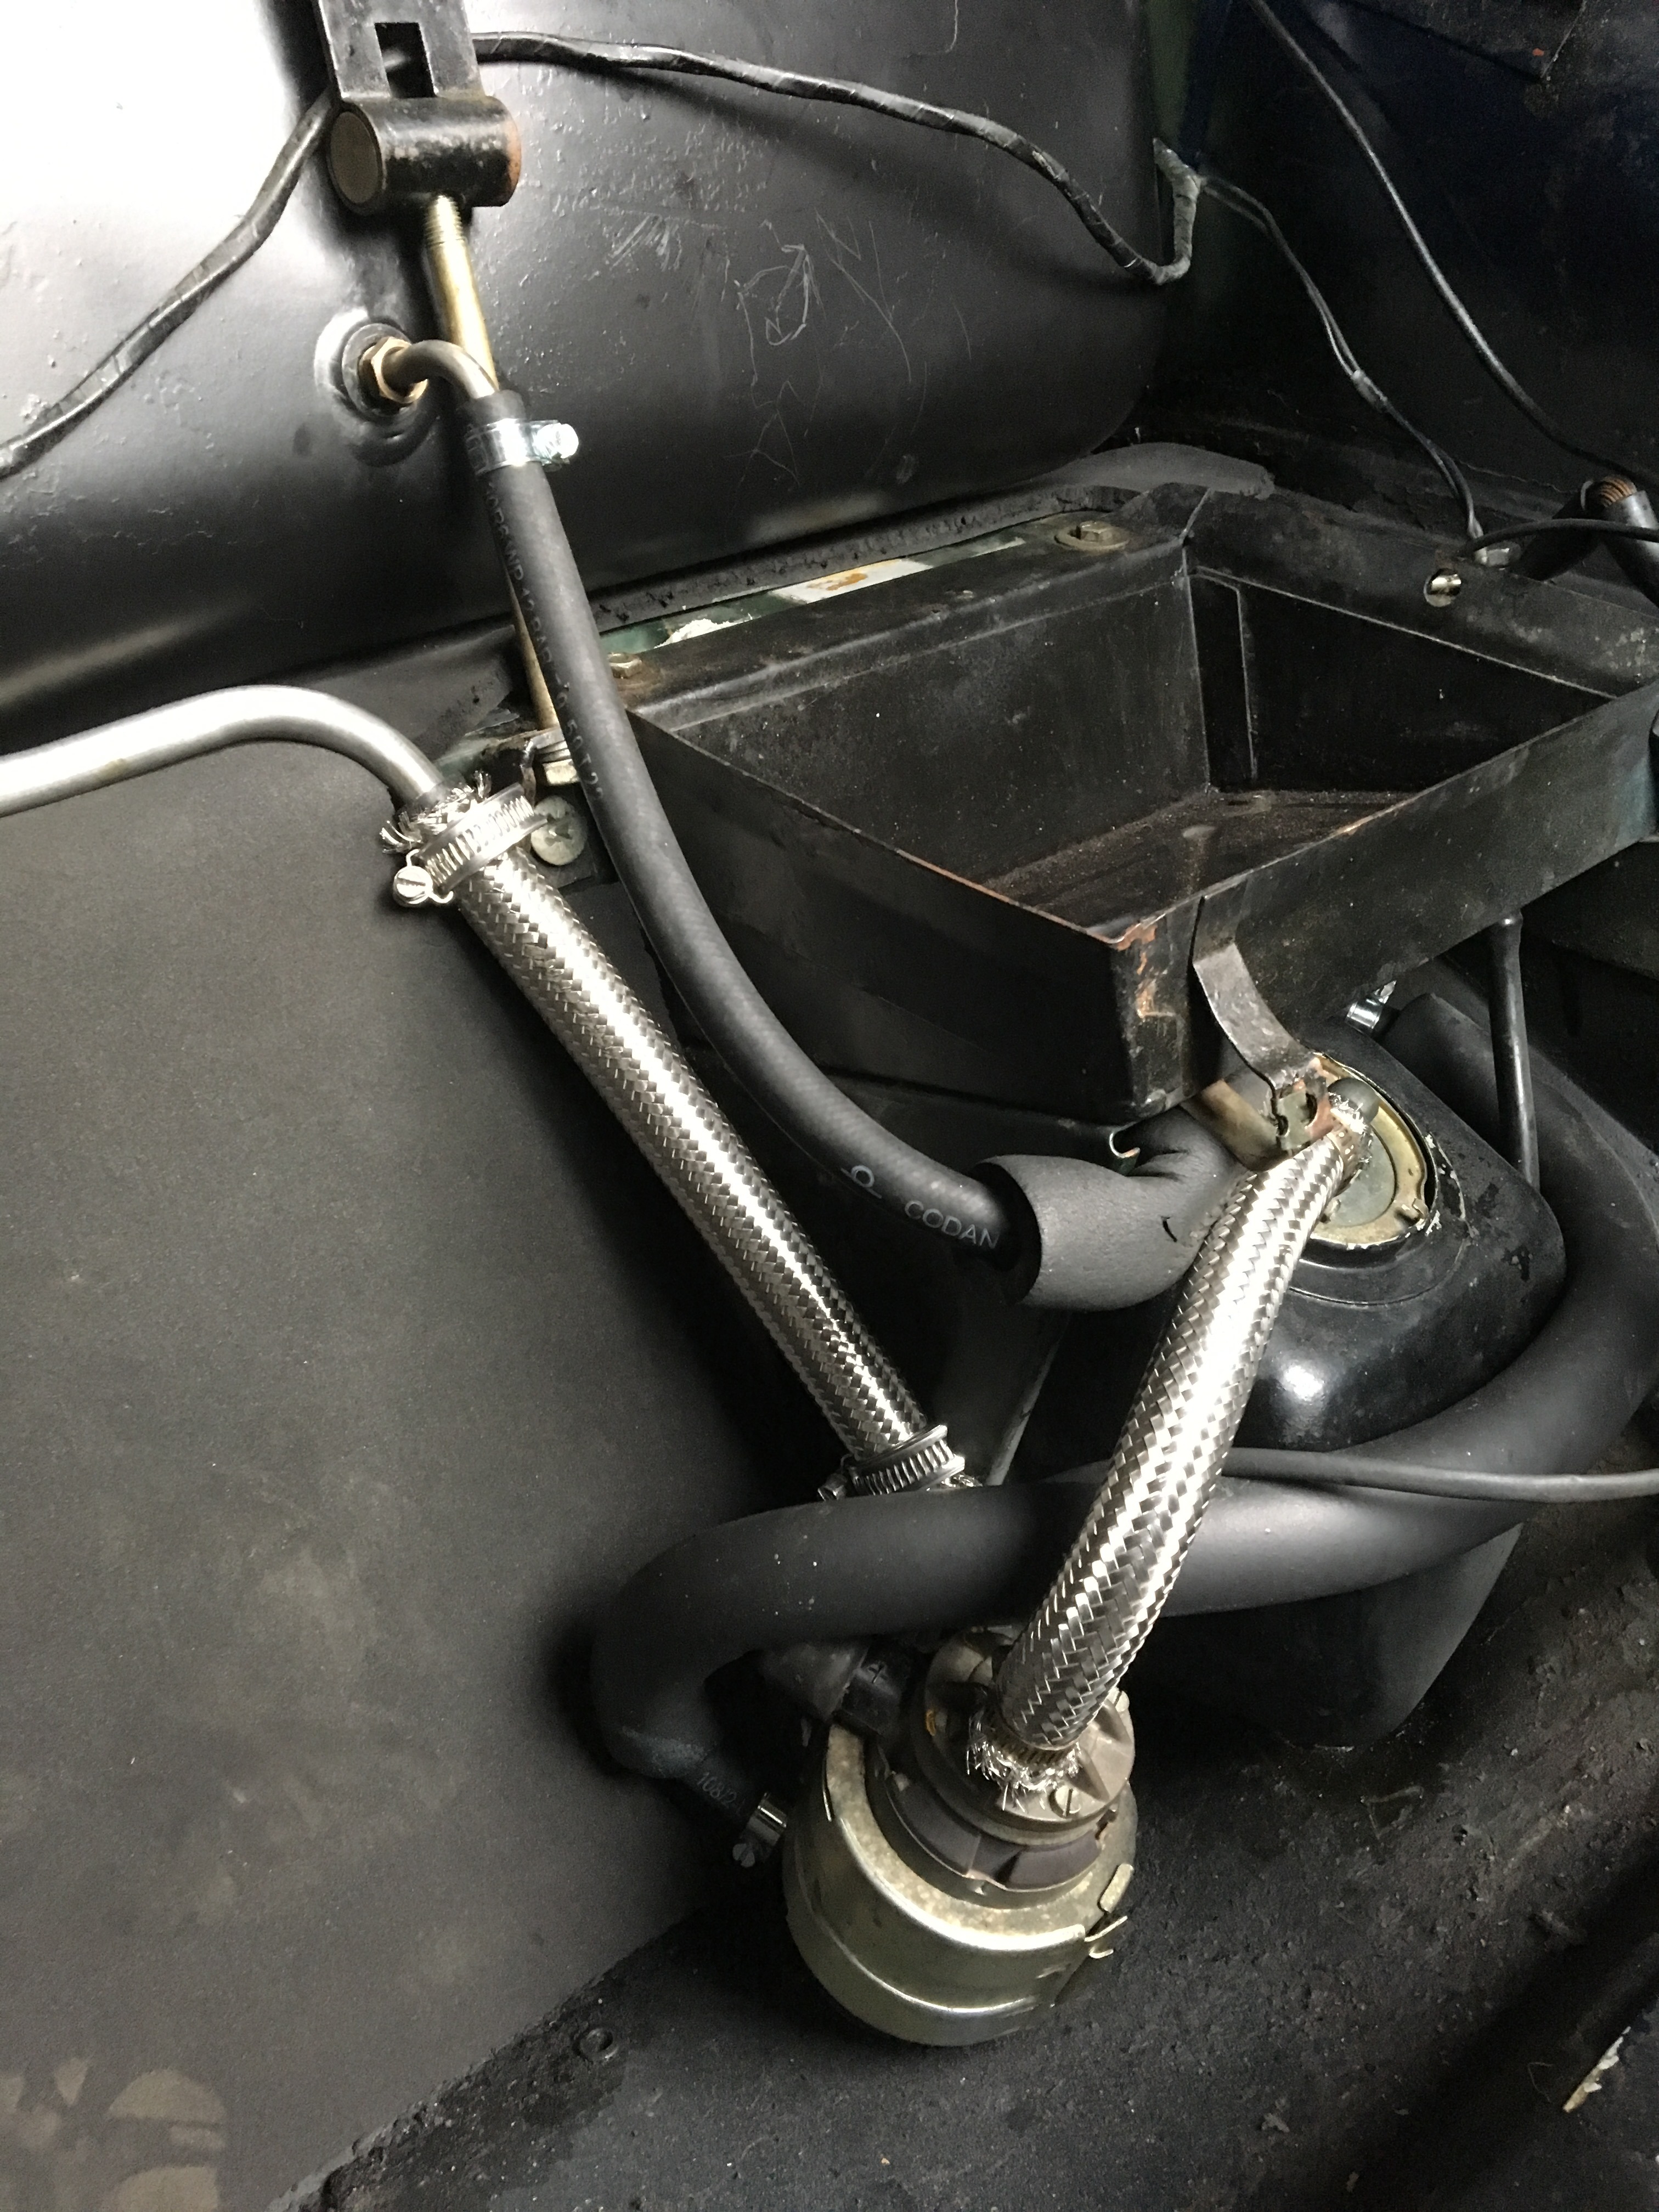
Photo below shows the following:
Sump tank below the battery tray
1/2″ fuel feed line (metal braided as normal black fuel line was not available in this size). It enters the sump tank behind the fuel pump
1/2″ pump feed line from sump tank to fuel pump top
3/8″ sump tank vent line
3/8″ outlet line going out of the side at the bottom of pump. The line is covered with a neoprene sleeve, probably to reduce noise transmission to the body