
2011
The 18. August 2011 at mileage 89.300 km the car passed inspection (MOT) without any remarks. Oil and water levels checked and found OK.
June 2012 PBV sells the car to AGR
The text from 2012-2016 below is translated, but otherwise left original with previous owner AGR as narrator
New inexperienced Jaguar-owner – I wonder if I can live up to the car’s history?
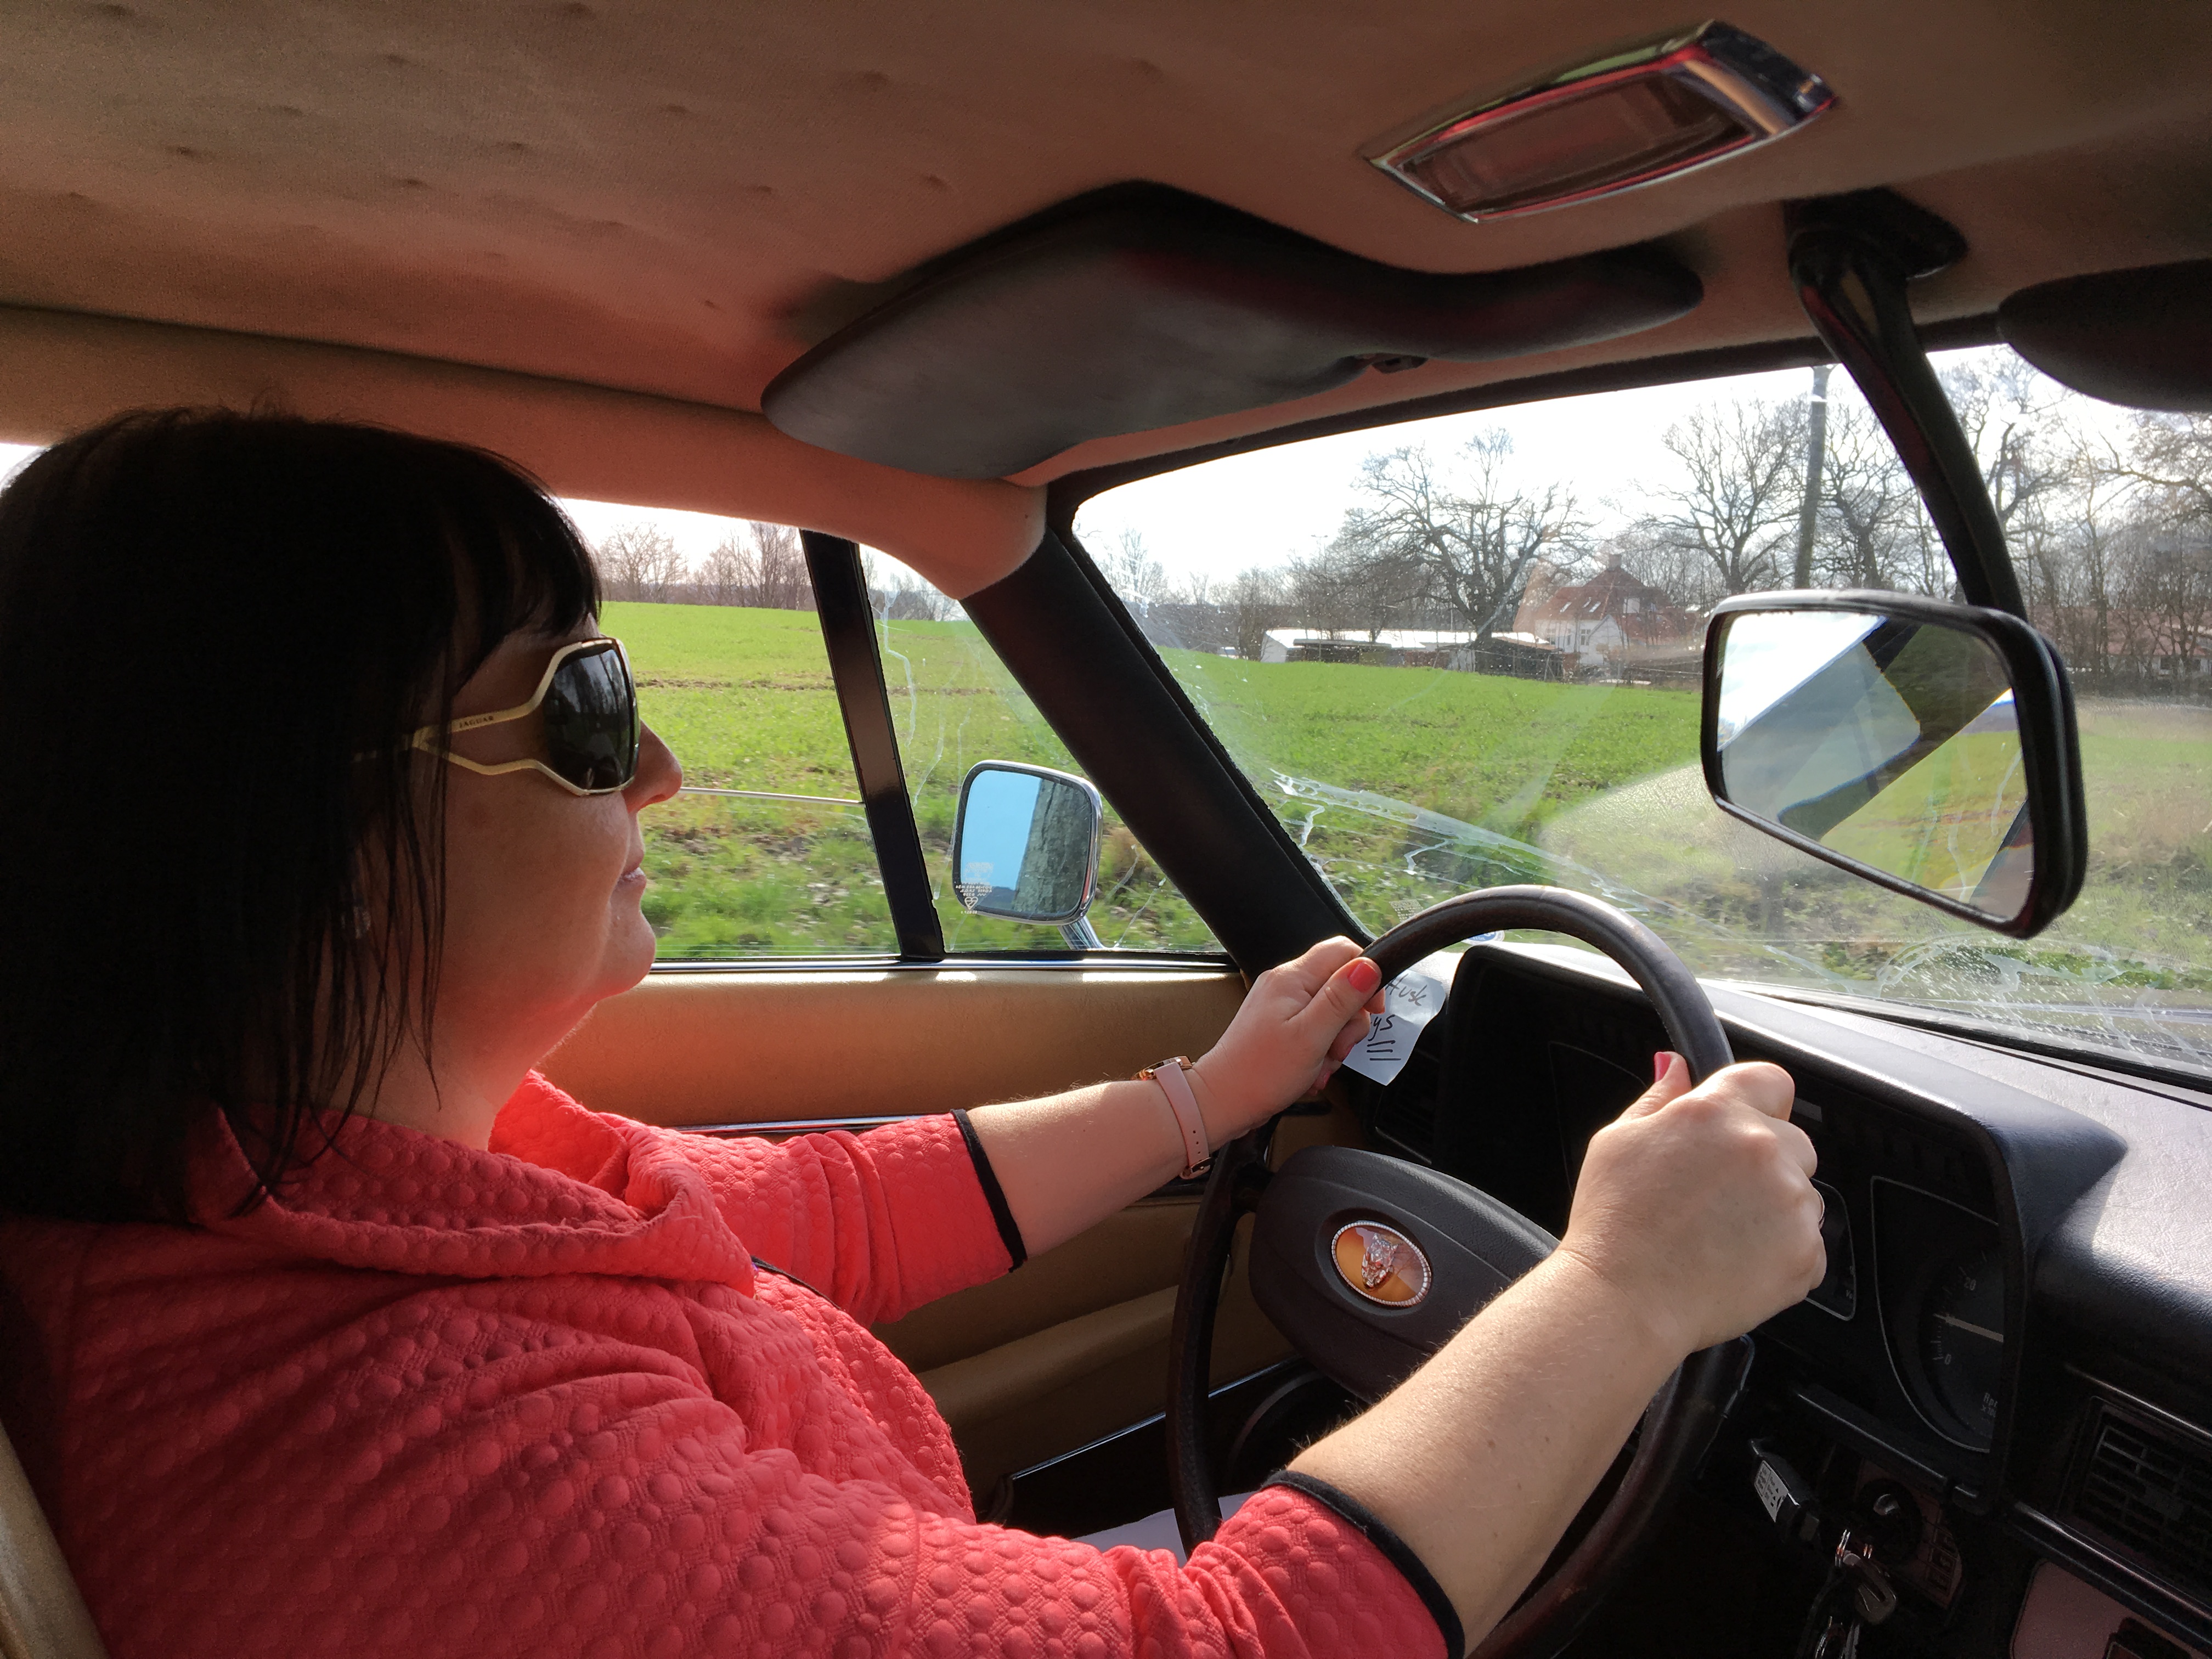
I (AGR) bought this Jaguar XJ-S V12 June 2012. I may as well admit that I do not have experience owning a classic Jaguar or a classic car at all. I have always been fascinated by the Jaguar-XJ, and my father-in-law has always thought it was a bit of a pity that I did not have an XJ while I lived in England but instead spent the money on BMW’s.
It was a bit of an incident I ended up with an XJ-S. I was actually looking for on an American car like a late sixties Ford Mustang but by chance I was told that there was a Jaguar, I ought to see. I didn’t know that it was a XJ-S, but when I saw it, I was pretty impressed by the design and engine – and that way my slumbering Jaguar-fascination suddenly awakened again. I then went home and read up a bit on the XJ-S, which I never really had noticed in traffic, and I was not less interested after this.
Unfortunately, the XJ-S, I had looked at, was sold a few days before I called back to the seller, but I was “hooked” so I searched further for another and found the Jaguar XJ-S V12, which is presented on this web page.
2012
The first few weeks of my ownership of this car I have driven about in the 700km, which includes 350km in order to get the car home after the purchase. This has went relatively smooth, except from that the ignition lock is broken. The small metalpiece driving the contact sets is broken. A new ignition switch is ordered at Vintage Car Service and a mechanic friend has made a temporary solution making at possible to drive the car until the new ignition switch is mounted.
| 20.07.2012 | 90500km | Faulty ignition switch replaced with new ignition switch from Vintage Car Service. |
| Created a drain hole in the bottom of the boot at the spare wheel and cleaned the drain tubes from the boot lid recess | ||
| 21.07.2012 | 90500km | 2 kg powder fire extinguisher mounted in the trunk. |
| 28.07.2012 | – | Front seats treated with leather soap. |
The next project is the replacement of the two engine thermostats. One of these (or both) may be defective and the hope is that this will also improve the current somewhat odd function (or most often lack of function) of the air conditioner …
| 13.08.2012 | 90700km | Replacing both thermostats in the engine (thermostats from Vintage Car Service). |
Replacement of thermostats have immediately resulted in a hotter engine, but the needle comes still not quite up to “N”, however, further up than before. I’m assuming that the needle is calibrated on the basis of the original 88 degree thermostats, so the current 82-degree thermostats do not get the needle up on “N”, as it is described in this article from jag-lovers .
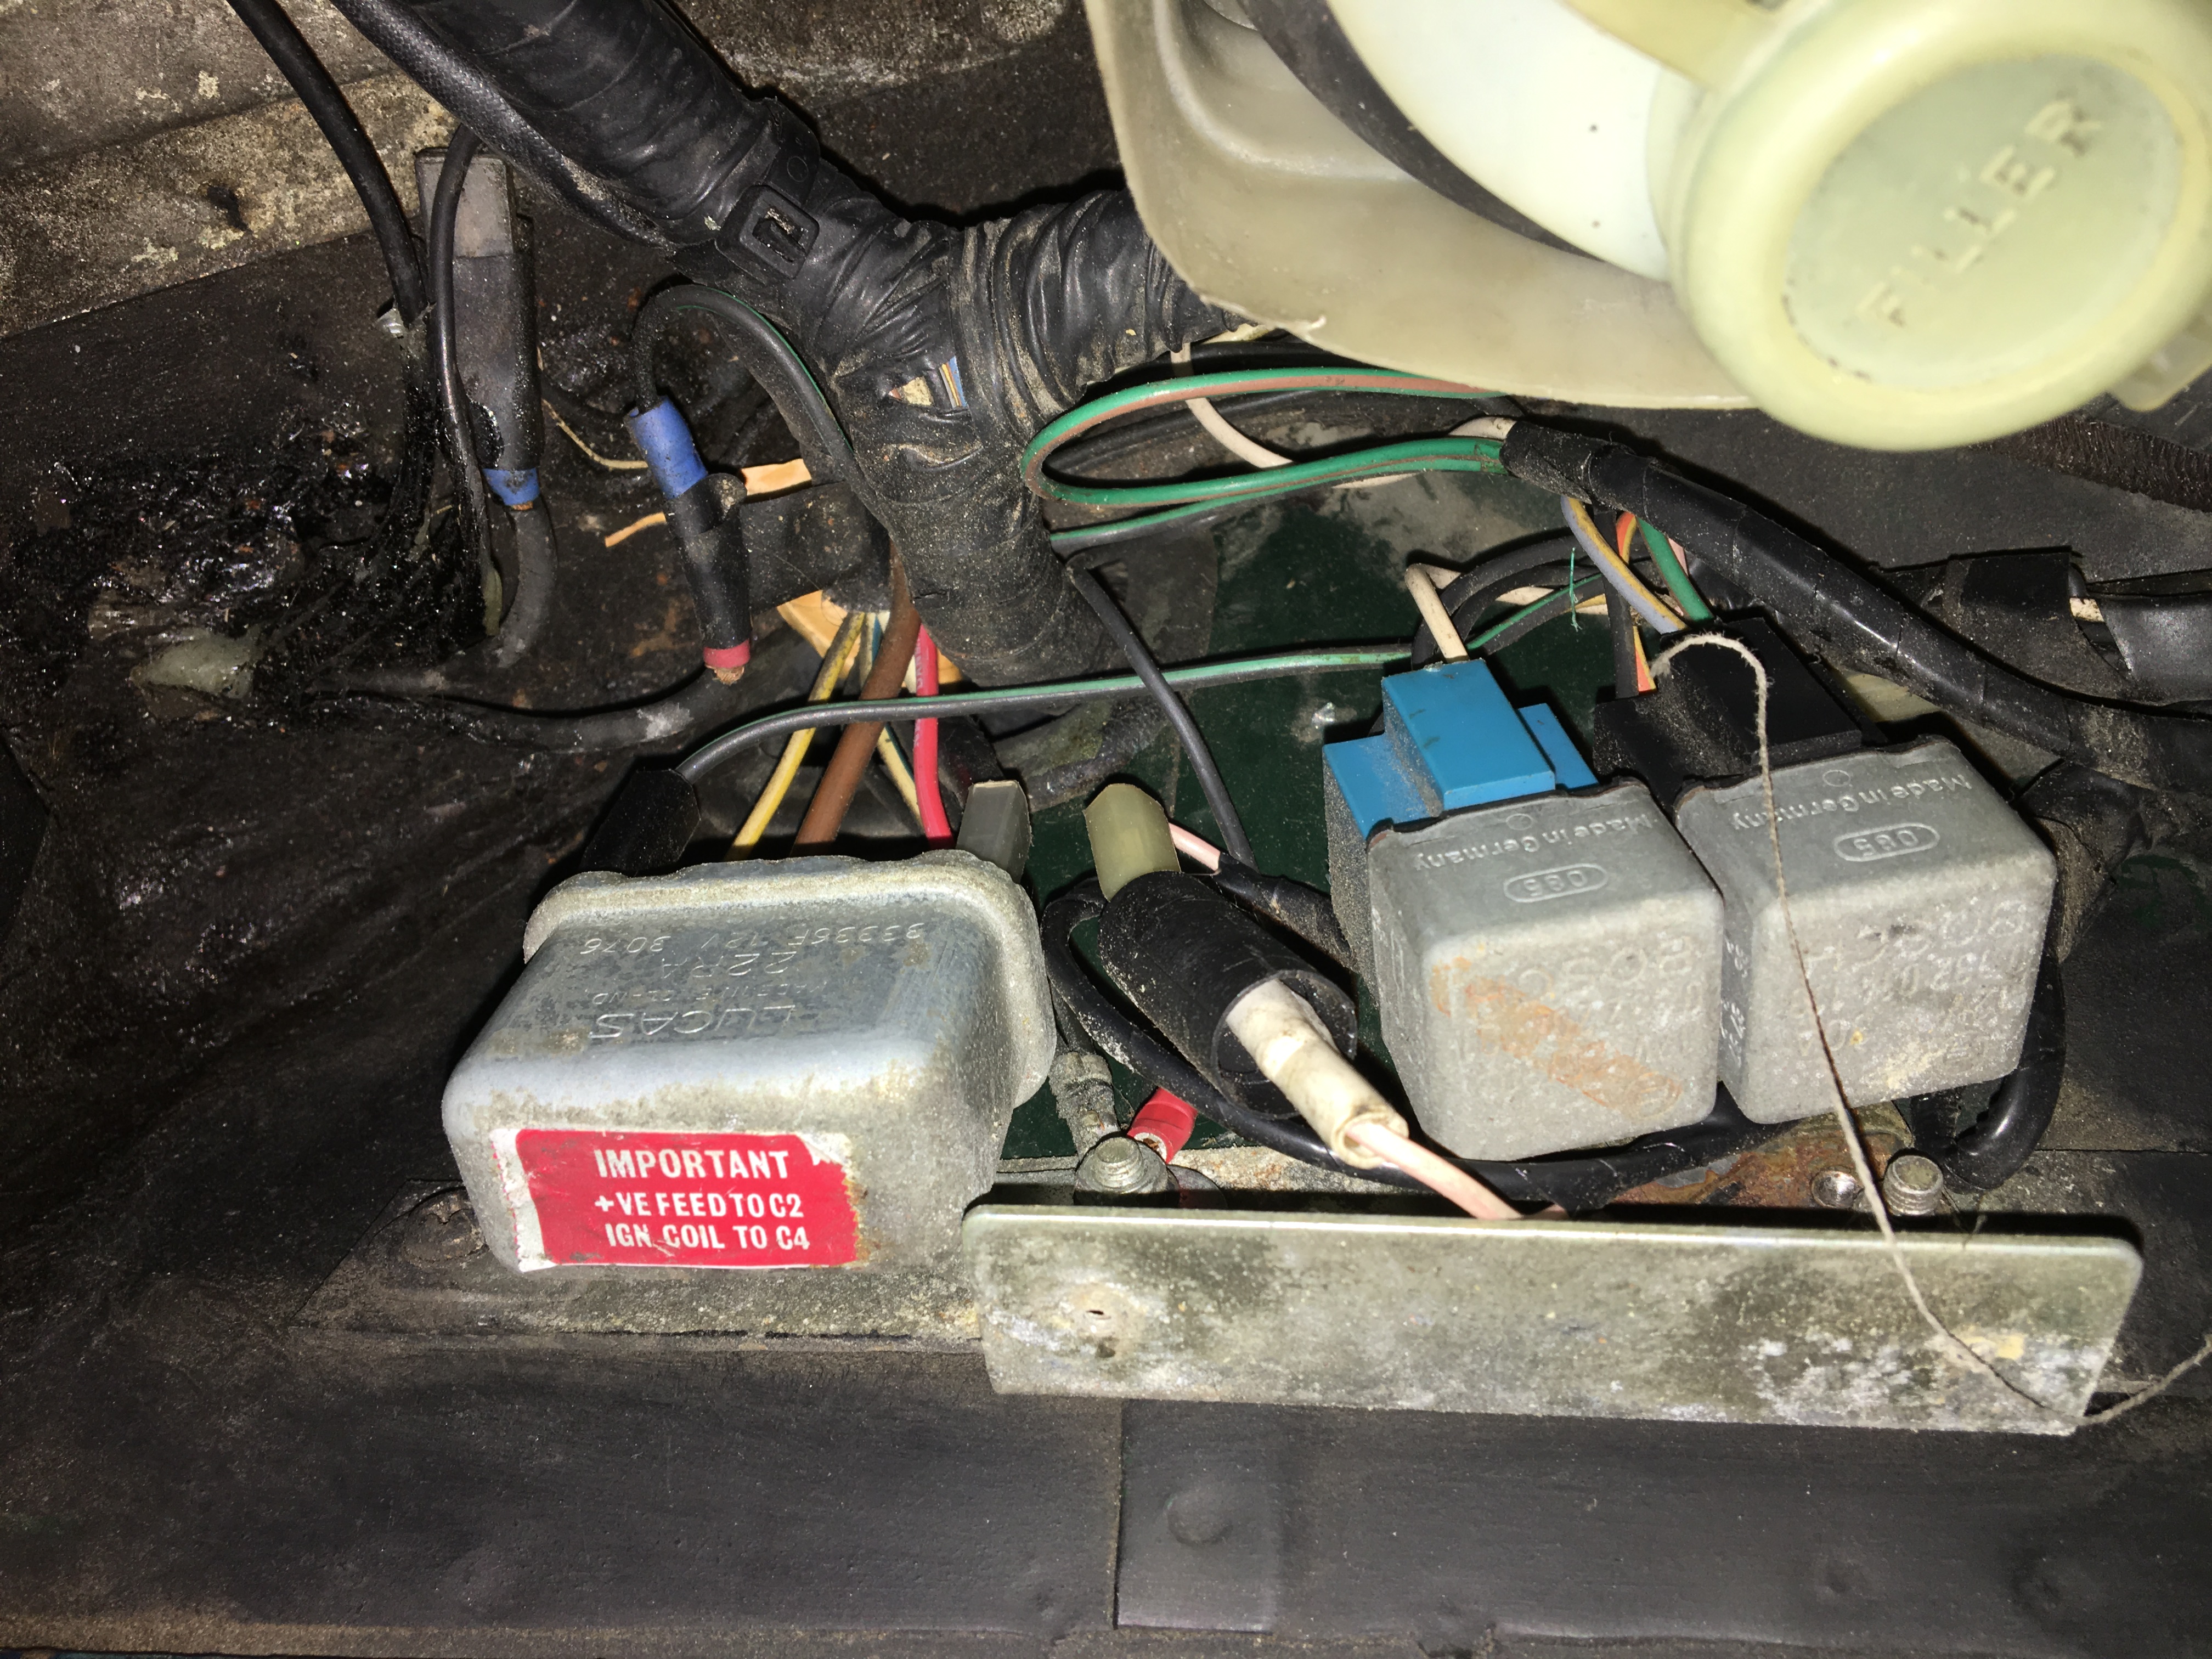
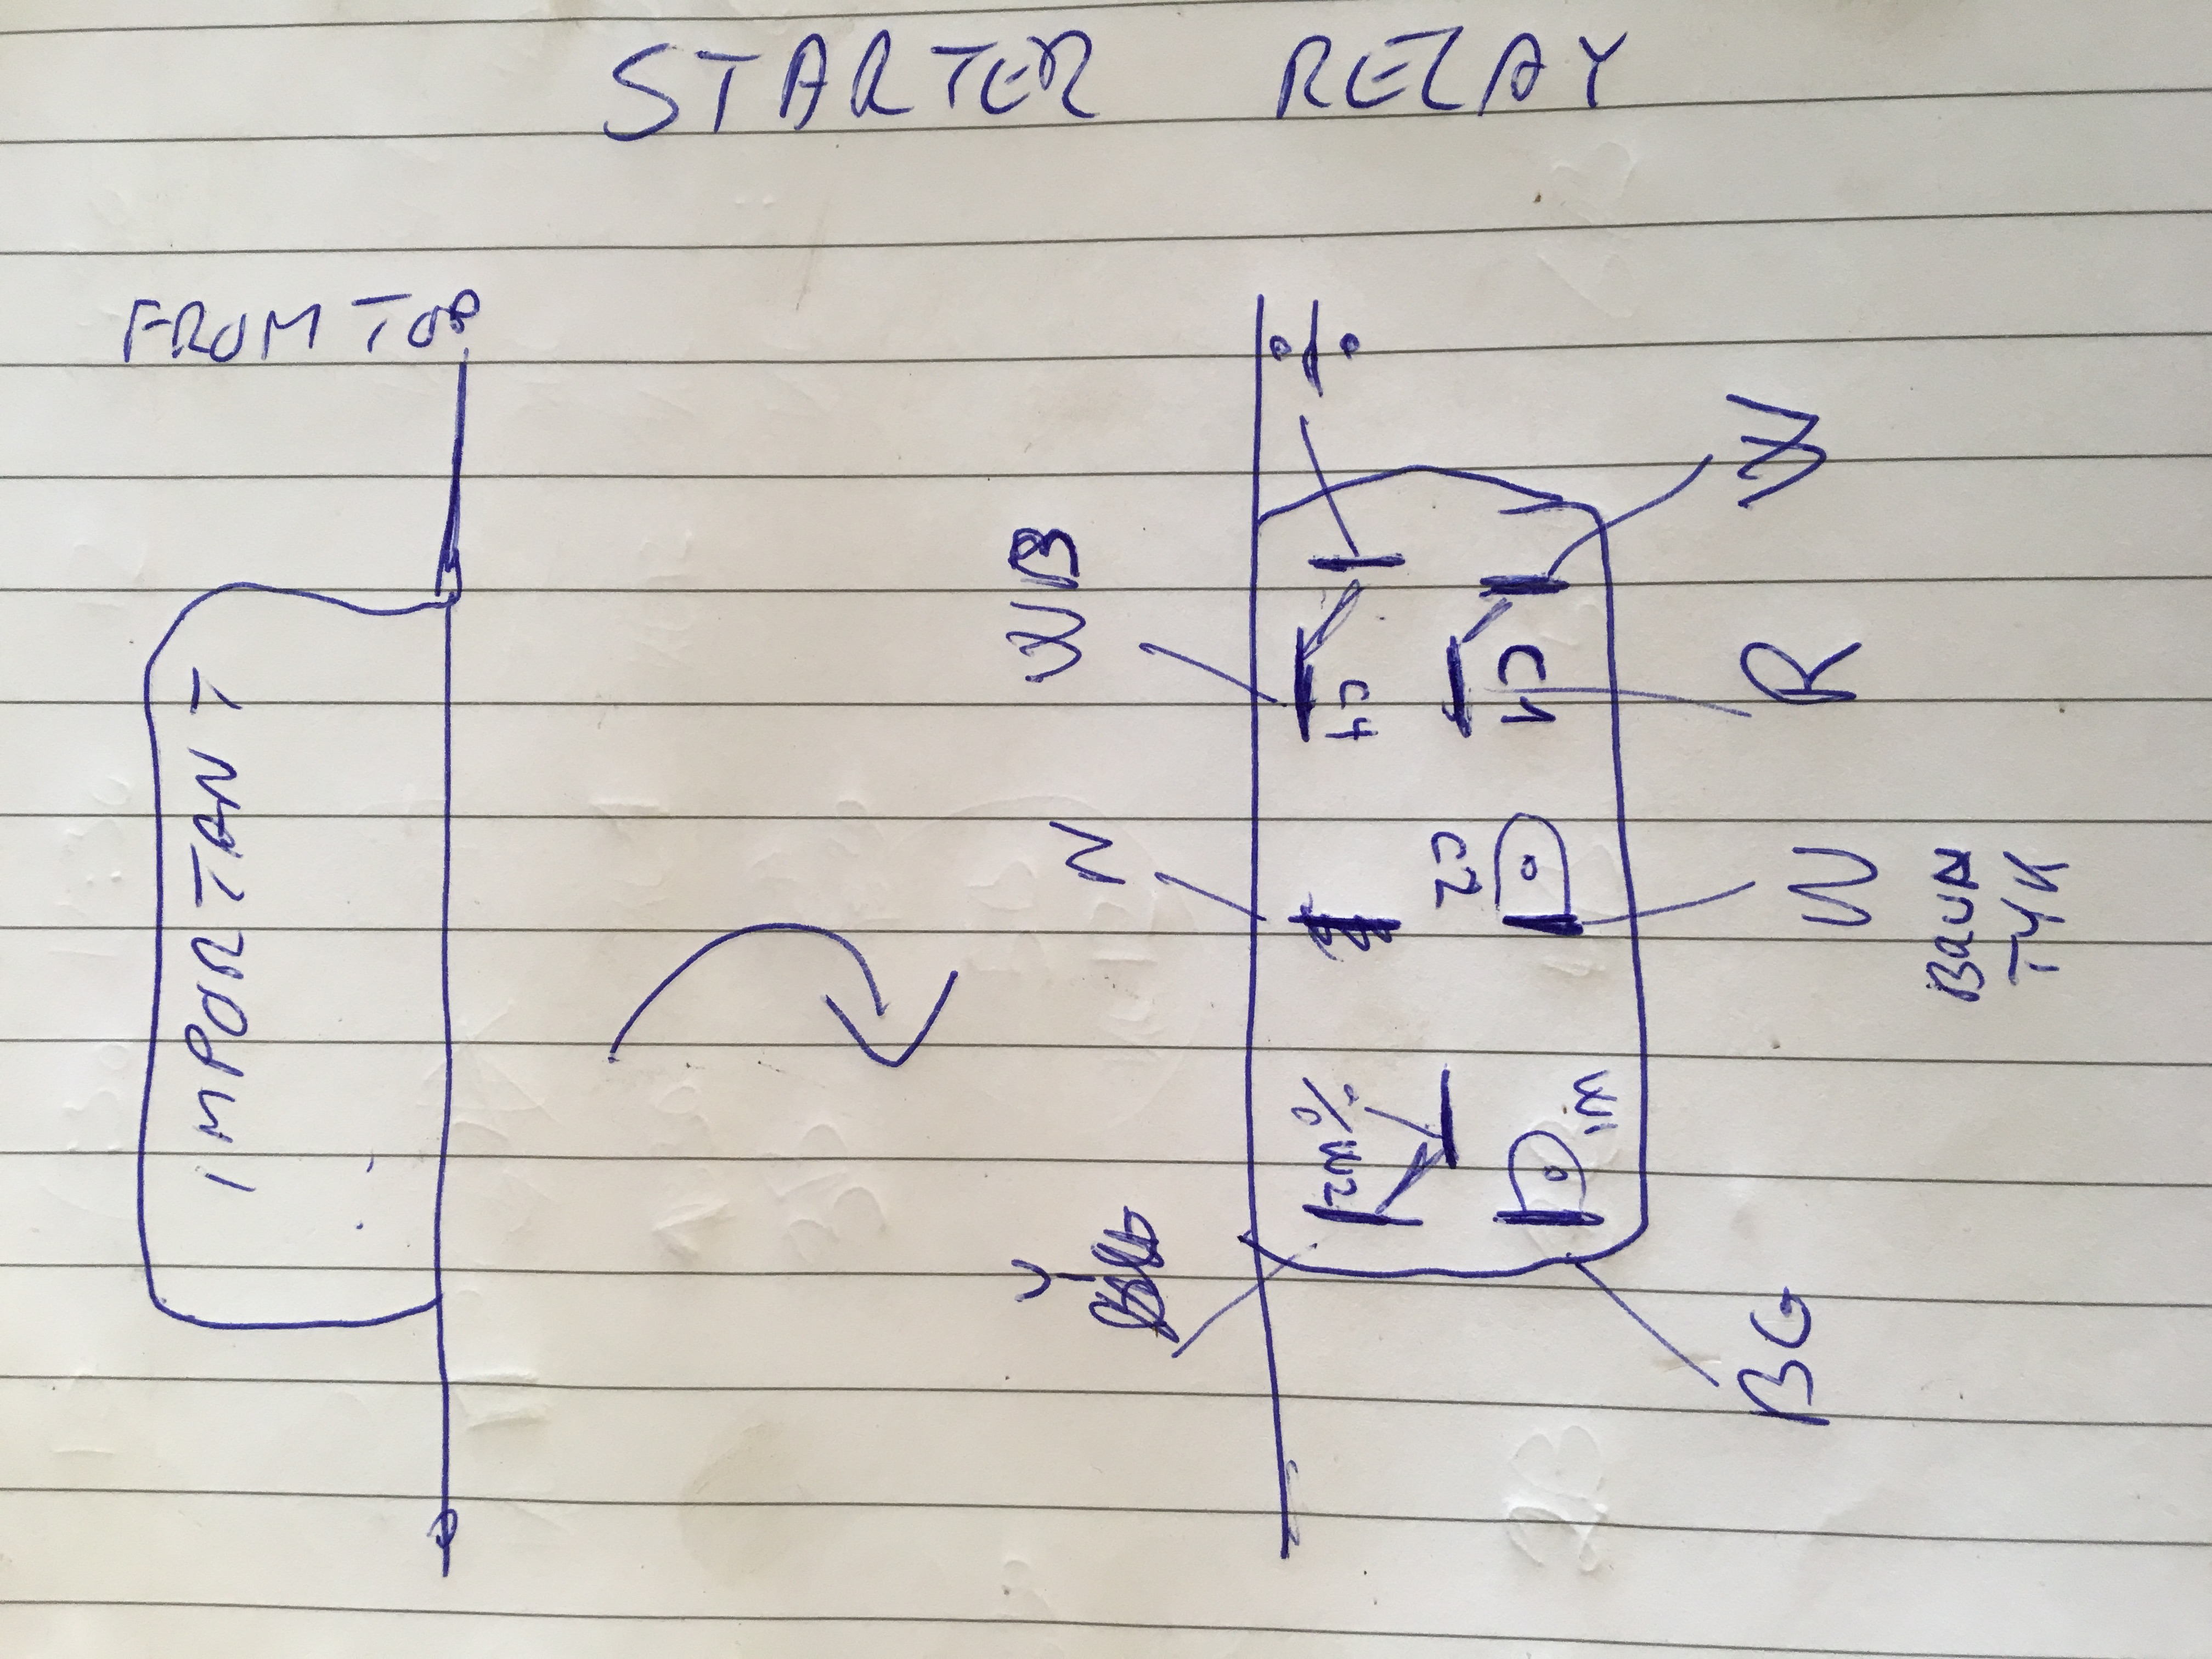
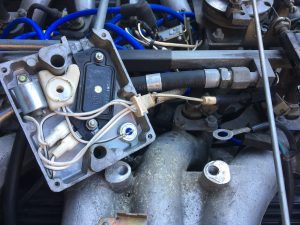
Someone suggest that a fuse has blown, the only problem is that I have checked the fuse and it works fine. The symptoms are that neither the blowers for the ventilation system, horn or window washer pump works and these systems are all on the same fuse. Further debugging revealed, that it was a relay that was faulty. This relay is placed between ignition and fuse box and provides several circuits.
| 09.09.2012 | 90900km | Replacement of defective relay between ignition and fuse box (sitting physically just above the fuse box) |
Now have the car as just been in the workshop in order to get a little rust fixed as well as changed the spark plugs and oil, as well as regular maintenance. On the same occasion was gearbox suspension repaired, so now it runs like a dream. Except that it has begun refusing to start without notice, but I have to probably look at next spring, for now it must soon be parked for the winter.
2013
I am participating with the Jaguar in Oldtimer race in Graasten in the end of May as well as the English car meet in Løgumkloster in June.
The car was inspected (MOT) in august 2013. In the first place it failed approval due to lack of seat belt lock when stationary.
I did however get this rectified later, since the seat belt type in this Jaguar does not have drag lock when stationary. In addition, small comments on oil spill at a rubber gaitor, which was repaired immediately after the inspection.
| August 2013 | 92000km | Repair of defective steering rack boot as well as adjustment of headlight |
2014
The first task for the Jaguar is driving with my son and partner to the high school Prom party at Sønderjyllandshallen in Aabenraa. We only just made it as a power steering oil hose started leaking. With a few refills on the way we managed. I ordered a new PS oil hose at Vintage Car Service and had it fitted at the local mechanic in Tinglev.
| May 2014 | 93000km | Replacement of power steering hose |
Also in 2014, I participate with Jaguar in the Oldtimer race in Graasten in the end of May as well as the English car meet in Løgumkloster in June.
I continue to enjoy this fine Jaguar product, but only until I notice dripping from the front. It turns out to be a leaking water pump. I went to see Jaguar specialist Karl-Heinz Kühn in Flensburg, who performed the repair as well as several others associated repairs, amongst other things repair of the radiator.
| August 2014 | 93309km | Replacing the water pump, radiator repair, as well as various other associated repairs |
However, the joy is short again. Driving along I notice heavy smoking from the rear wheels. It turns out to be the rear brakes sticking. The rear brakes is replaced including new calipers at Jaguar specialist Karl-Heinz Kühn in Flensburg and there is again several associated repairs initiated by disturbing old parts.
| October 2014 | 93500km | Replacement of rear brake (complete) as well as various other consequential repairs. |
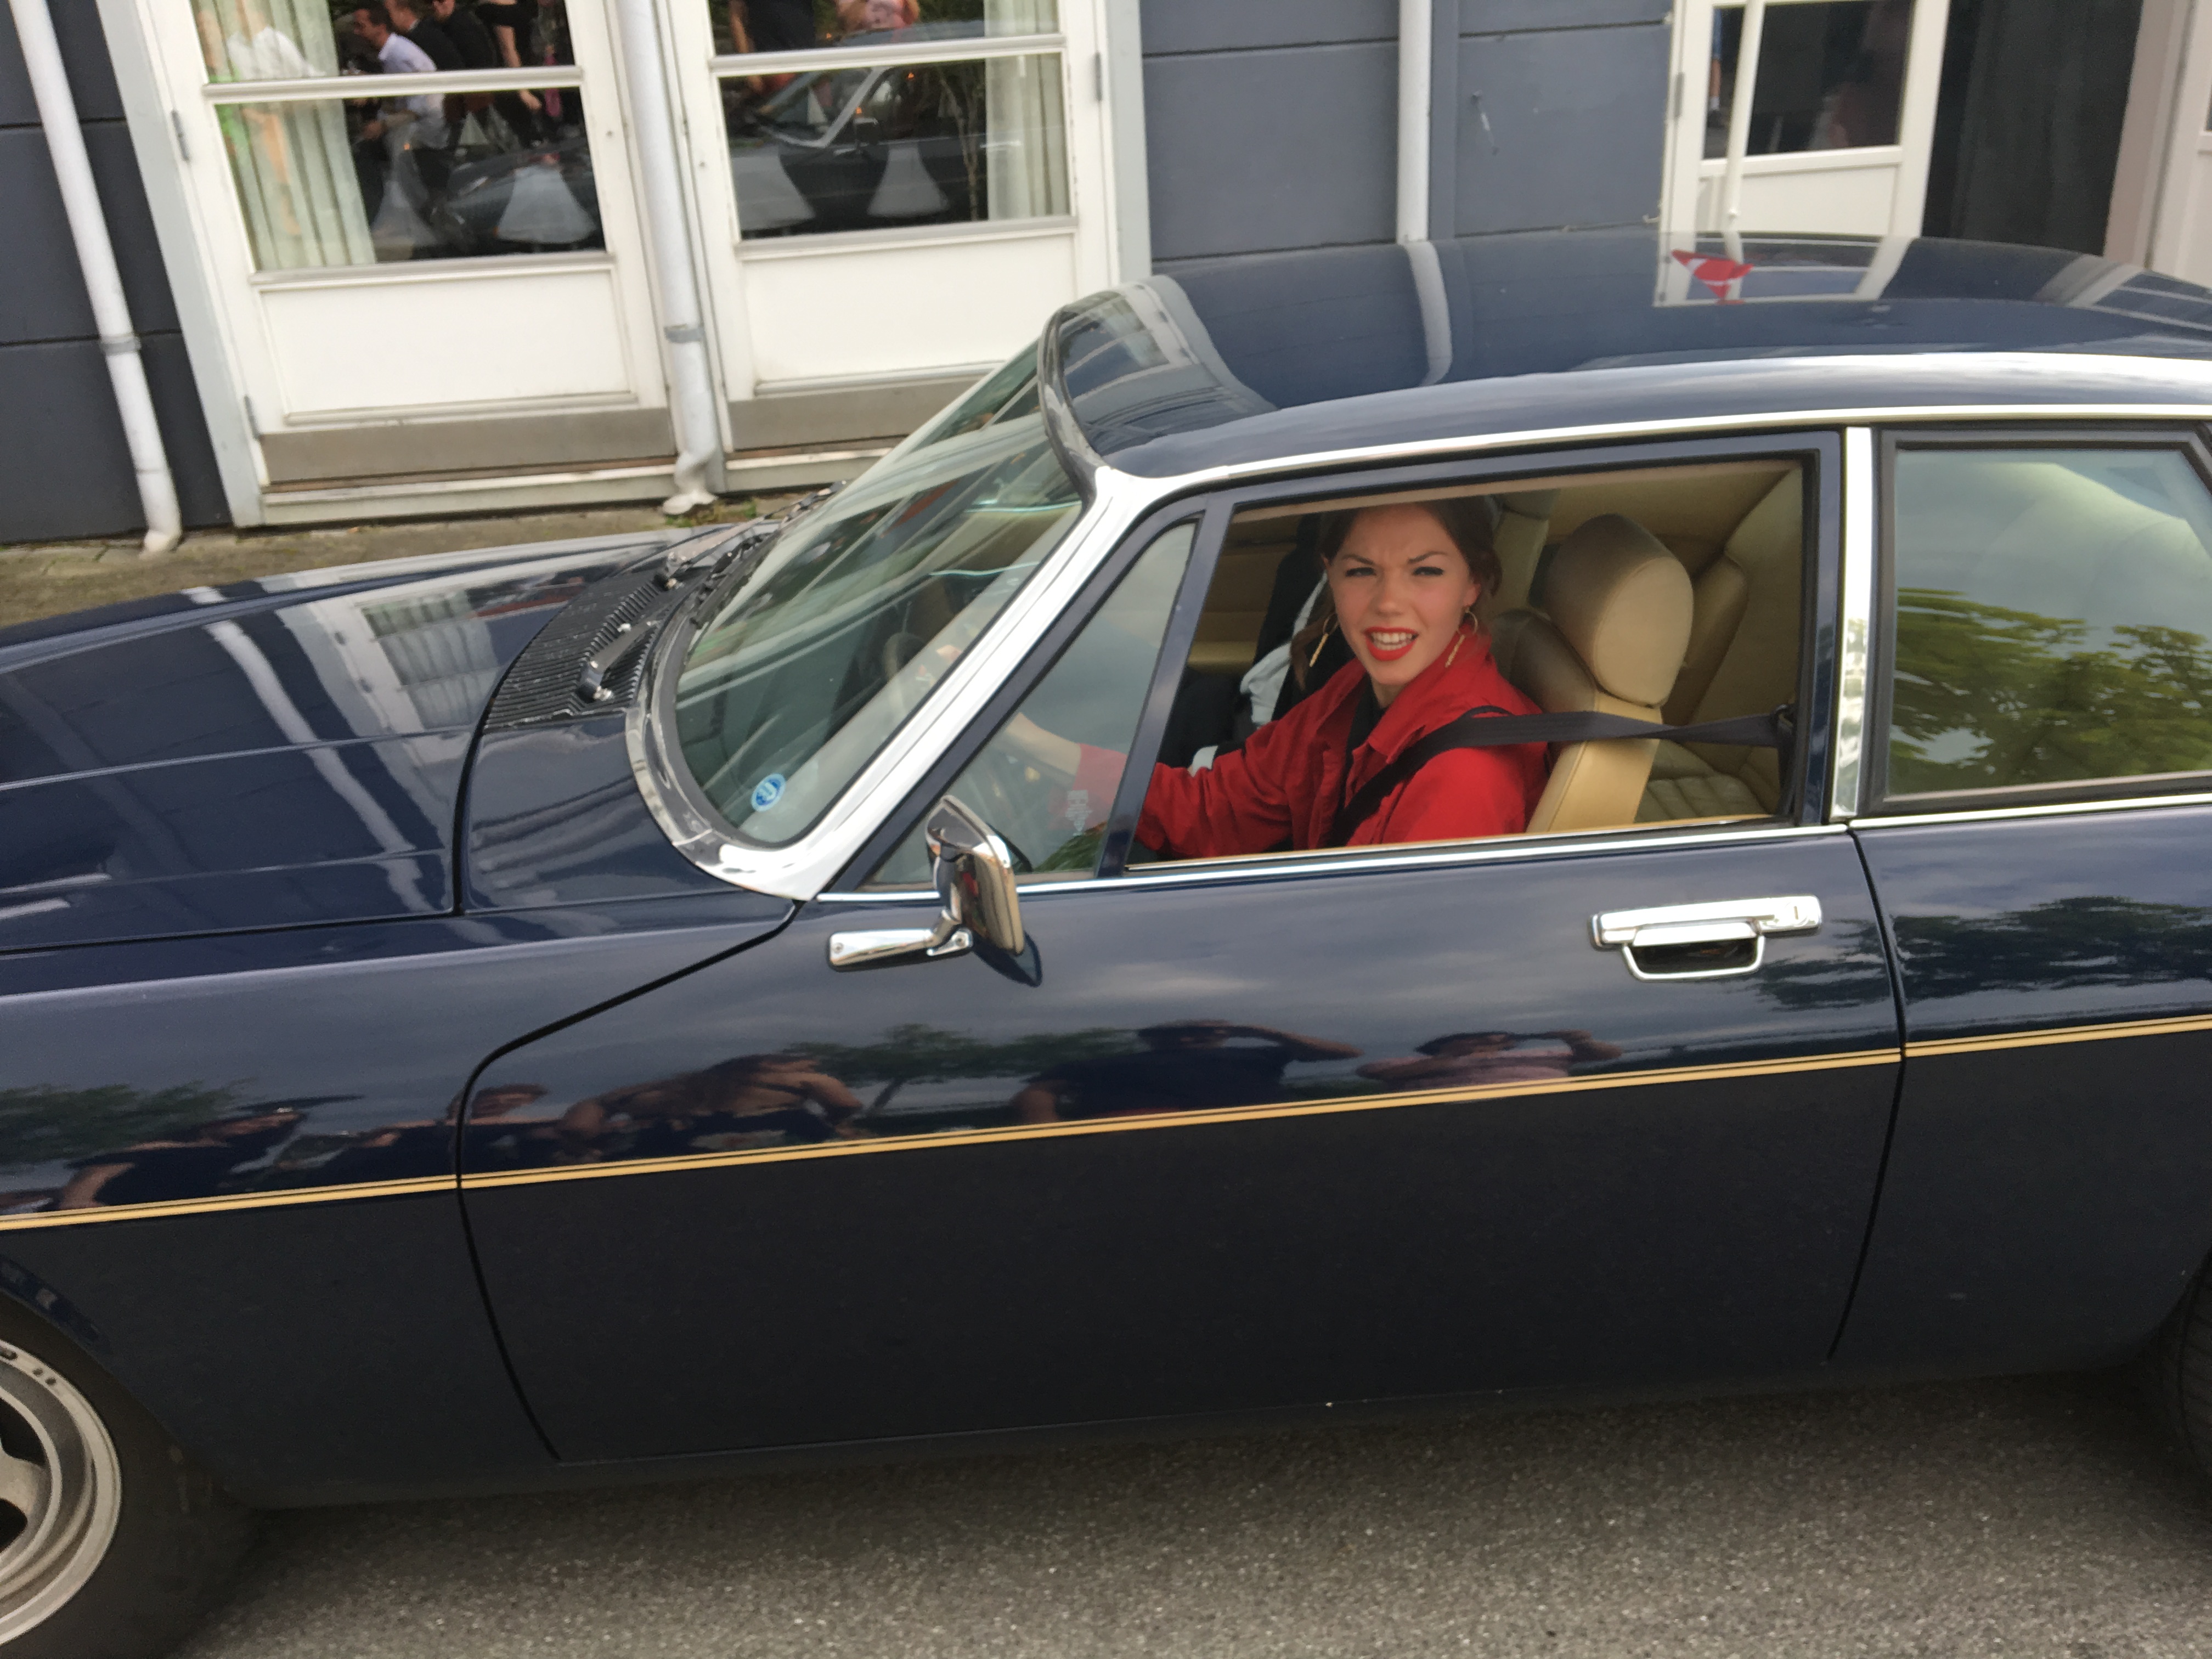
New owners in 2016
| 28th April 2016 | 94805km | Leo and Anne-Marie are the new owners of the car ! We saw and drove the car first time in October 2015. The car drove really well, but the amount of patina took some time to get used to. After looking at 5-6 other XJ-S (and driving 1, as the rest was not running…), we decided this was the one. |
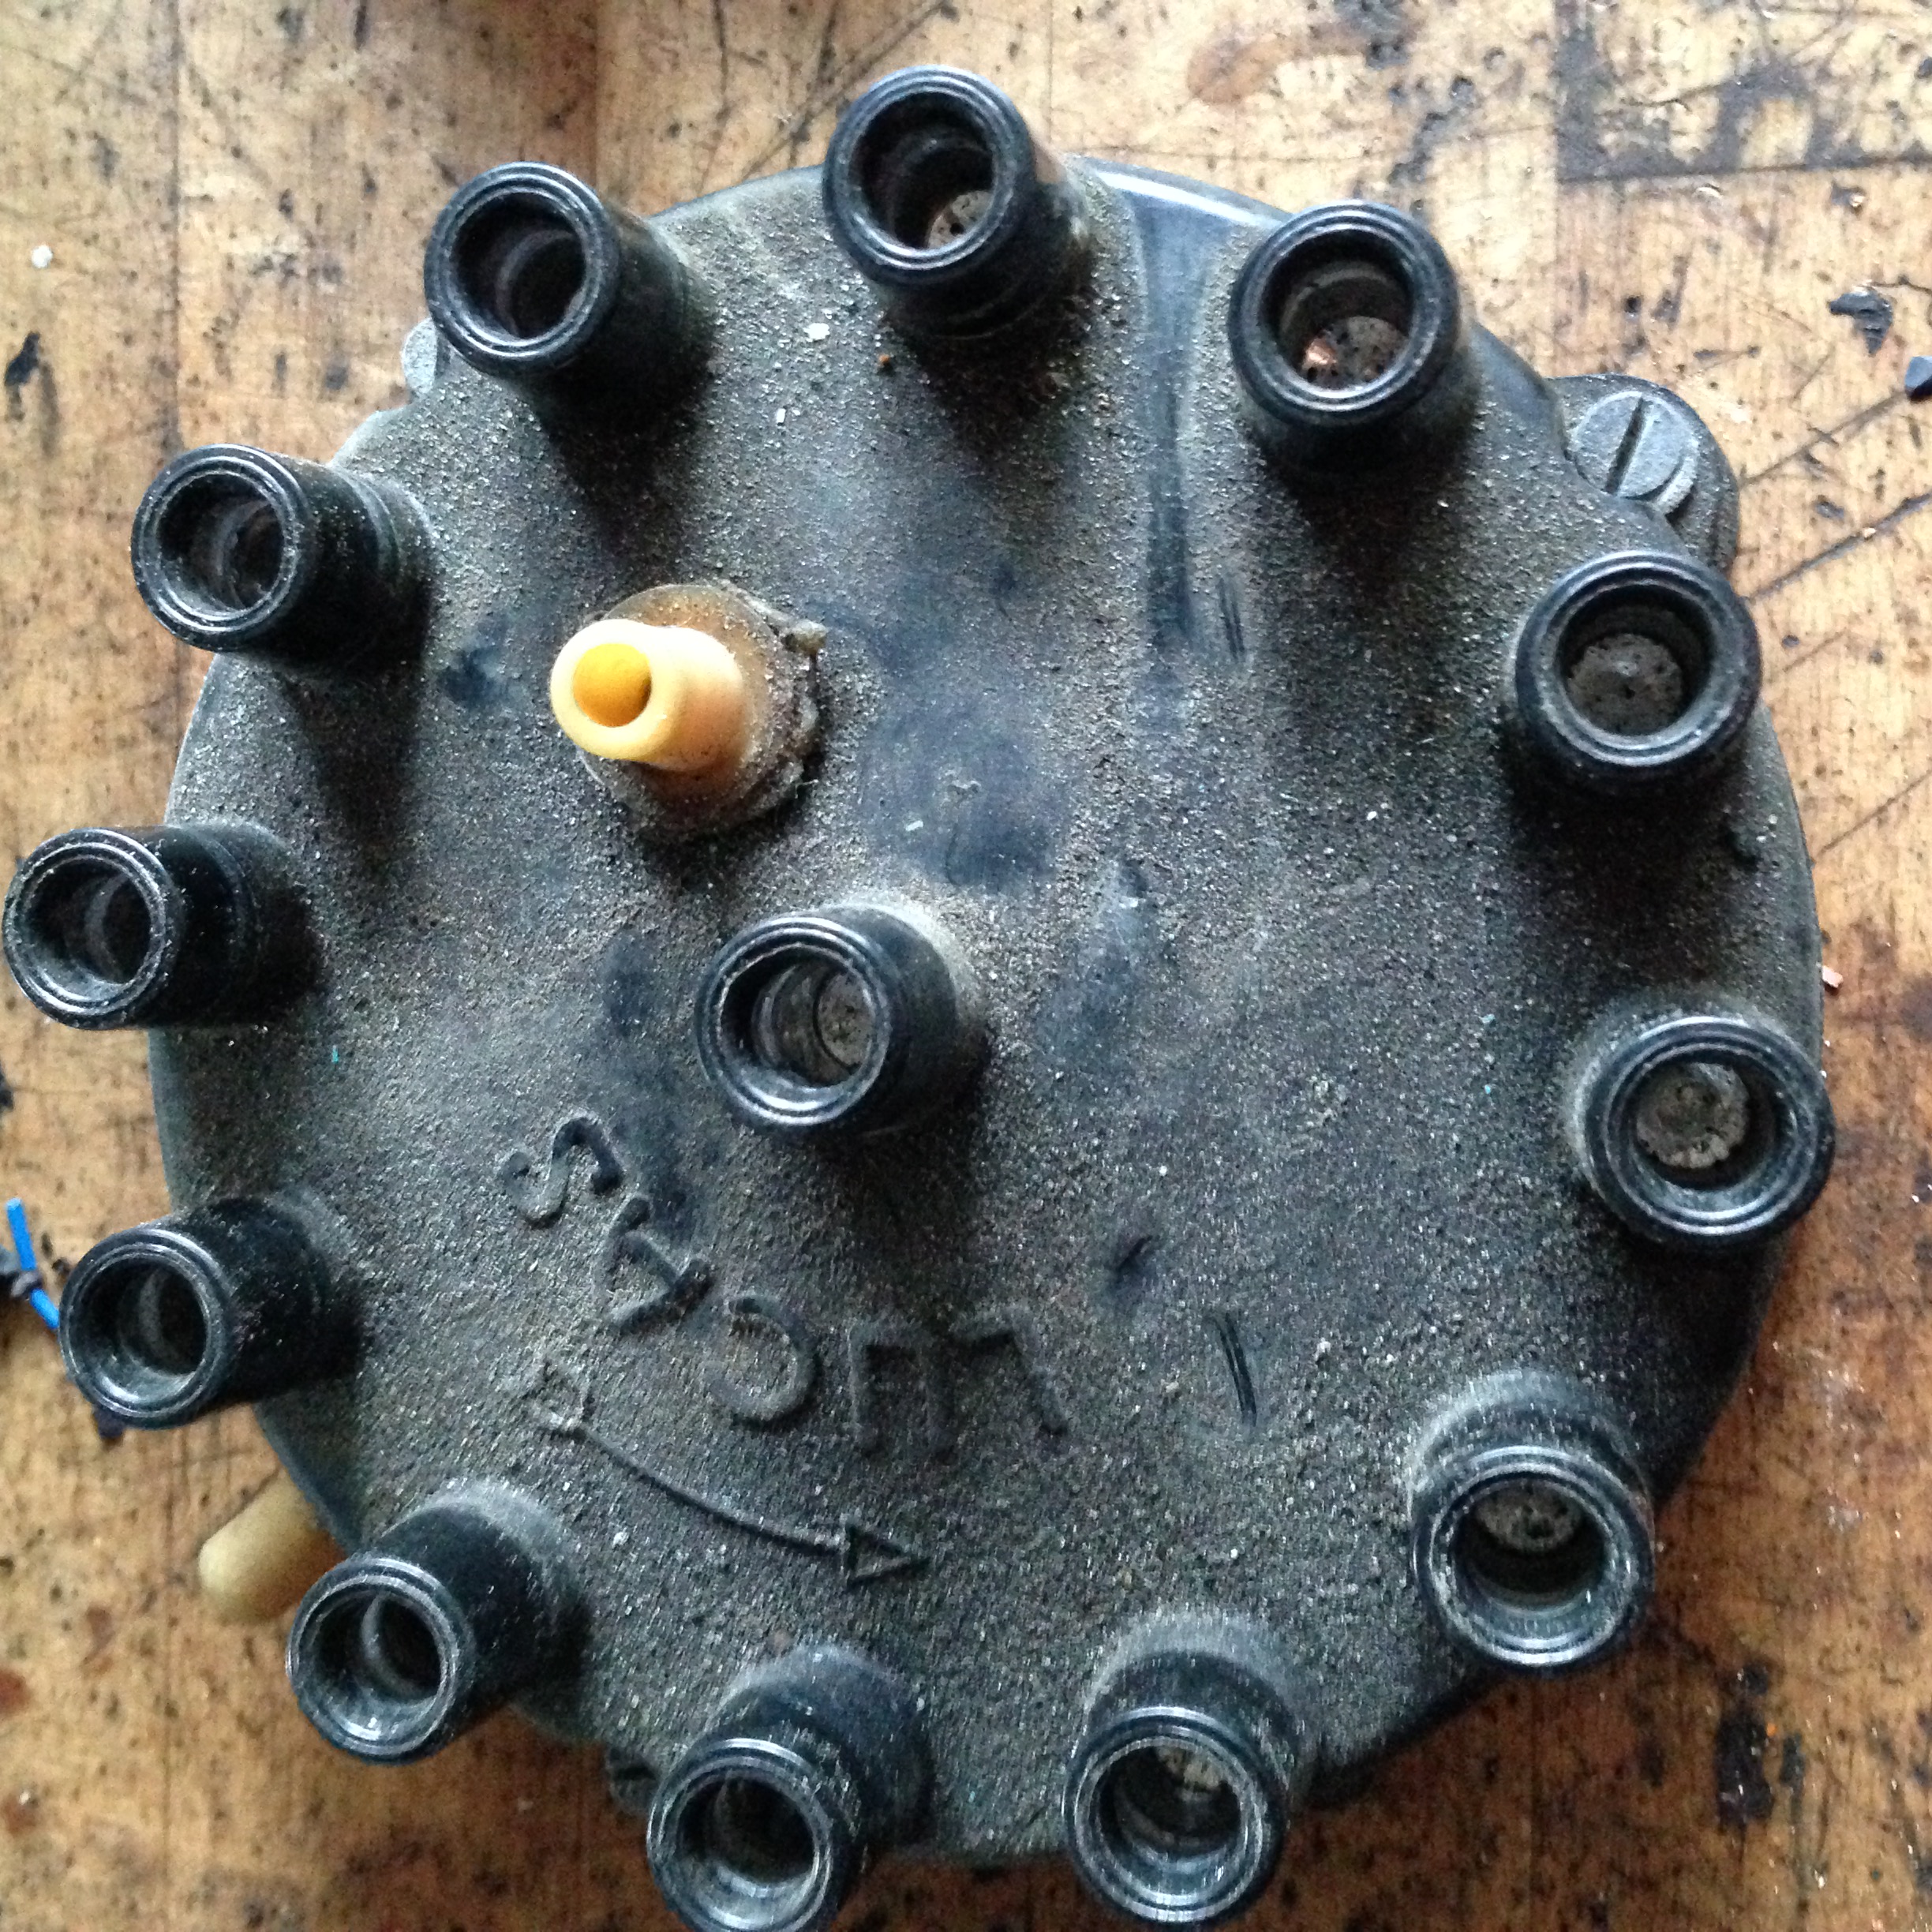
| 13th May 2016 | New wiper blades 15″. RH blade is too long, but that seems to be a common ‘feature’ Distributor cap removed and cleaned, free angular movement of the rotor checked and found OK. Spark plug leads cleaned. A/C drive belt tightened Air cleaner boxes cleaned, air filter checked, found ok and rotated 180° to sit correctly with the closed steel backplate section facing the throttle body opening to prevent the engine from damaging the paper filter. Front axle greased. Front brakes look fine, but bushings looks … old |
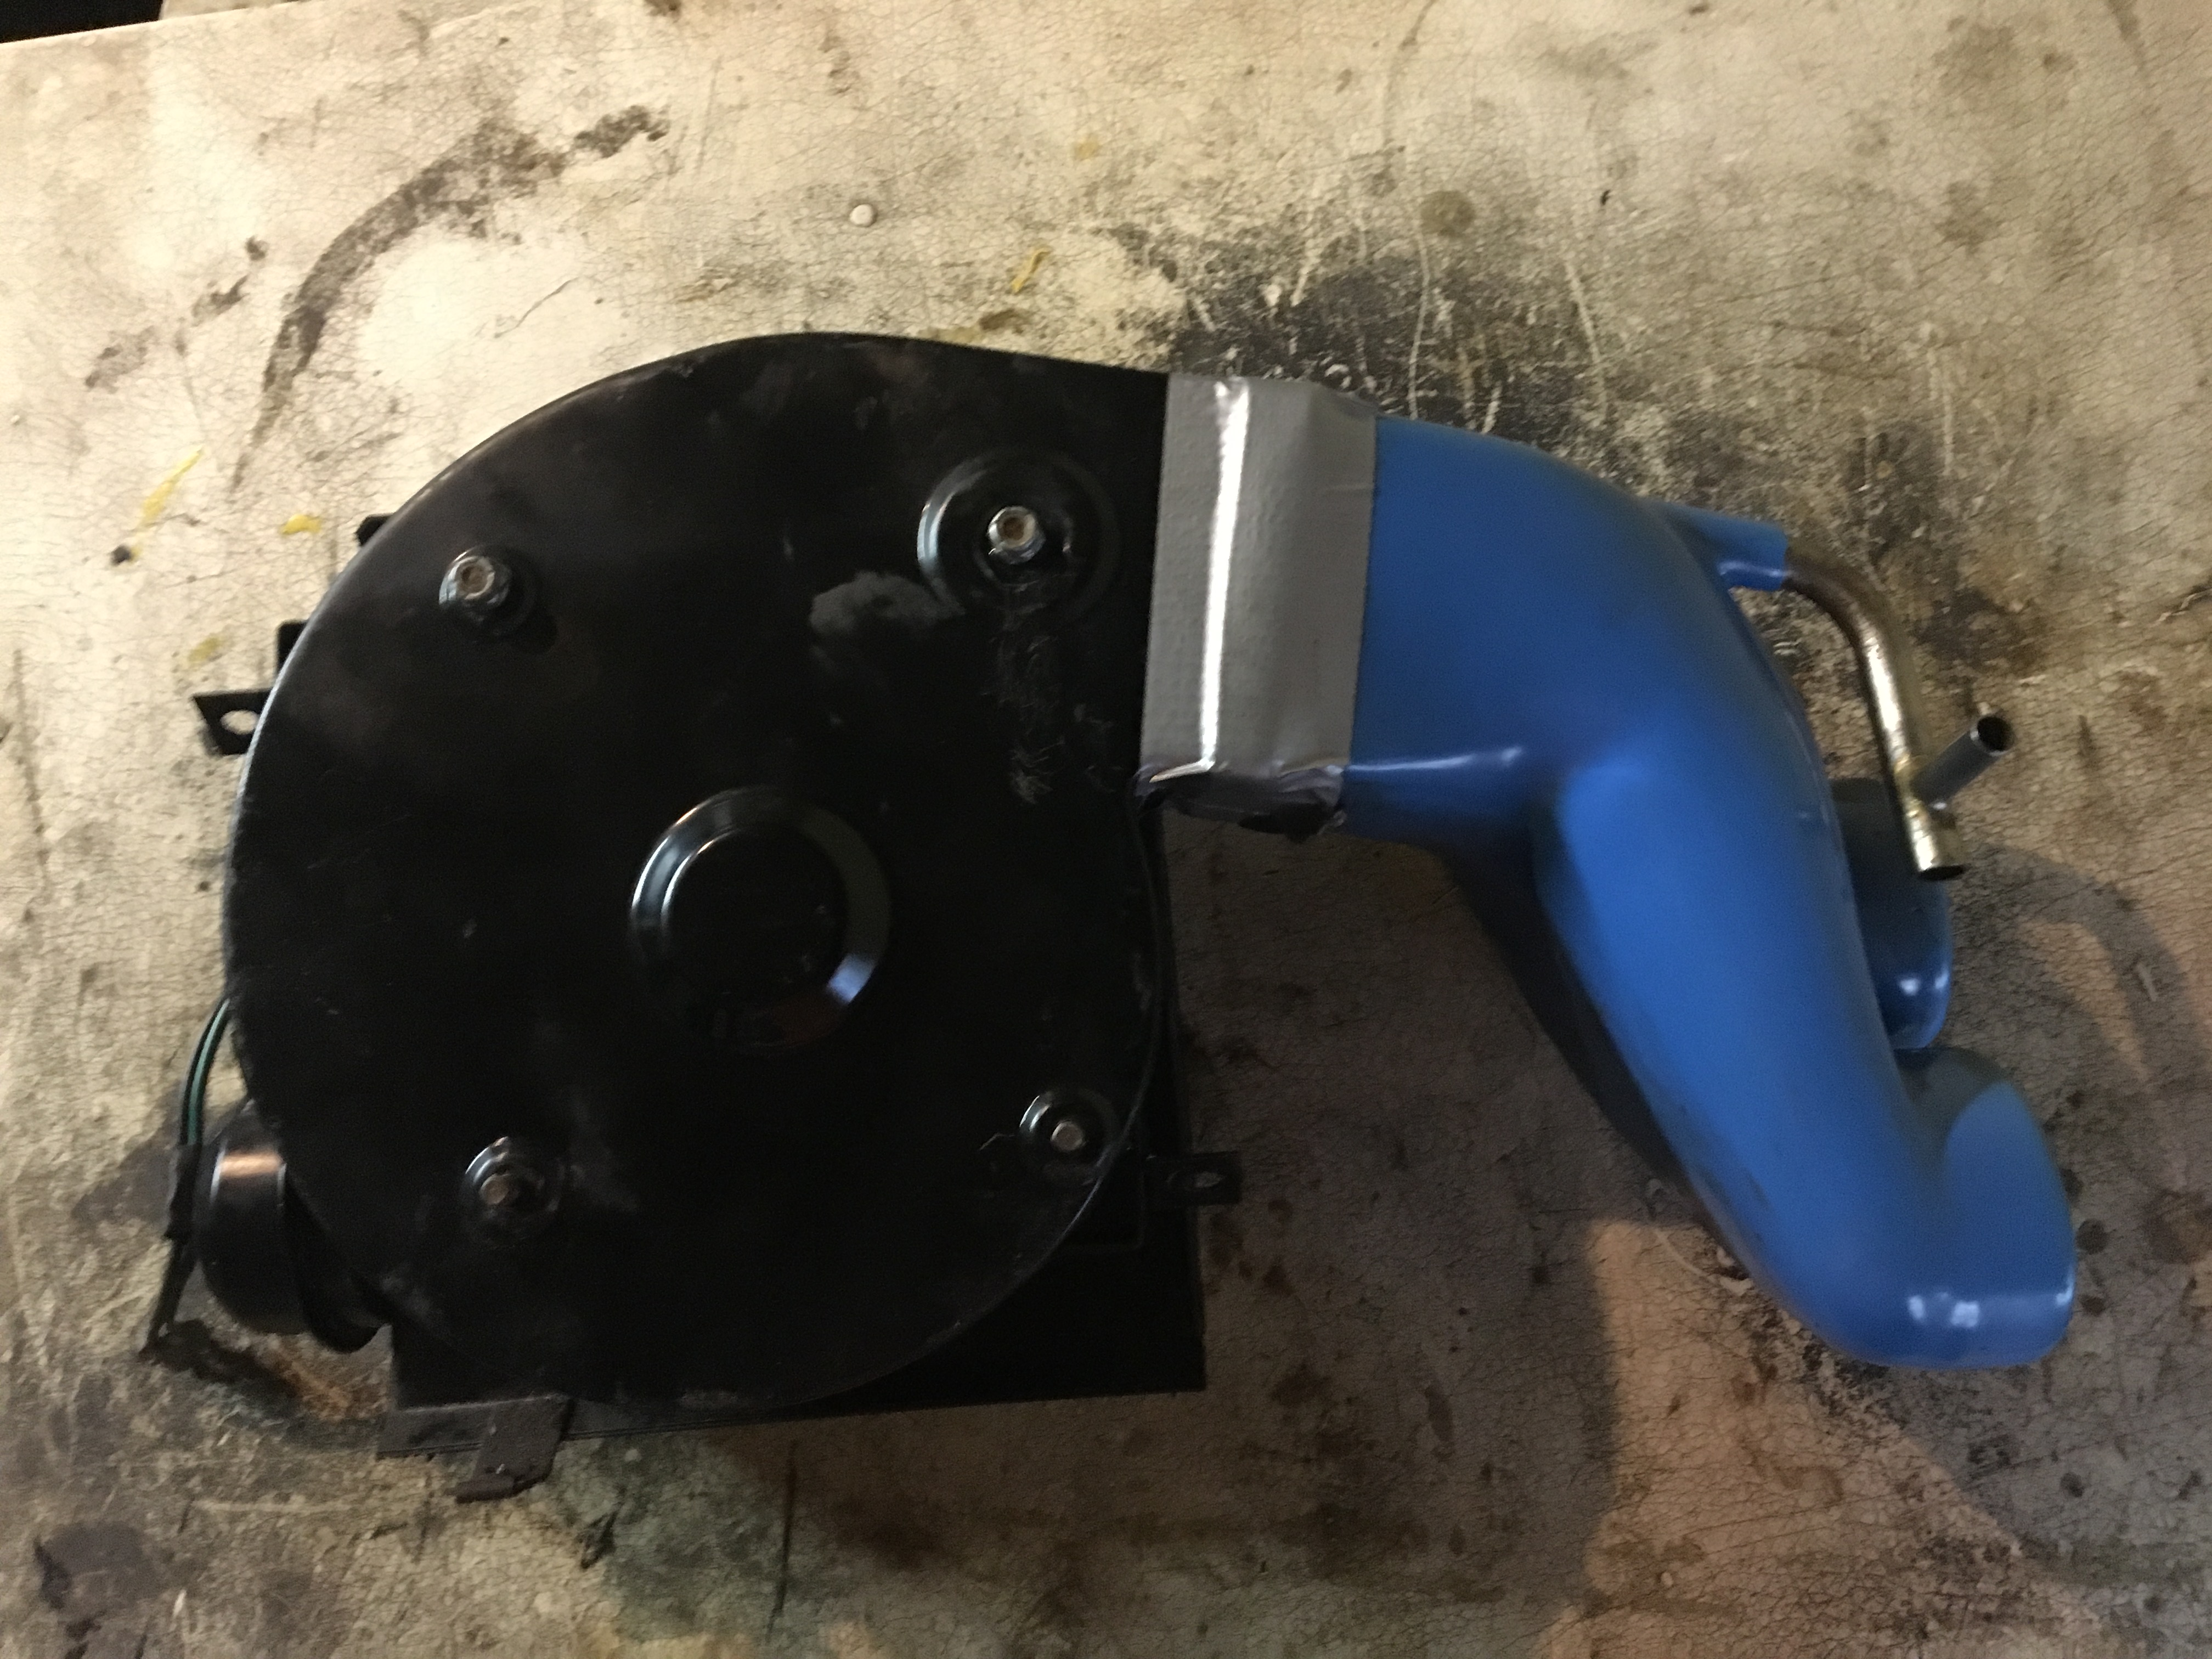
| 18th May 2016 | 95250km | The engine driven cooling fan was cracked. A new cooling fan EBC4553 from David Mannners mounted. Updated black design. The operation was possible, but not funny to do without removing radiator and fan shroud. I did not slide a piece of cardboard between radiator and fan, but that is recommended to protect the fragile structure of the radiator (and my knuckles) The fan clutch looks quite new, nice and clean. Water pump drive belt tightened. |
| 23rd June 2016 | 95700km | Left rear tyre and spare tyre exchanged. This results in 4 similar and not too old tyres on the car and the most ugly rim in the boot with an old tyre on it. |
Investigation of the non-working climate control.
The air coming from the wents is cold and the fan speed can only be off or on max.
The vacuum operated heater valve placed centrally on the bulk head works fine, and warm water flow is present. The temperature sensor in the water line is also OK. This is important, as a defective sensor makes the control think the water is still cold and then waits for the water to heat up before starting the fans up.
The fan resistor pack was measured in situ (probably not possible to remove w/o dismantling a lot more) and found OK. The 4-relay unit removed and repaired. 2 hair wires were broken. After this the fan now has 2 speeds, but cannot be turned off anymore !
Discussion on forum concludes I need a new climate control. LINK
| 30th June 2016 | 95800km | Rear axle greased. Wheel housing edges cleaned, inspected and covered in Dinitrol. Some rust found, small rust holes sealed for now with heavy dinitrol. Alternator and servo pump belt tigthened, servo fluid topped up with Dexron II ATF. |
3-4rd July 2016. Trip to Lüneburg to visit my brother and family. The car drives really well and returns an average consumption better than 8 km/l, and we didn’t drive particularly slow…
30-31st July 2016. Trip to Copenhagen Historical Grand Prix, where the car was on display at Jaguar Club of Denmarks exhibition. Again the car behaves well, but the aircon decides for the second time to actually kind of work. The last 50 km was therefore done with the heat on max and no option to turn it off. Open windows…
| 11th August 2016 | Both windscreen wiper fitting pins exchanged with new DIY parts made in stainless steel after one pin broke during carwash… |
| 21nd September 2016 | 97100km | New climate control amplifier C45402. Climatron updated and refined digital control from an Australian Ebay-seller LINK Heating now works ! |
Winter 2016-2017
Mileage 97360. We are using the advantageous (read cheap…) Vintage Insurance, and that enforces no usage of the vehicle from November 15th to March 15th.
This allows for larger repairs, and this winter the ignition components has been replaced and the boot fuel smell issue has been solved worked on.
Ignition service: LINK
Fuel lines in boot and tank service: LINK
AAV fixed using Grant Francis’ great instruction: AAV rebuild procedure
March 19th 2017. First drive of the year. The car started well and runs really smooth.
29th March 2017. 97500km. Loose links in door mirrors fixed: LINK
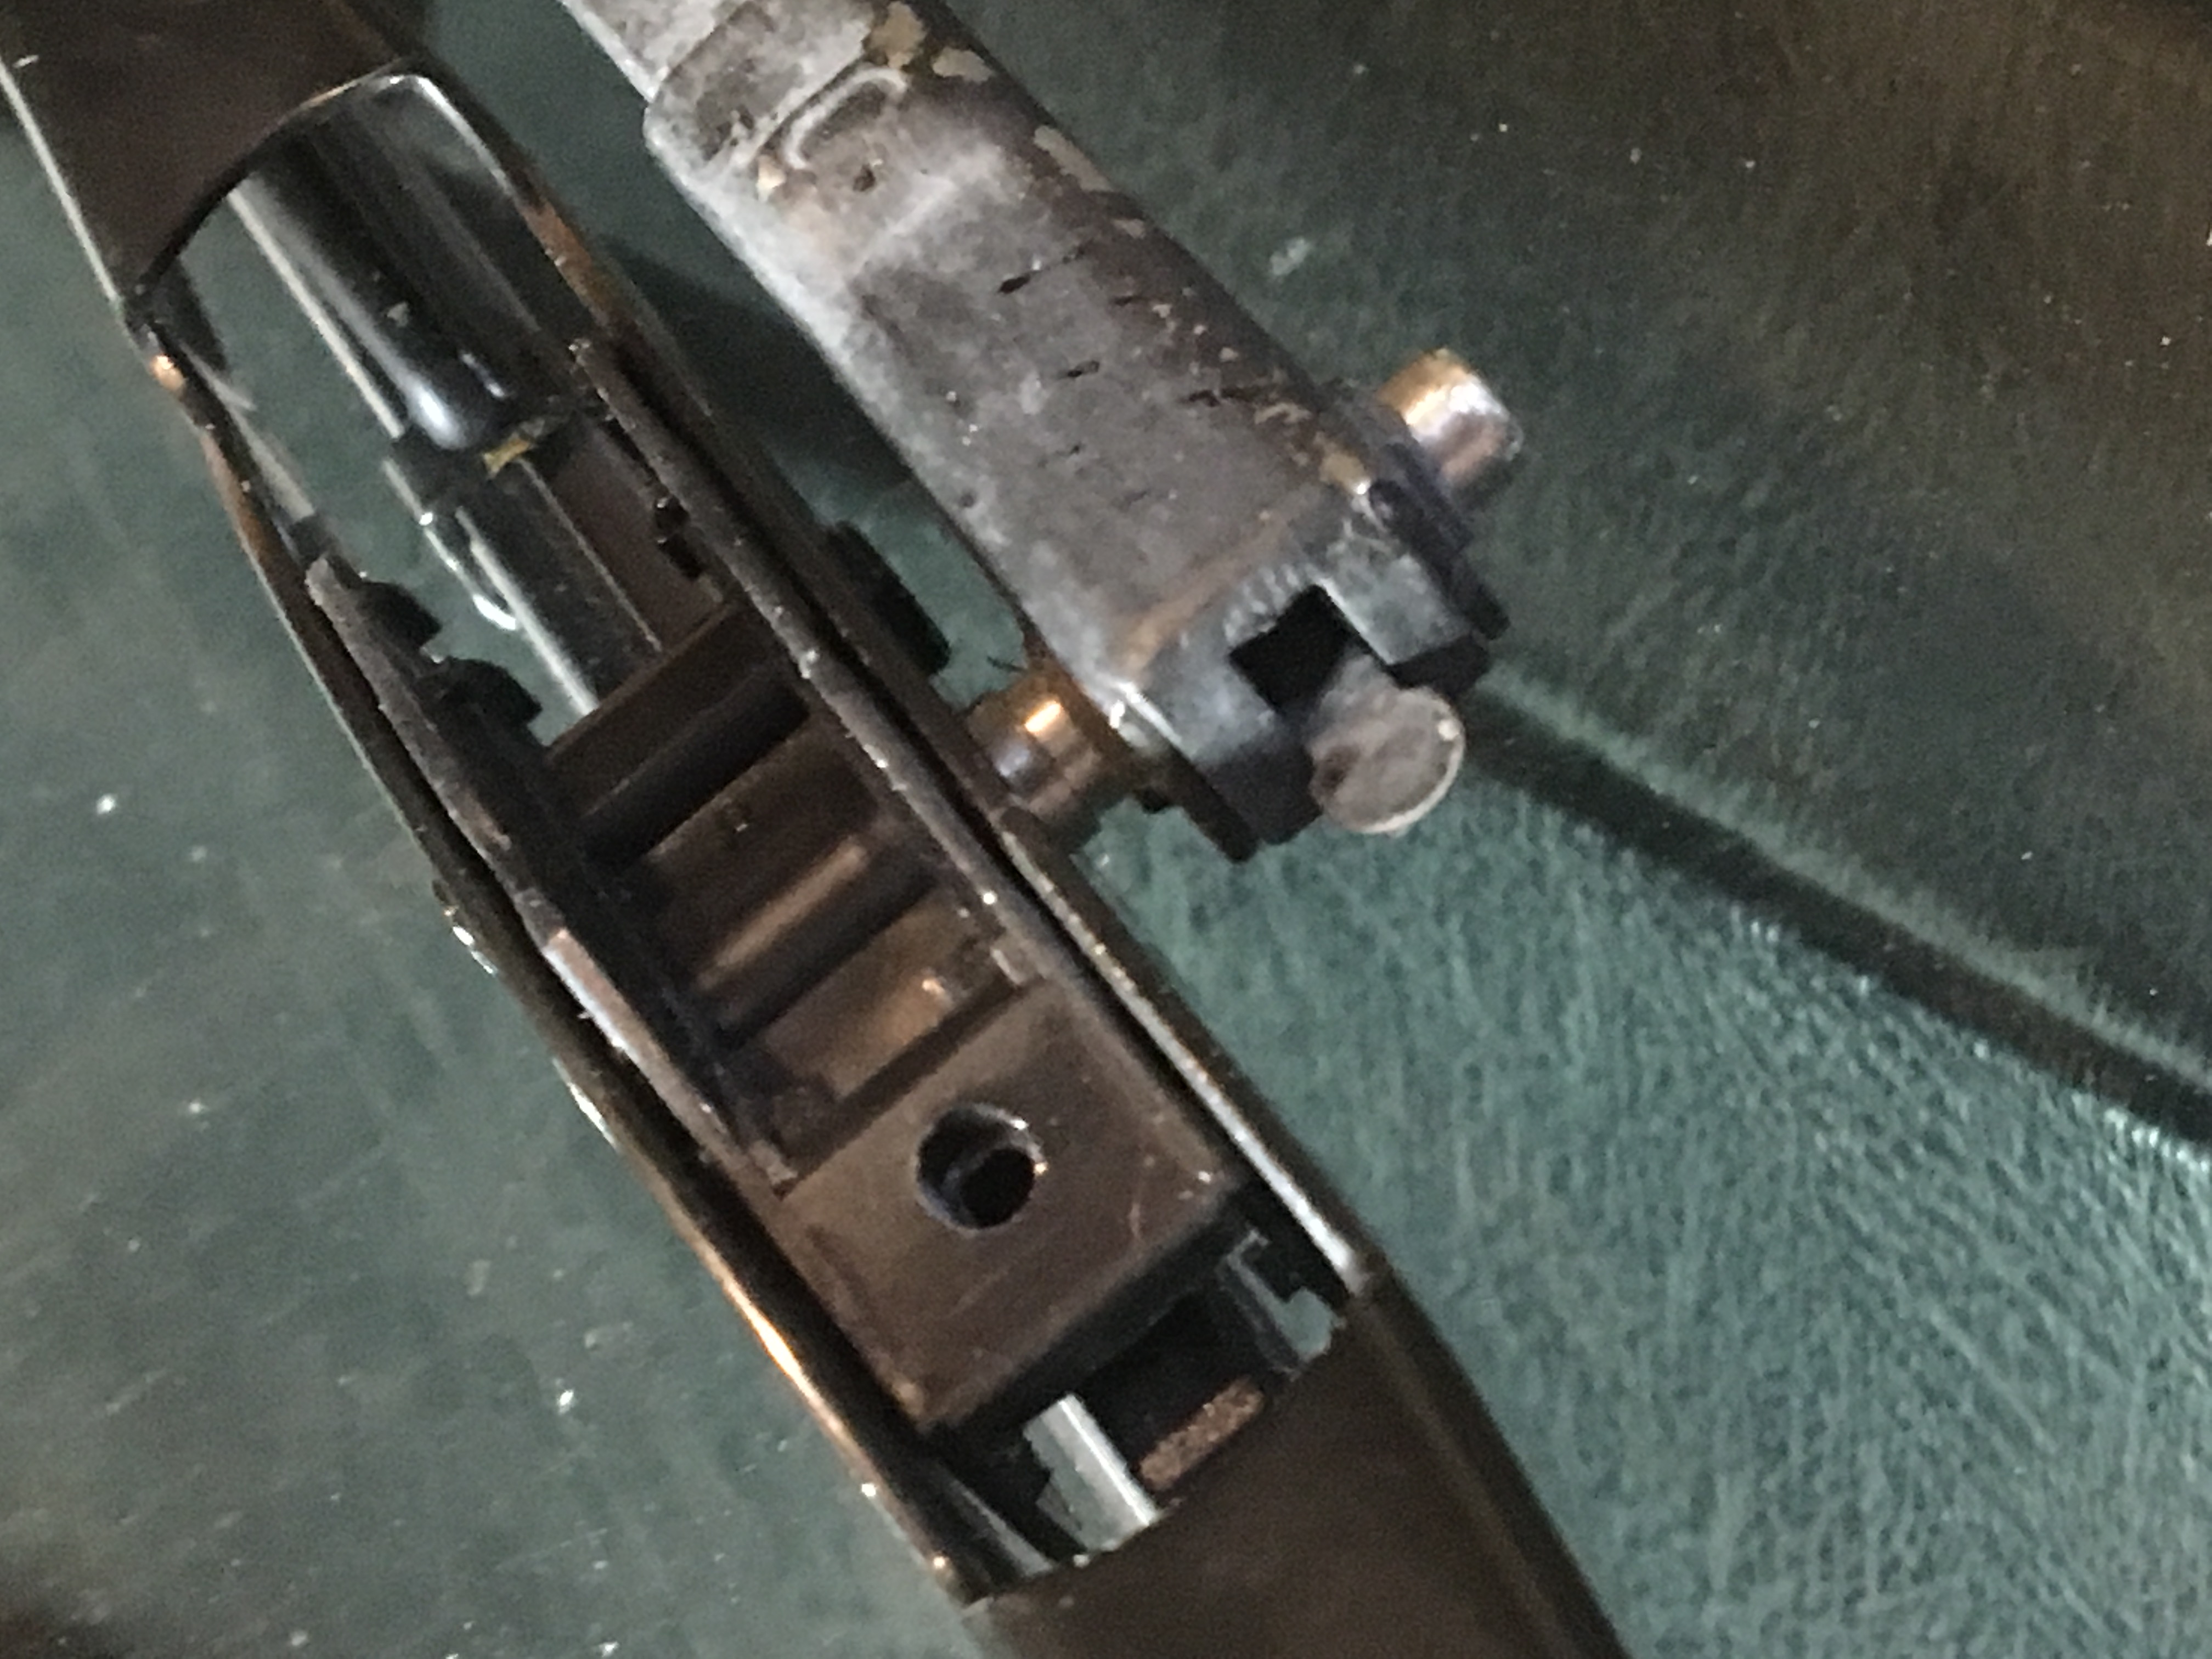
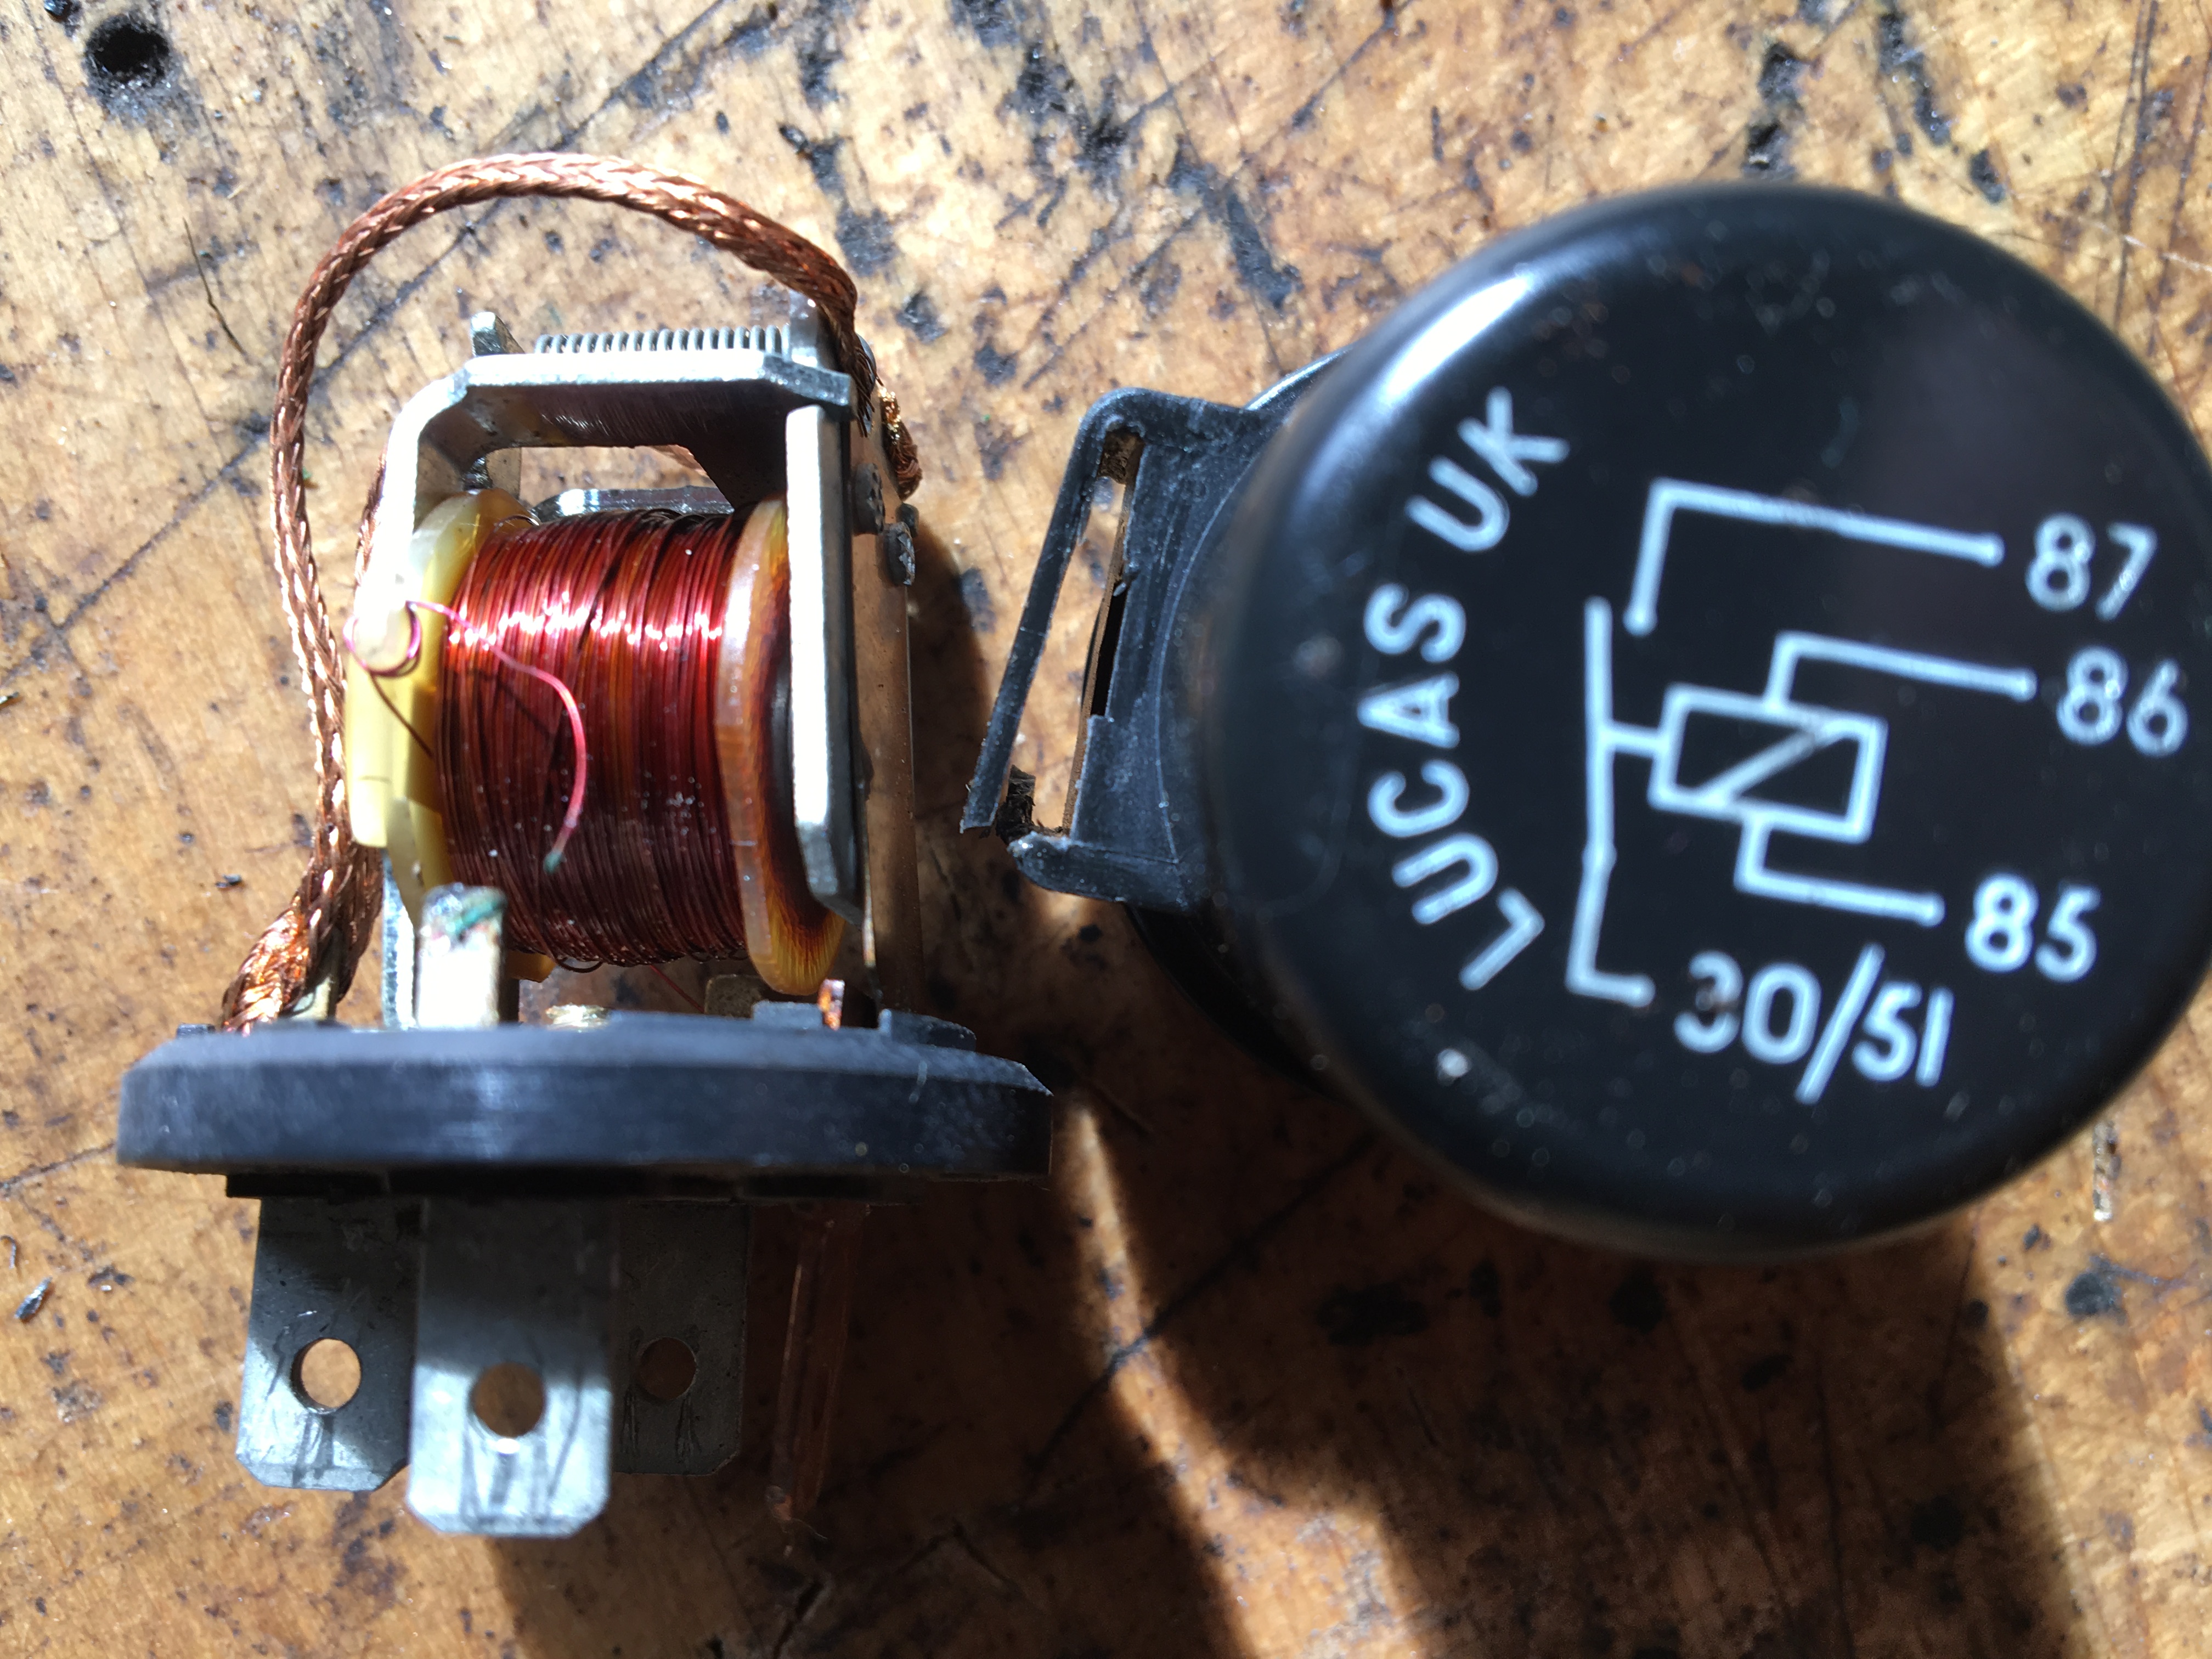
April 25th 2017. Stop light bulb failure module fails and causes the stop lights to fail (!). The unit is placed in the rear end of the centre console. Fixed by resoldering a broken wire –>
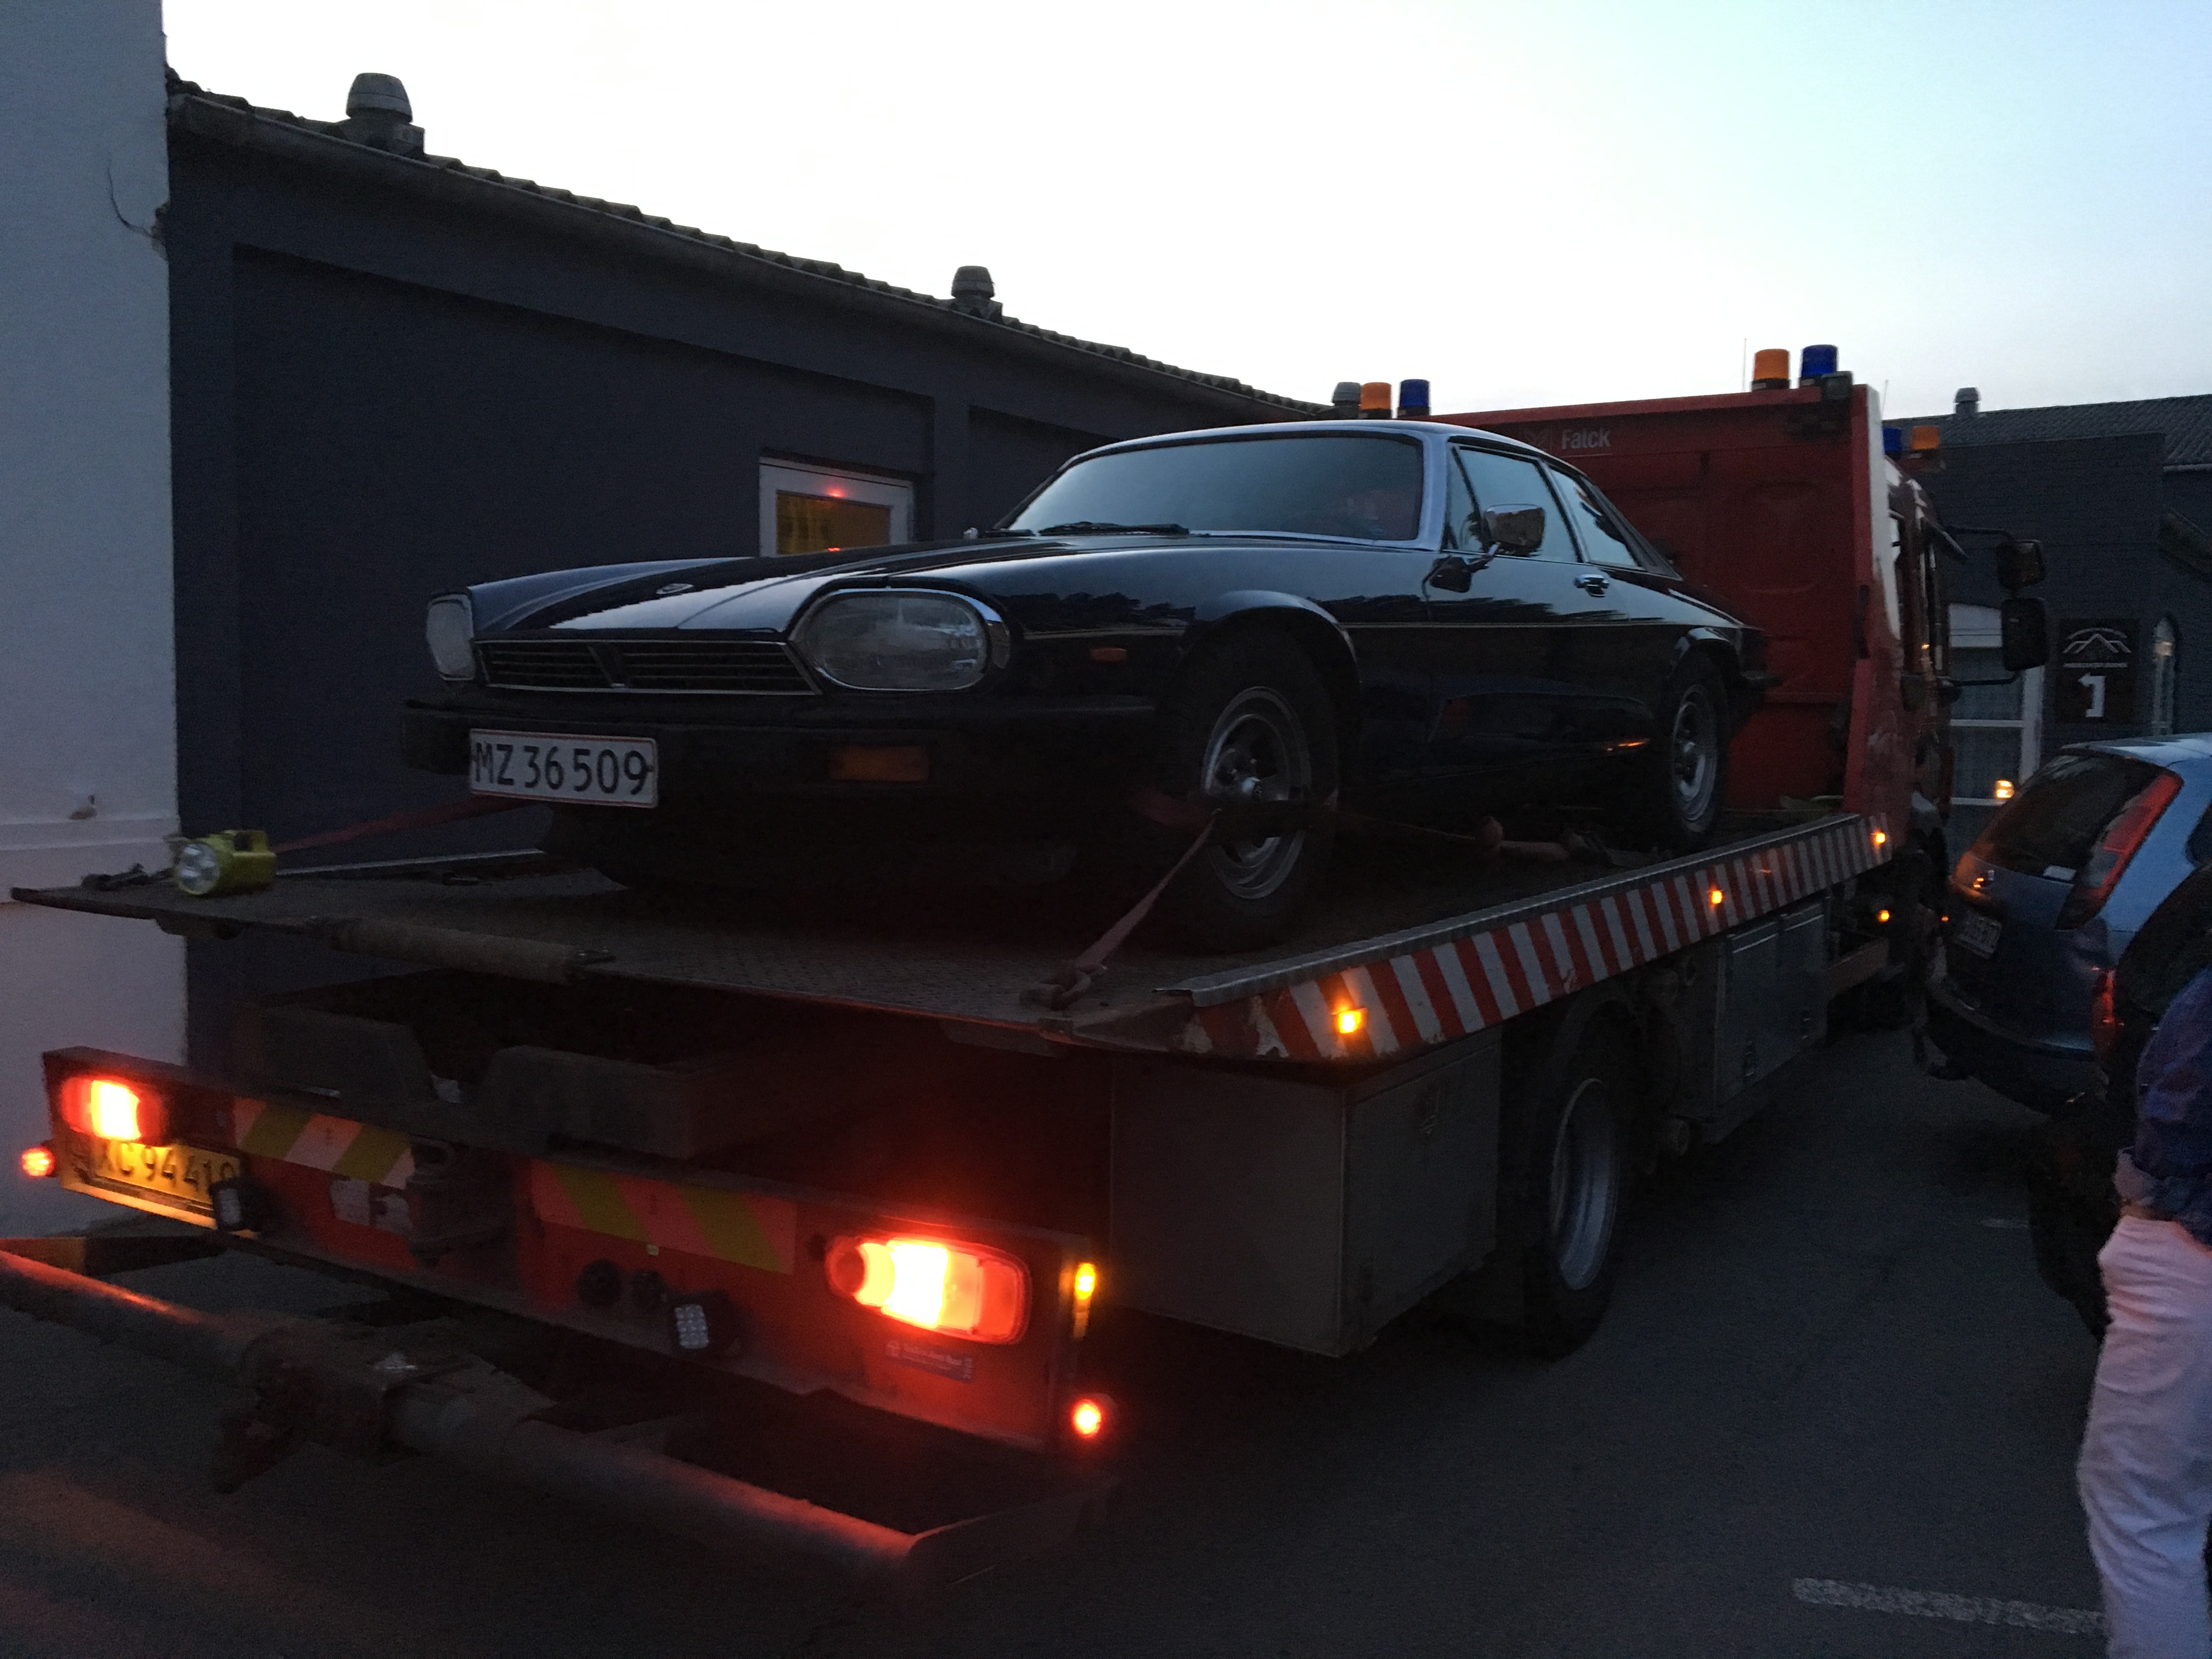
April-May 2017. We use the XJ-S for several long drives to Hamburg, Moesgaard, a confirmation drive and finally our son Jonas and his girlfriend borrows the car to drive to their prom night. We meet with them after they have arrived to the party. They hand over the keys, and then the car refuses completely to start. Zero reaction from the starter, so the drive home was on a flatbed transporter. It was lucky this didn’t happen when they were on their own in the car crossing through Odense…

The non-starting issue turned out to be lack of continuity in the circuit from starter relay through the switch in the gear selector. It was probably just the inhibitor switch that failed, but the quick solution was to give the starter relay a new ground through a parallel wire thereby cutting this safety switch out of the system. The starter relay is found on rear innner wing near the bulkhead.
August 1st 2017. 99.000 km. MOT passed with one minor error: Hazard warning lights doesn’t work. Registration changed to ‘Veteran’ with 8 year inspection schedule. I had the VIN corrected in the system as well as the old data included part of the body number as well.
November 15th 2017. 99894 km. Start of winter hibernation.
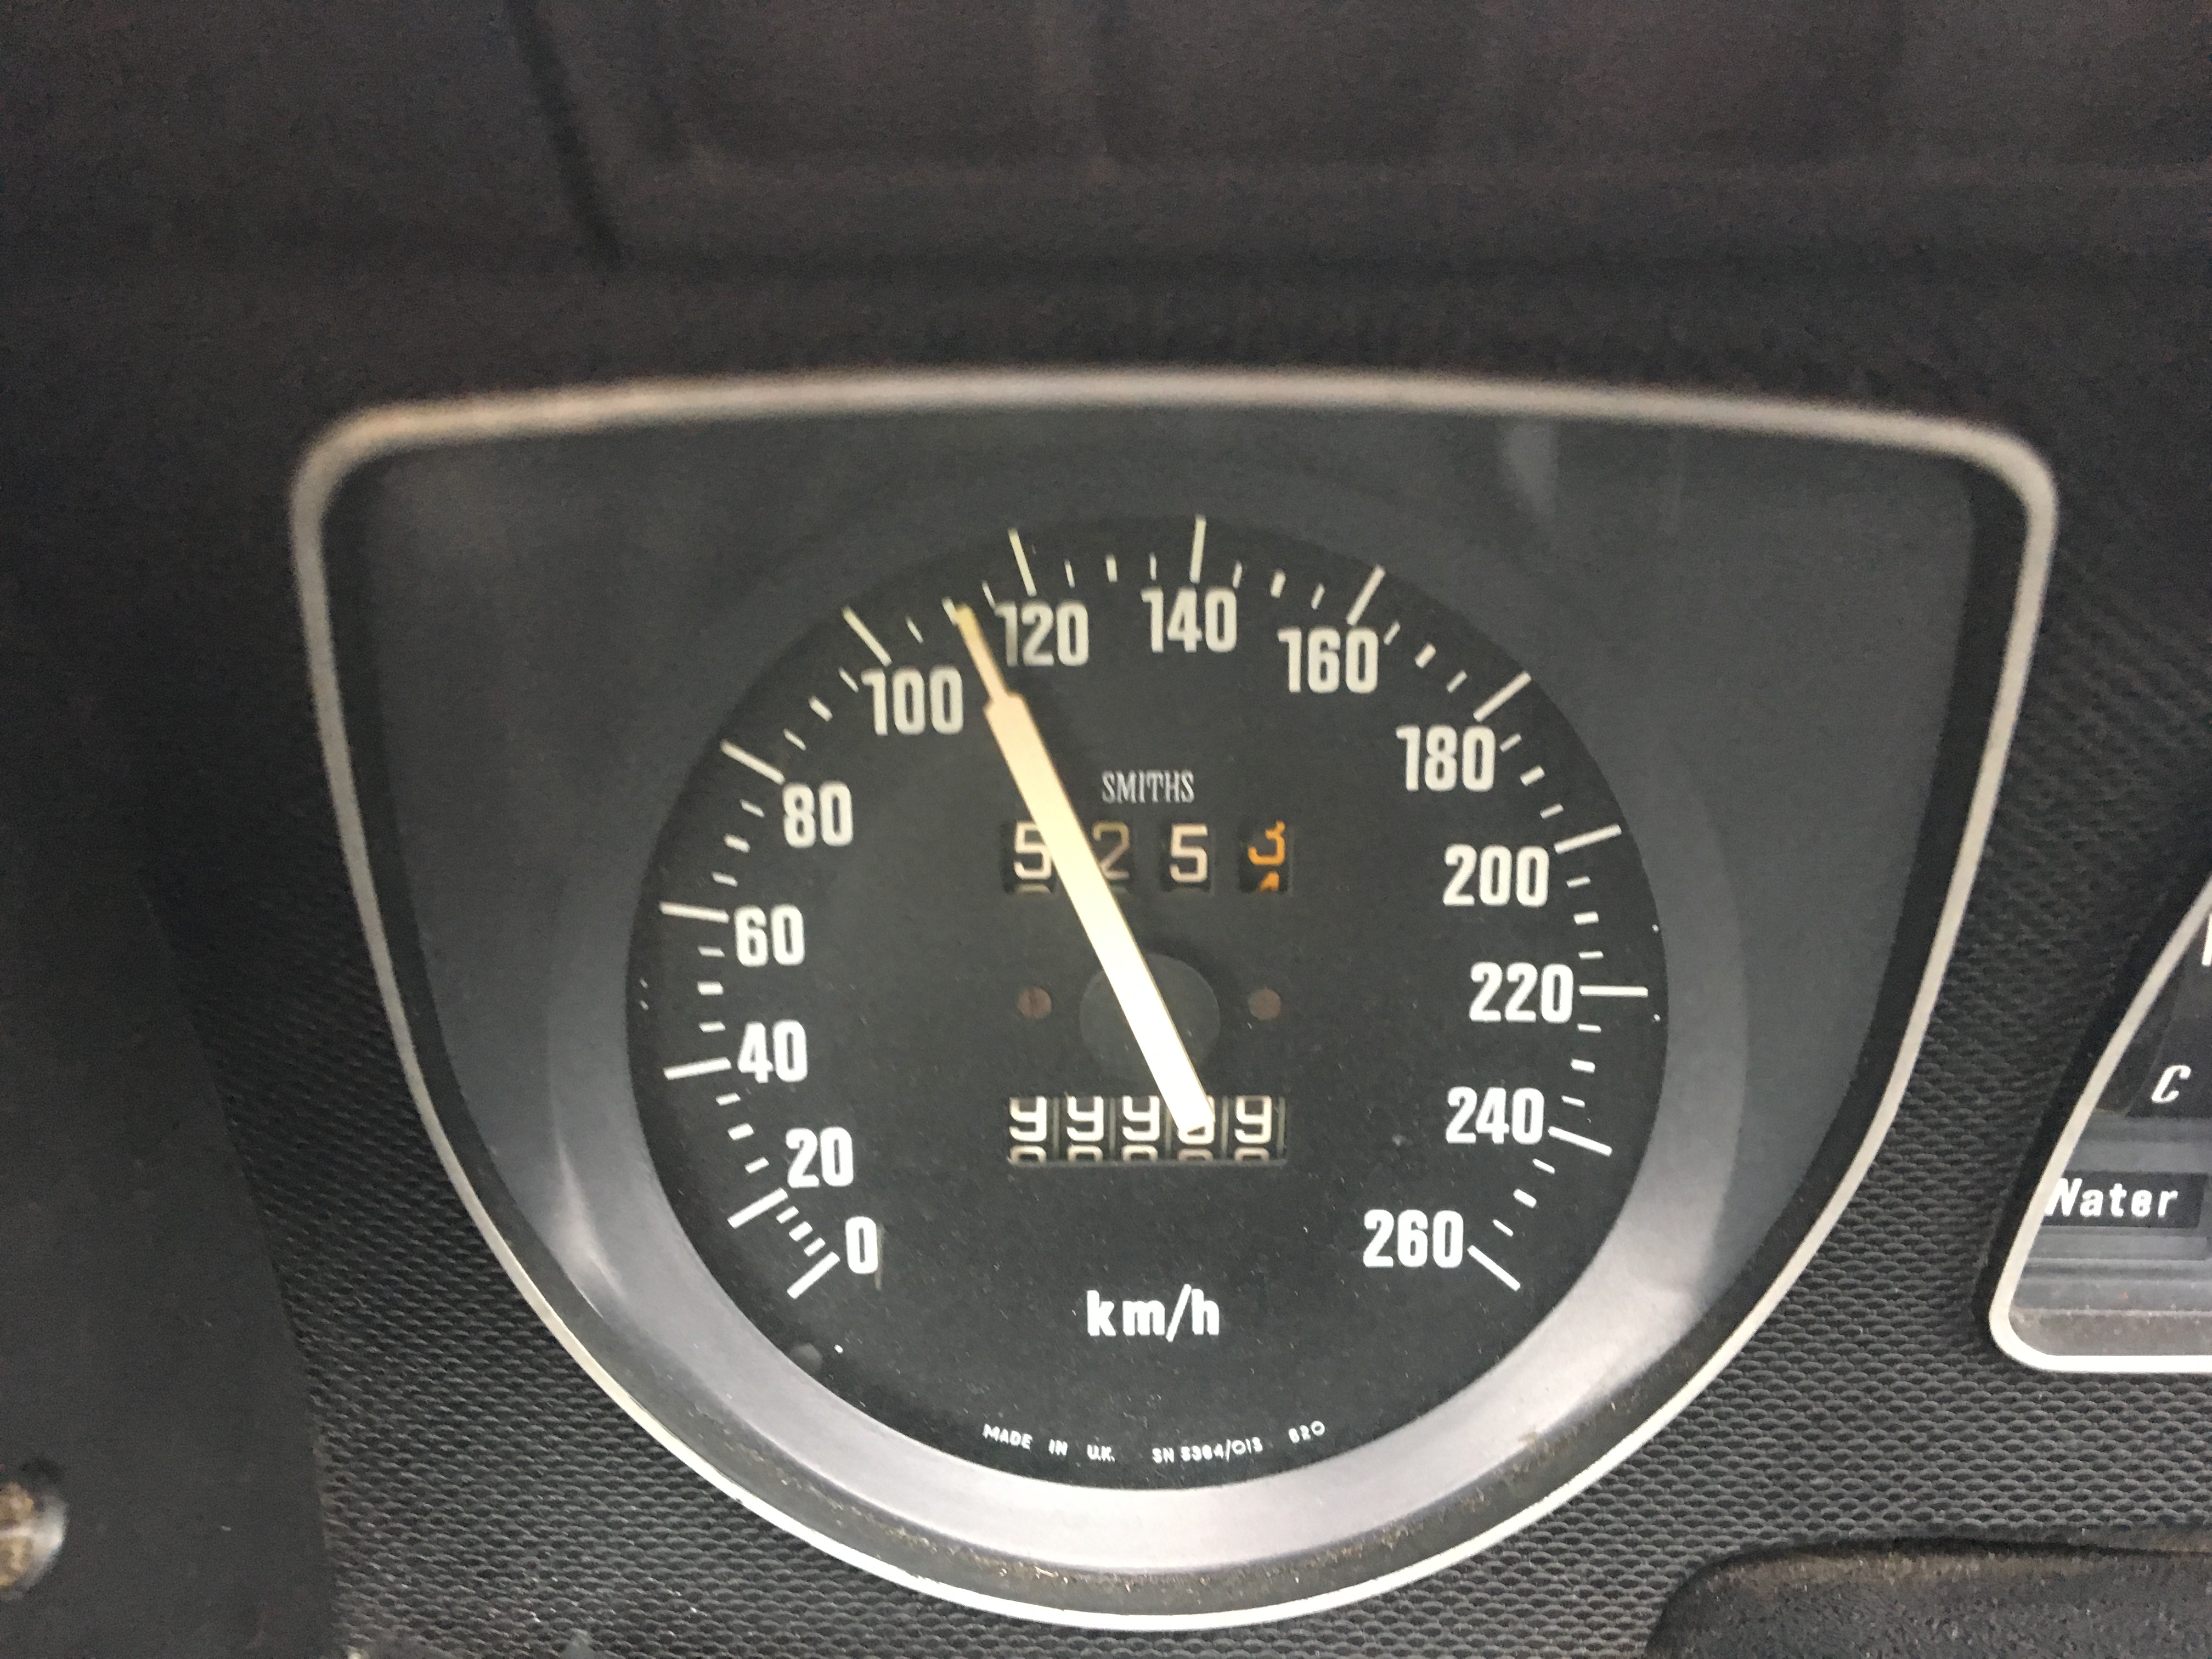
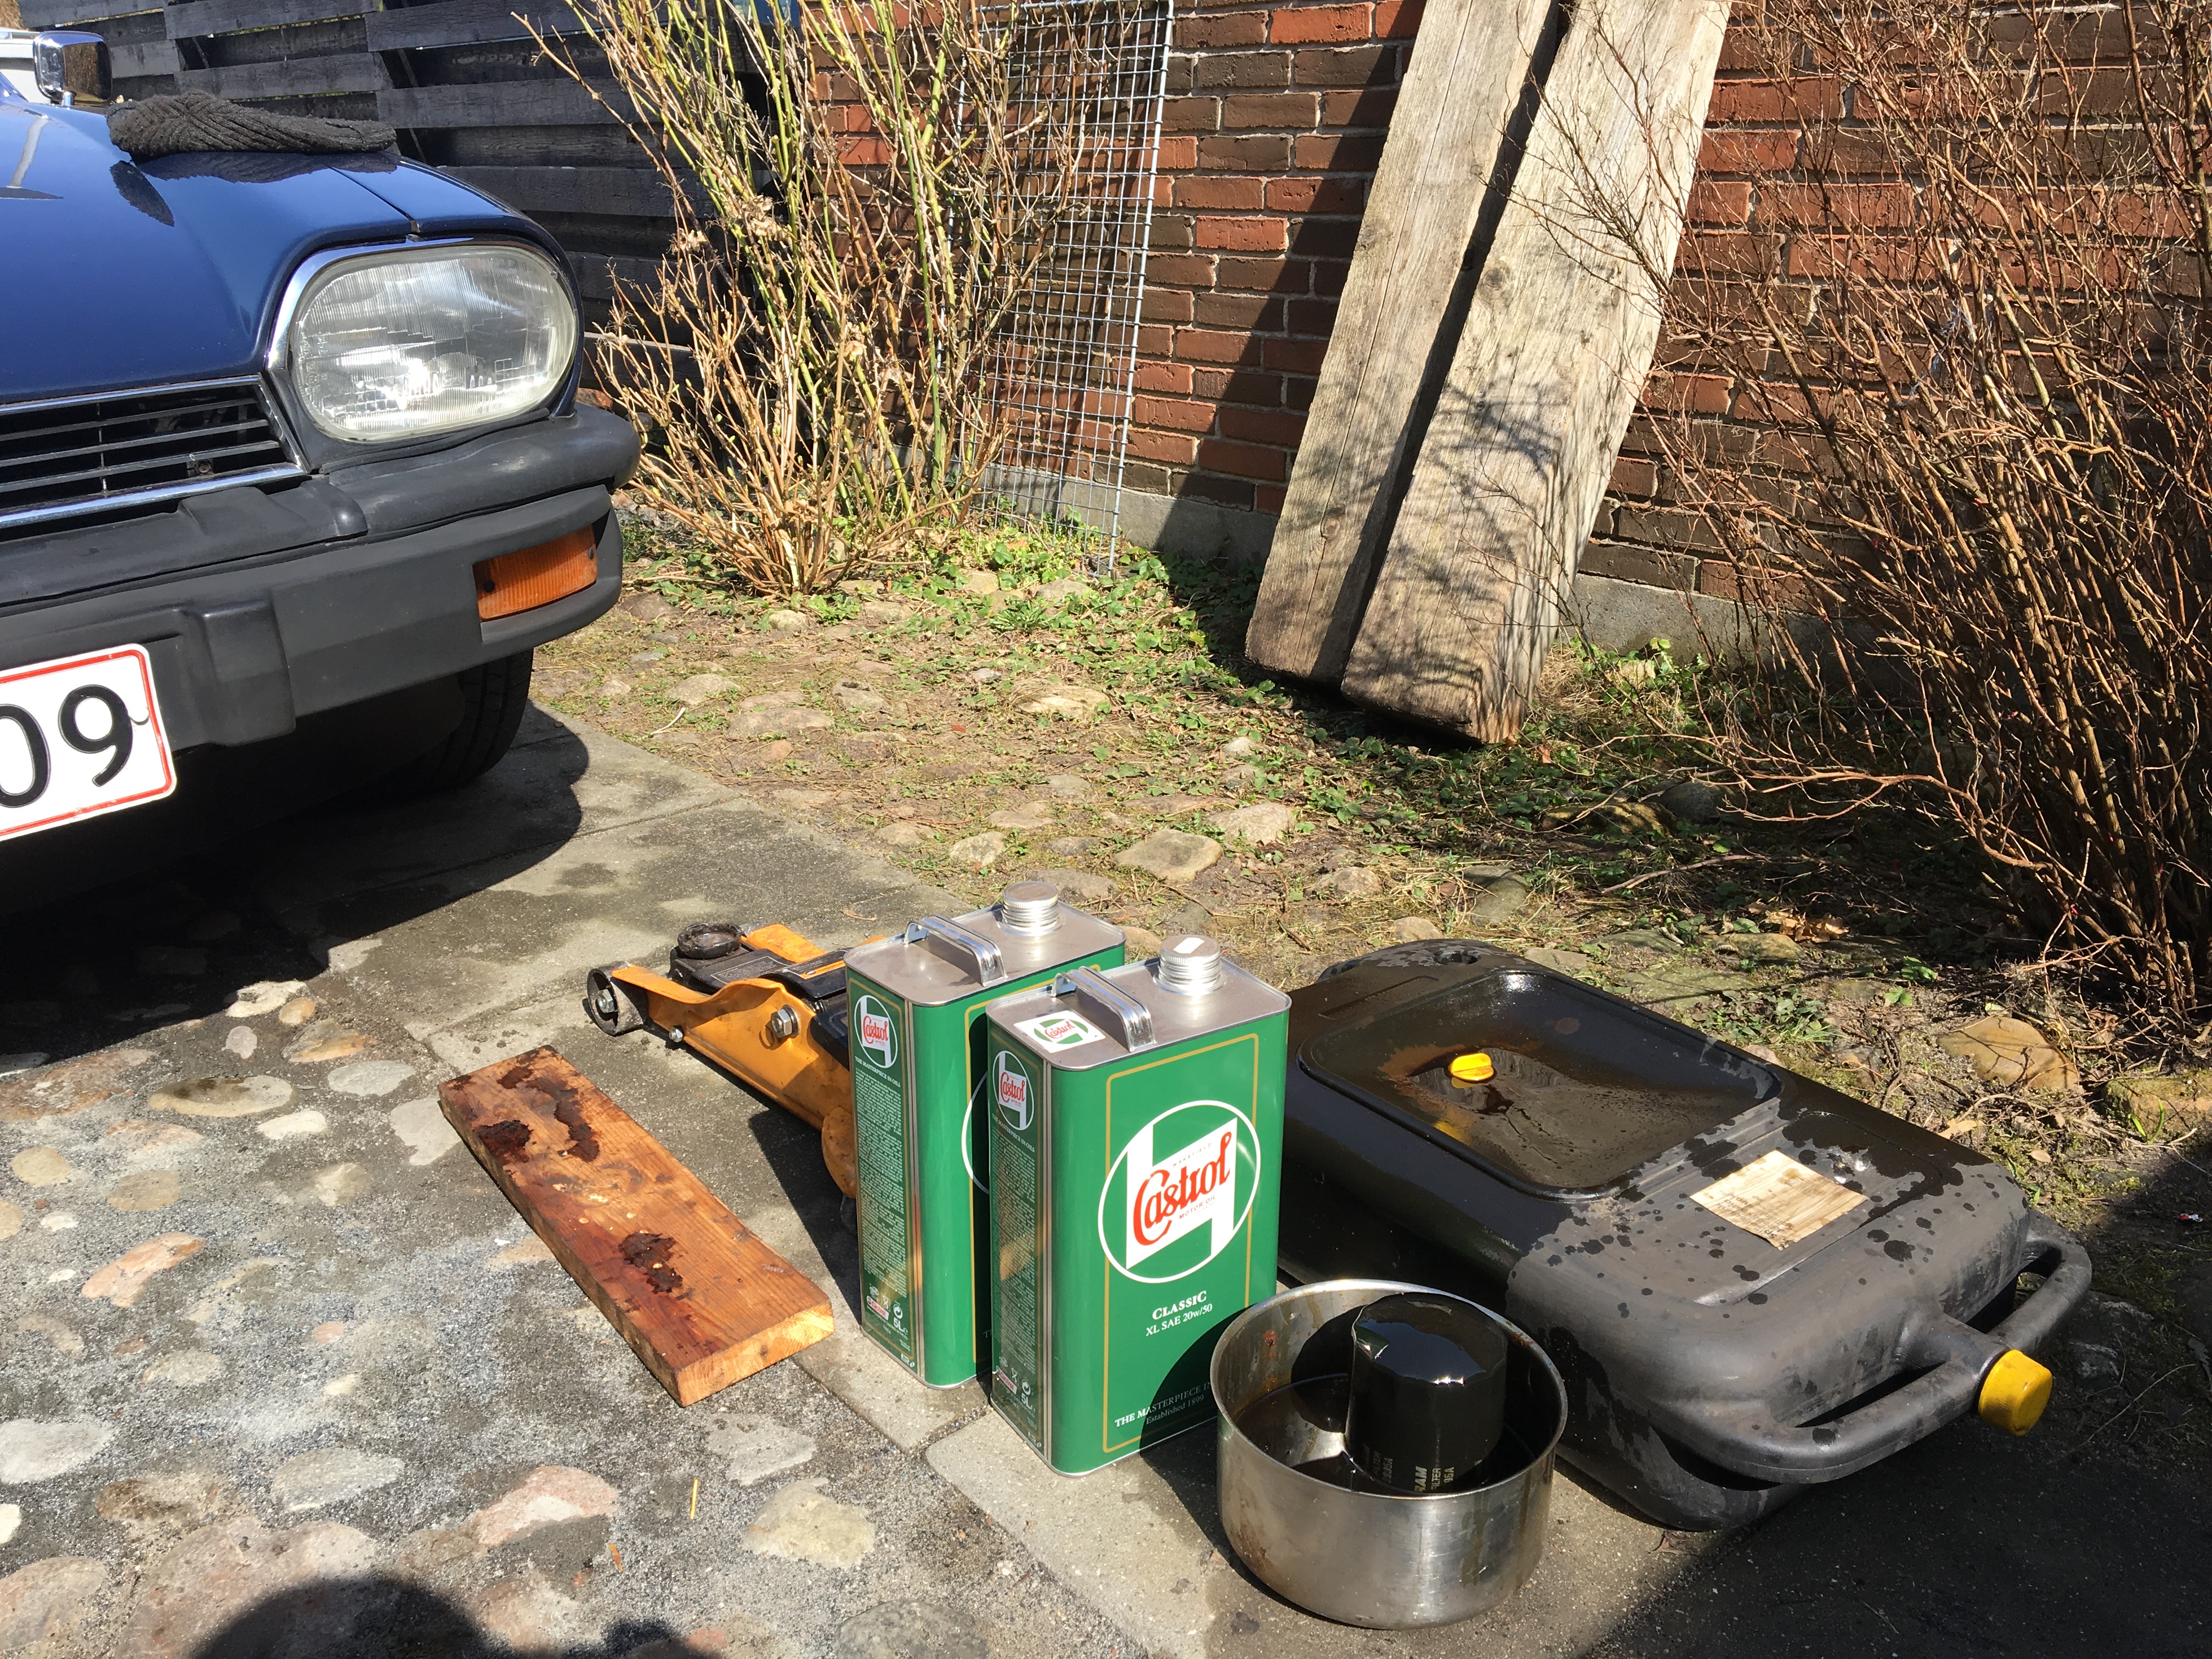
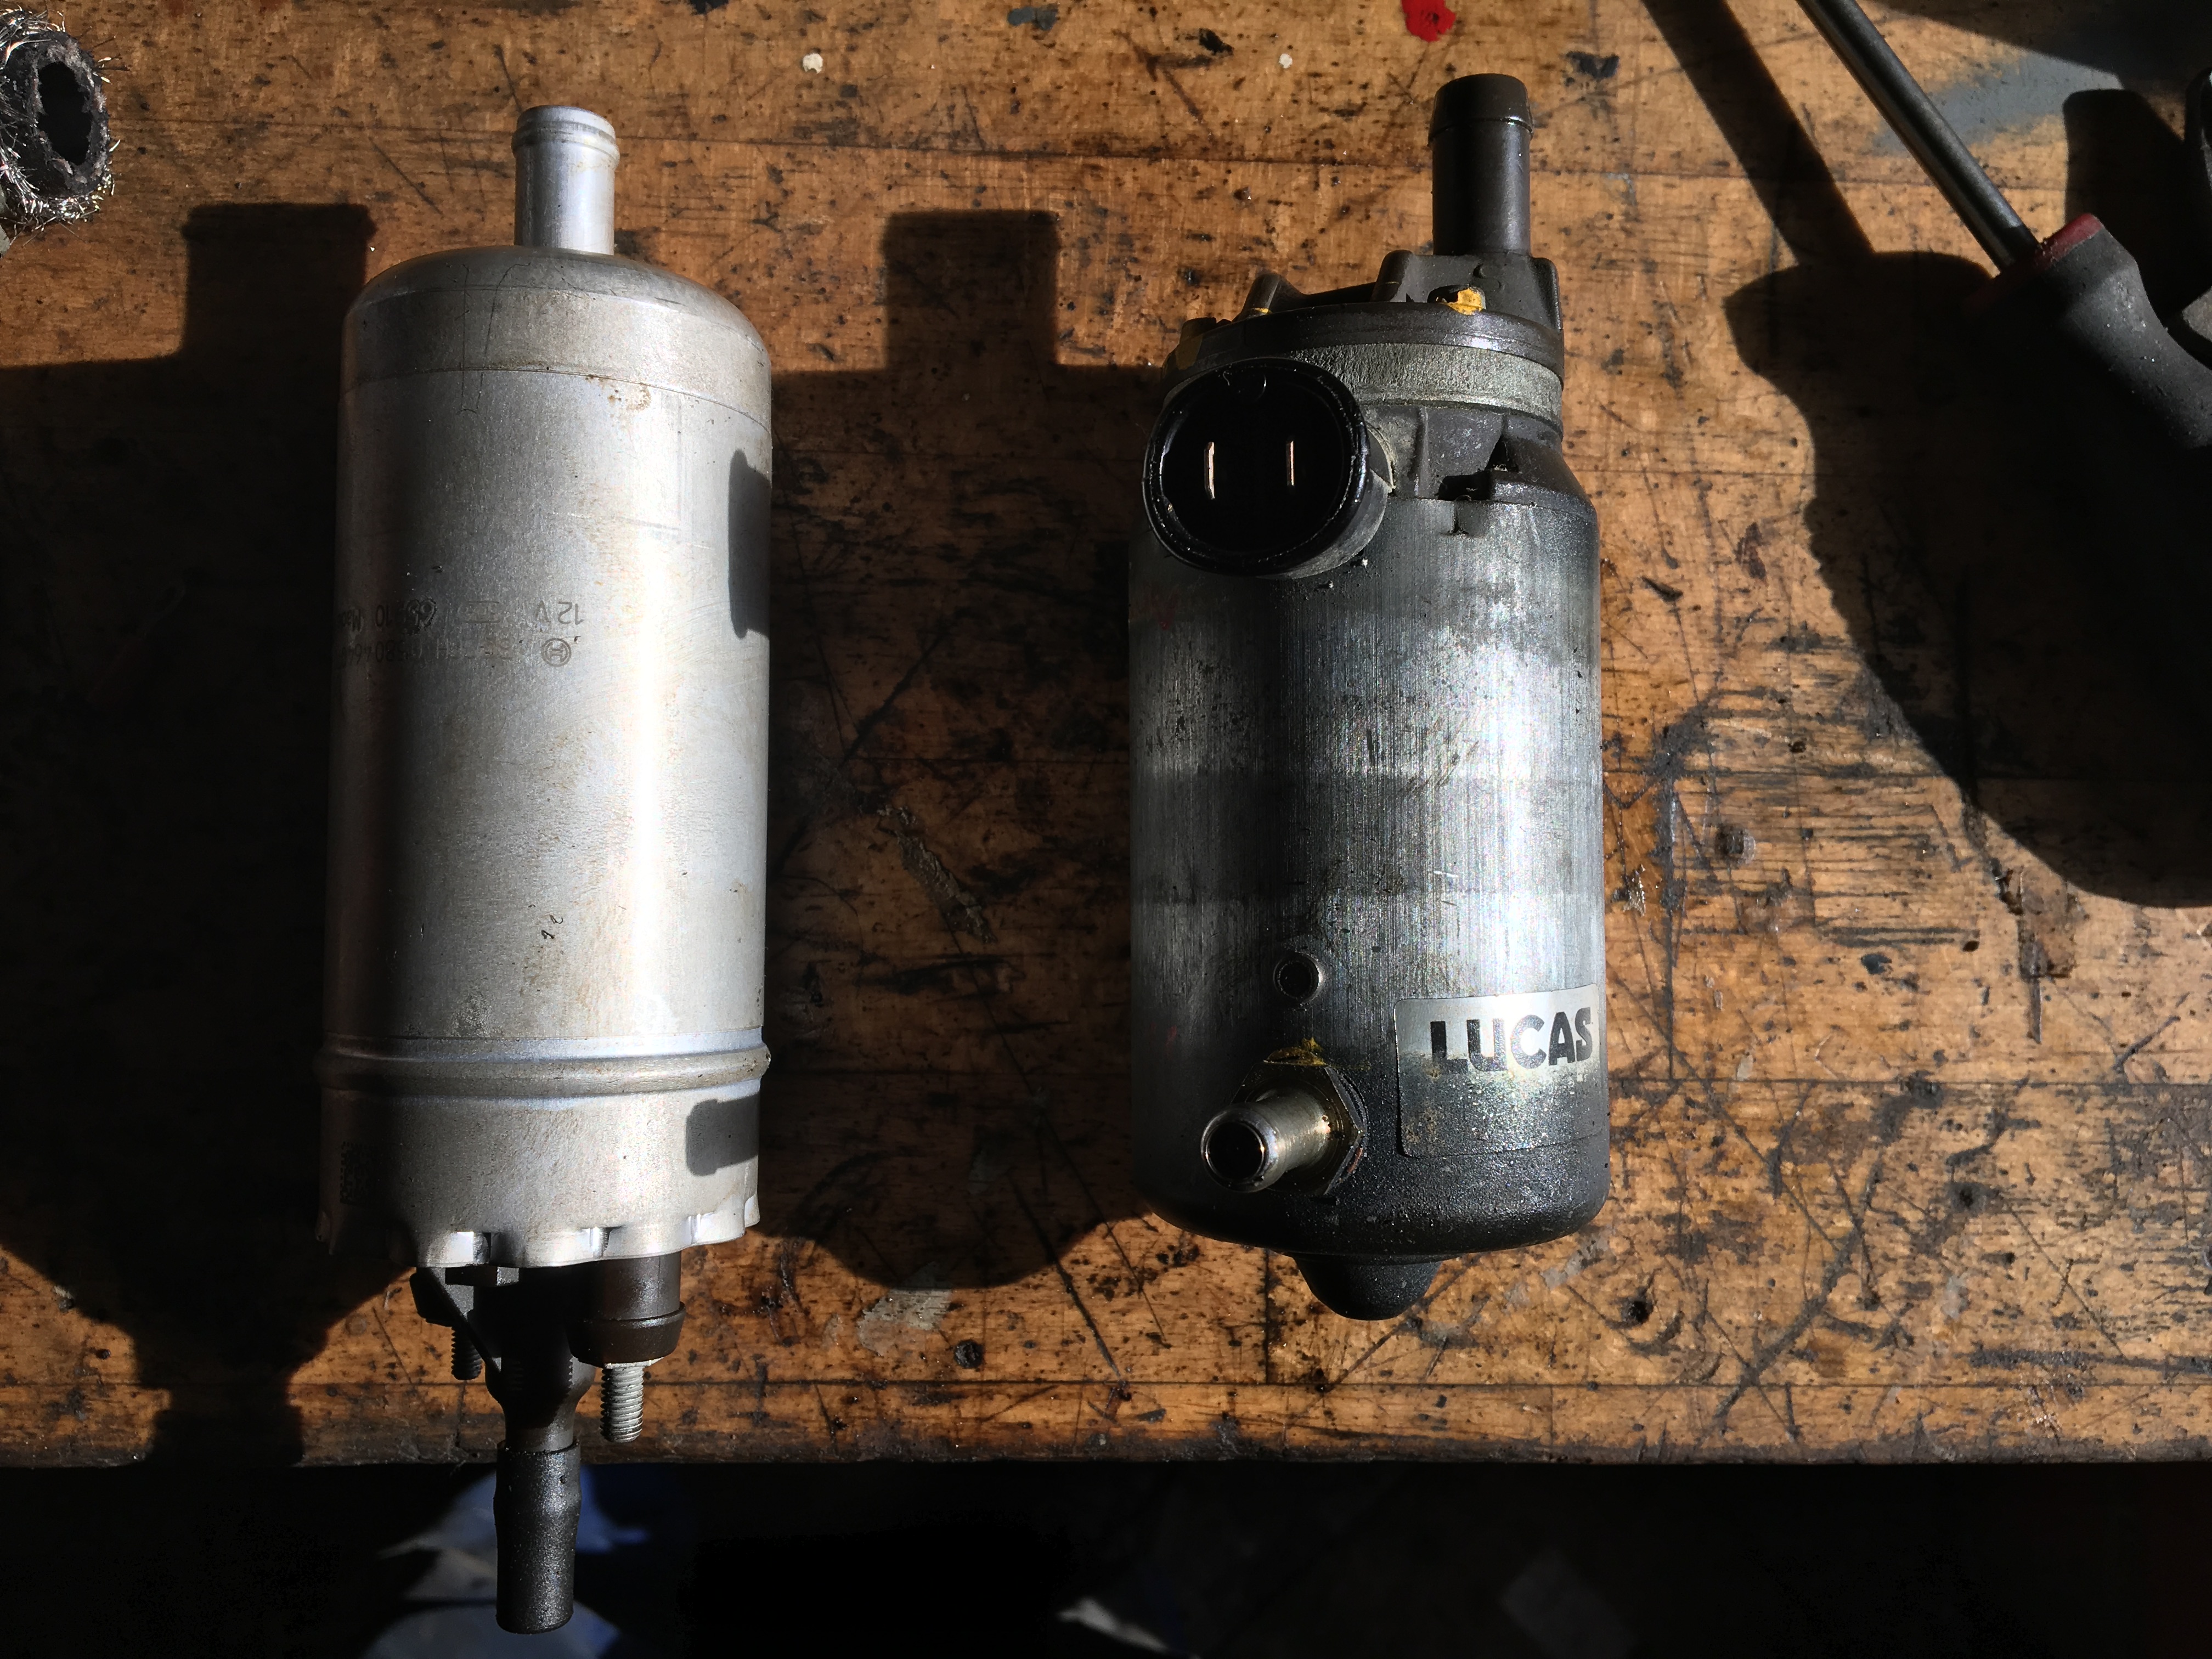
April 2018. 100000 km since the refurbishment in 1989 is passed, and the season starts with an oil + filter change and a new fuel pump to replace the original noisy pump. The new pump has different position of the outlet, and the new fit is not perfect. Needs to be repositioned next winter.
Later in April both electric windows fails to function. The cause turns out to be a broken wire in a relay placed in RH foot well.
I do a confirmation drive for a former collegue, so the car is once again polished and fettled for.

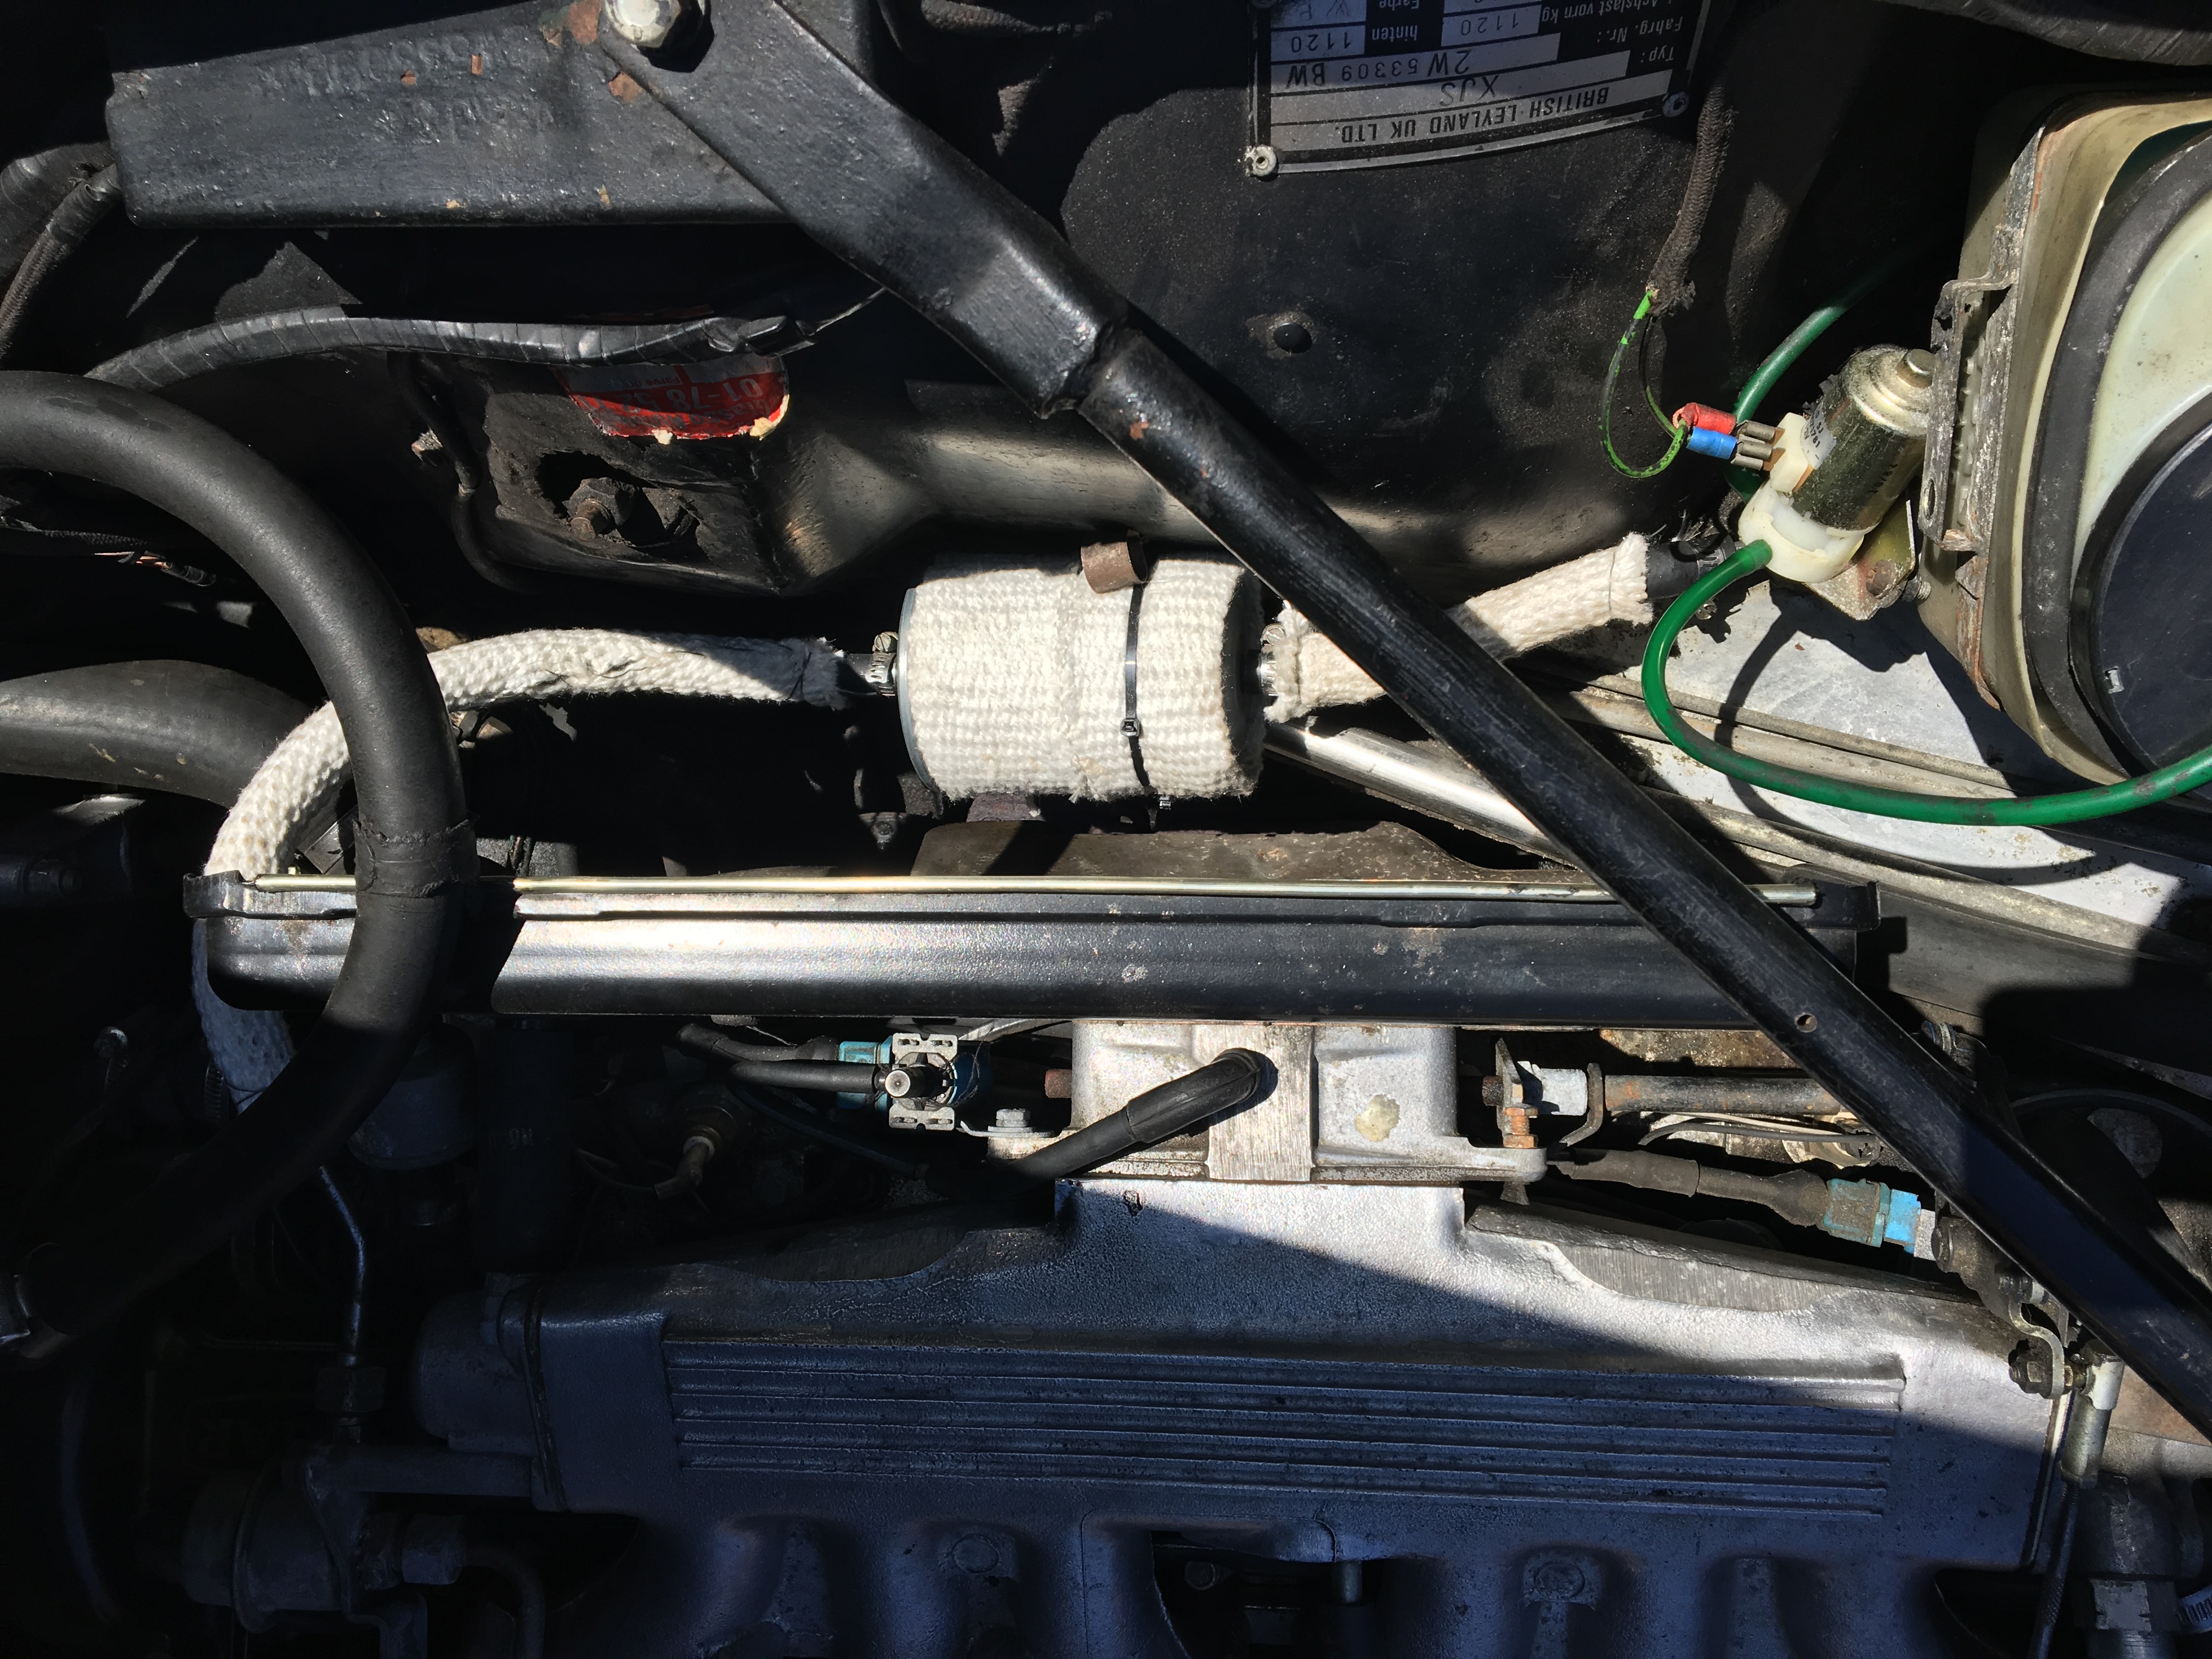
June 6th 2018, 00600 km. New Bosch fuel filter mounted, fuel line between fuel filter and first pressure regulator replaced. Fuel line routing improved (moved away from exhaust downpipes) and lines and filter is insulated with glass felt wrapping. The condensator in the ignition amplifier placed on LH inlet manifold is removed, as these are known to fail and cause ignition failures, and we are having exactly that: Misfire especially at high ambient temperature and at low load/low rpm
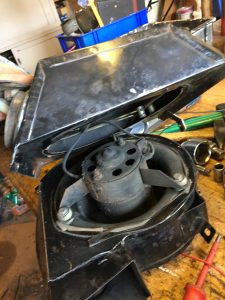
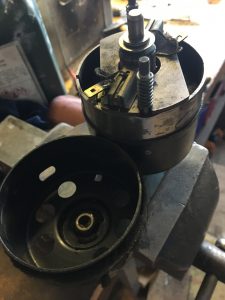
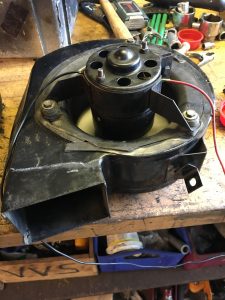
June 19th 2018. LH dash fan is removed and dismantled to find out why it is making noise. It turns out there is a lot of axial and radial play in the electric motor. By adding shims to take up most axial play the radial play is also reduced.
The fan is placed in the footwell. Remove knee bolster, disconnect battery. Next step is to get the bracket with fuses out of the way. It is mounted on 4 studs, where the upper left is close to impossible to access. The fan itself is fixed with 2 bolts. Once these are removed you force open the lower air flap. This causes the upper flap to close, and the fan can only be removed when the upper flap is closed. You will have to disconnect the power connection and a vacuum line as well to get the fan out.
Disassembly and assembly is pretty straight forward, more or less everything is just bolted together. I had 3mm axial play, which I reduced to 1mm. Noise gone !
July 27th 2018, 01400 km. Brake fluid change. DOT4, 0.5 liter used.
August 15th 2018. 01660 km. Aircon conversion from R12 to R134A finished. New condensor and filter/drier/receiver from FENair. Details here: AC conversion
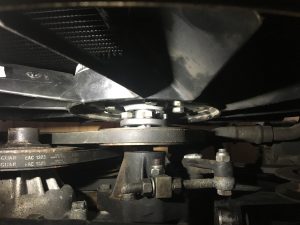
August 21st 2018. 01700 km. Viscous fan hub (NBC2215AA) changed. The old hub had less resistance against rotation when warm, and compared to the new hub the resistance was also lower when cold.
Simple comparison test: Clamping the hub flange and giving the hub a good flick: Old hub takes 4 flicks to do a full turn, while the new takes 6 flicks. Both cold.
The professional test method can be found here: PDF
Tip: The hub can be changed without removing the fan itself. The ends of the threded studs on the drive is very close to the clutch when assembled. Due to this the nuts must be removed and mounted in steps. Mounting one nut too far will prevent mounting of the remaning nuts.
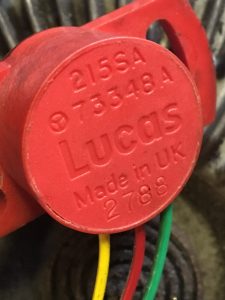
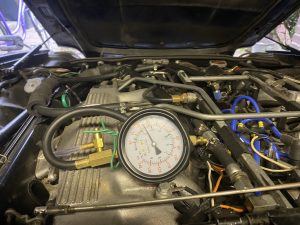
August 21st 2018. 01700 km. The original Lucas TPS (throttle position sensor) dated 2788 is replaced due to continouos low throttle running issues. The TPS is a simple potentiometer with 90° operation angle delivering a fraction of 0-5V increasing with throttle opening to the ECU as throttle position feedback.
In case of dropouts in TPS signal the ECU will not know the correct throttle opening and fuel injection pulse length will therefore be wrong. Idle output voltage of the TPS is adjusted to 0,324V (must be 0,32V±0,02V). This was another point, that could cause the rough running at light throttle, but the new part didn’t change anything.
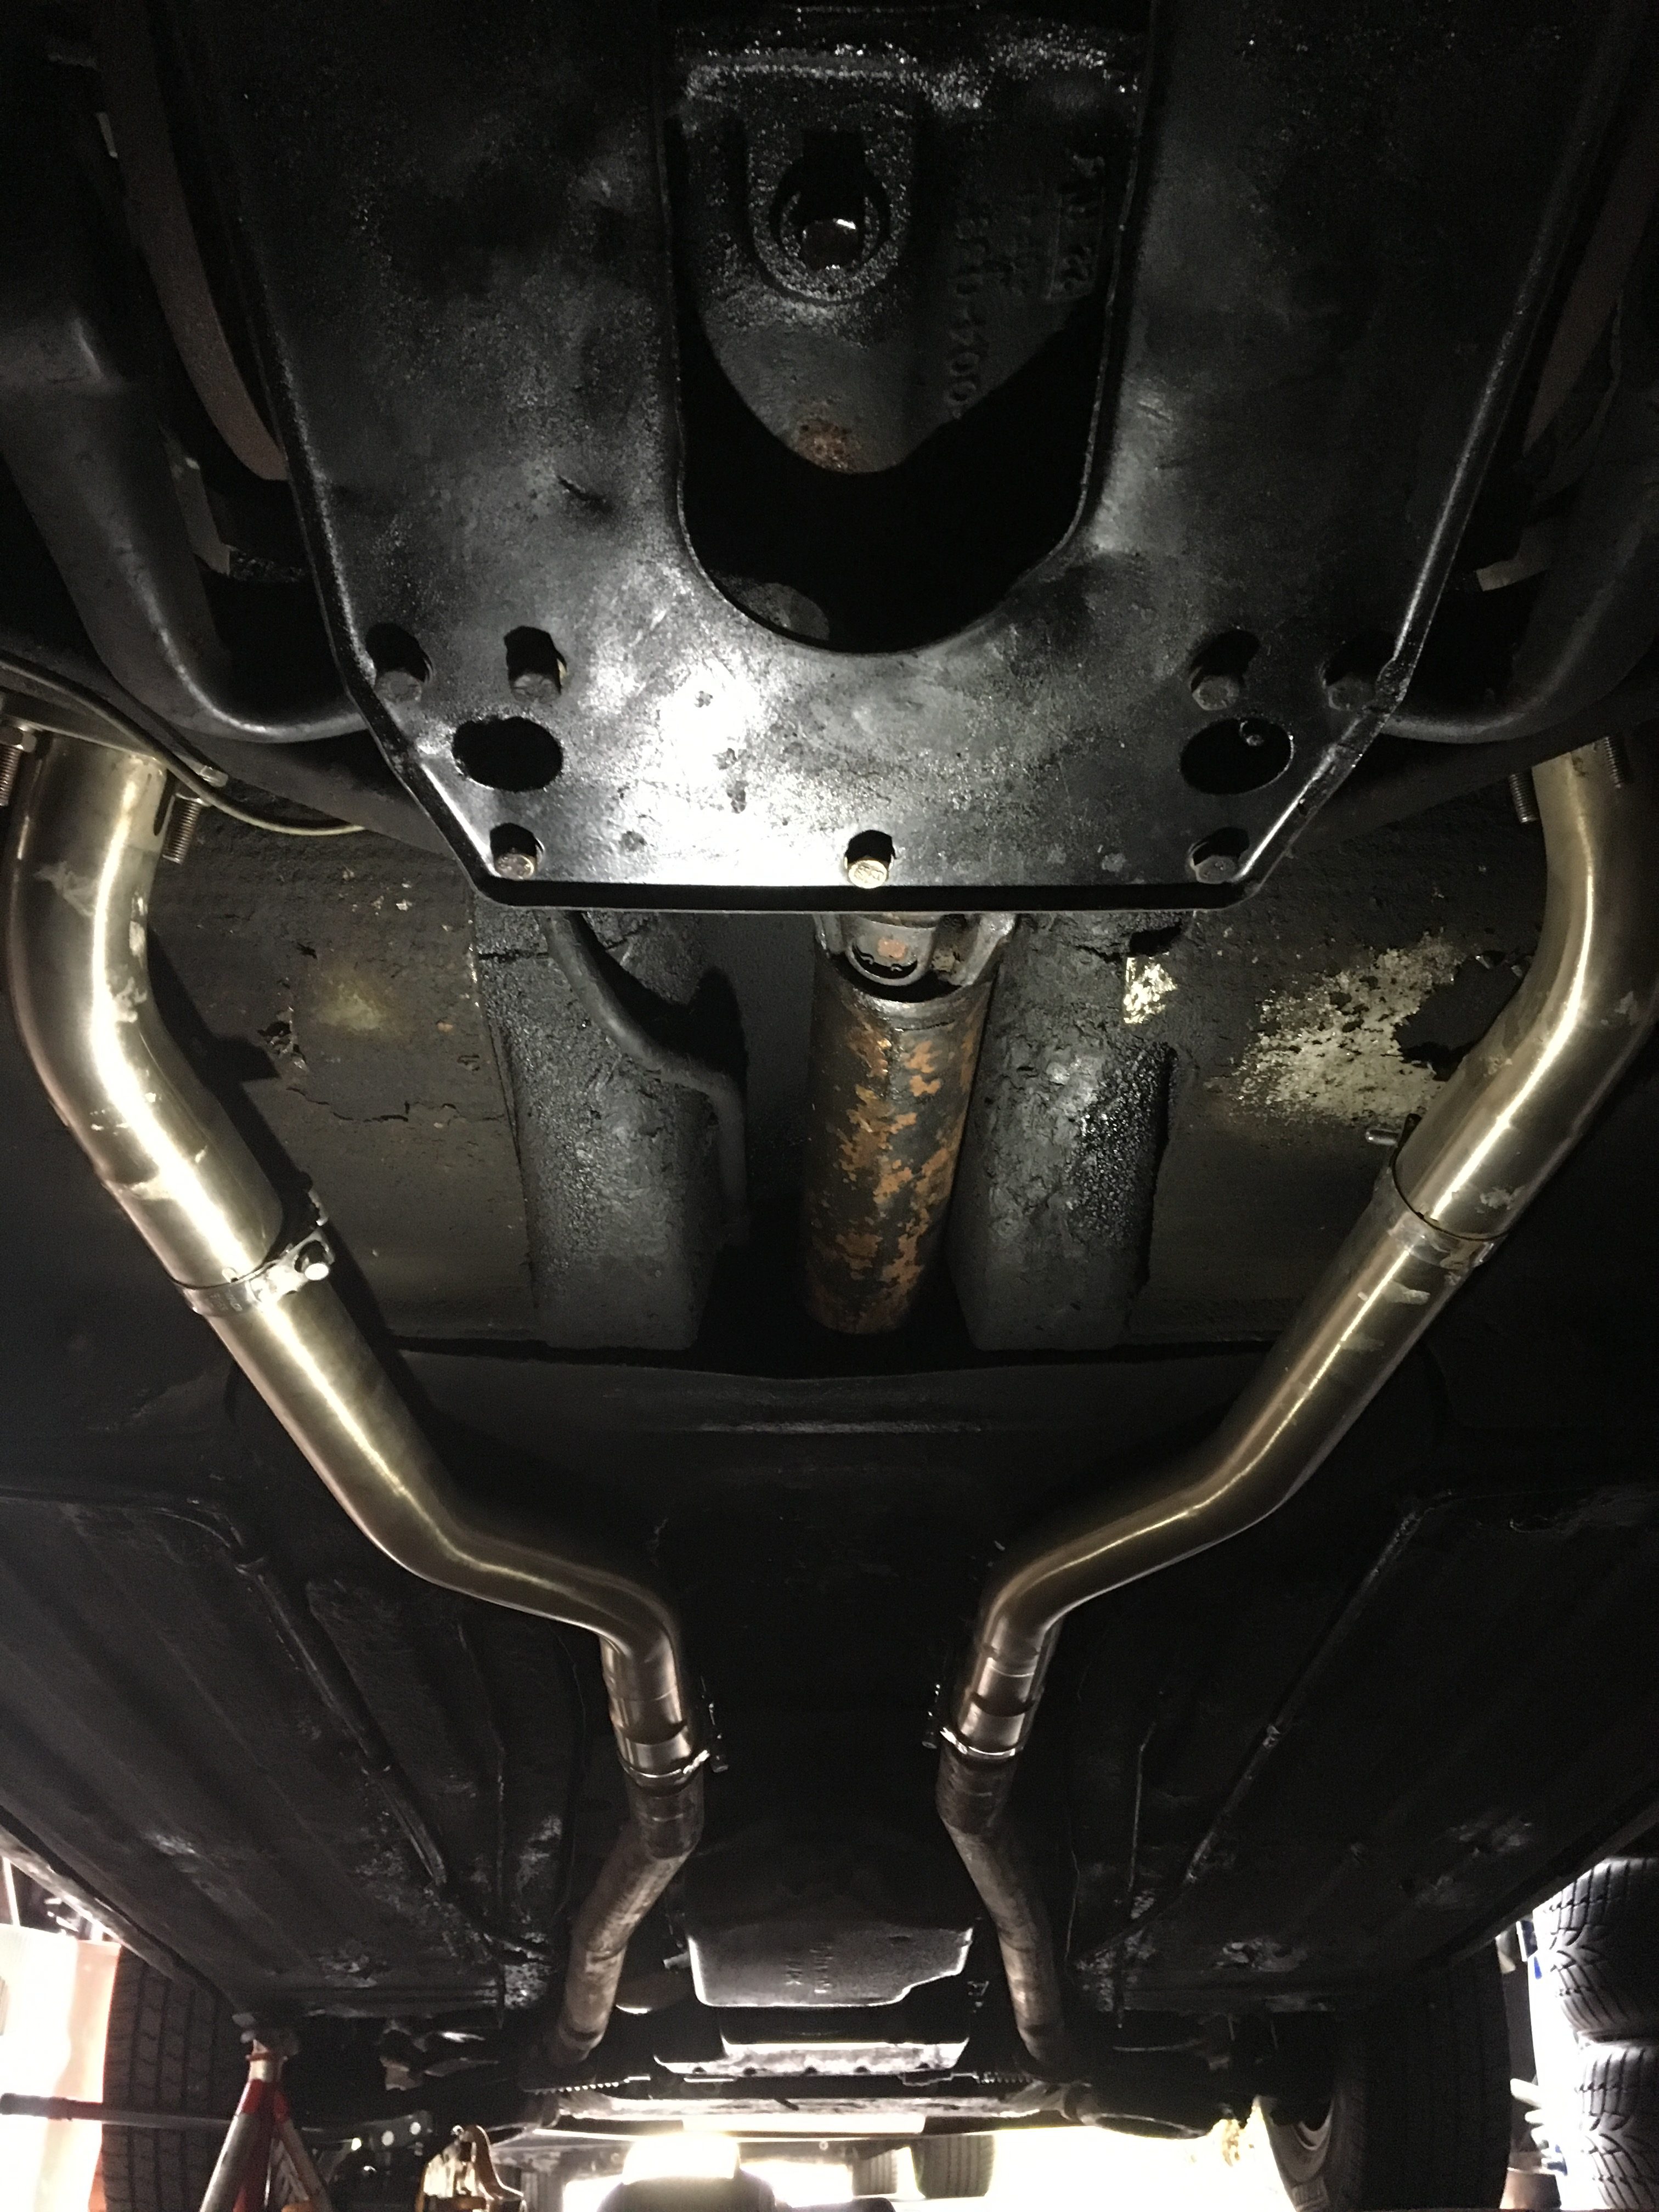
August 2018. The centre box sections of the exhausts was leaking and centre box delete tubing from Simply Performance is mounted. This unleashes some noise and maybe a few BHP as the centre boxes are known to be quite restrictive. The car is still fairly quiet inside.
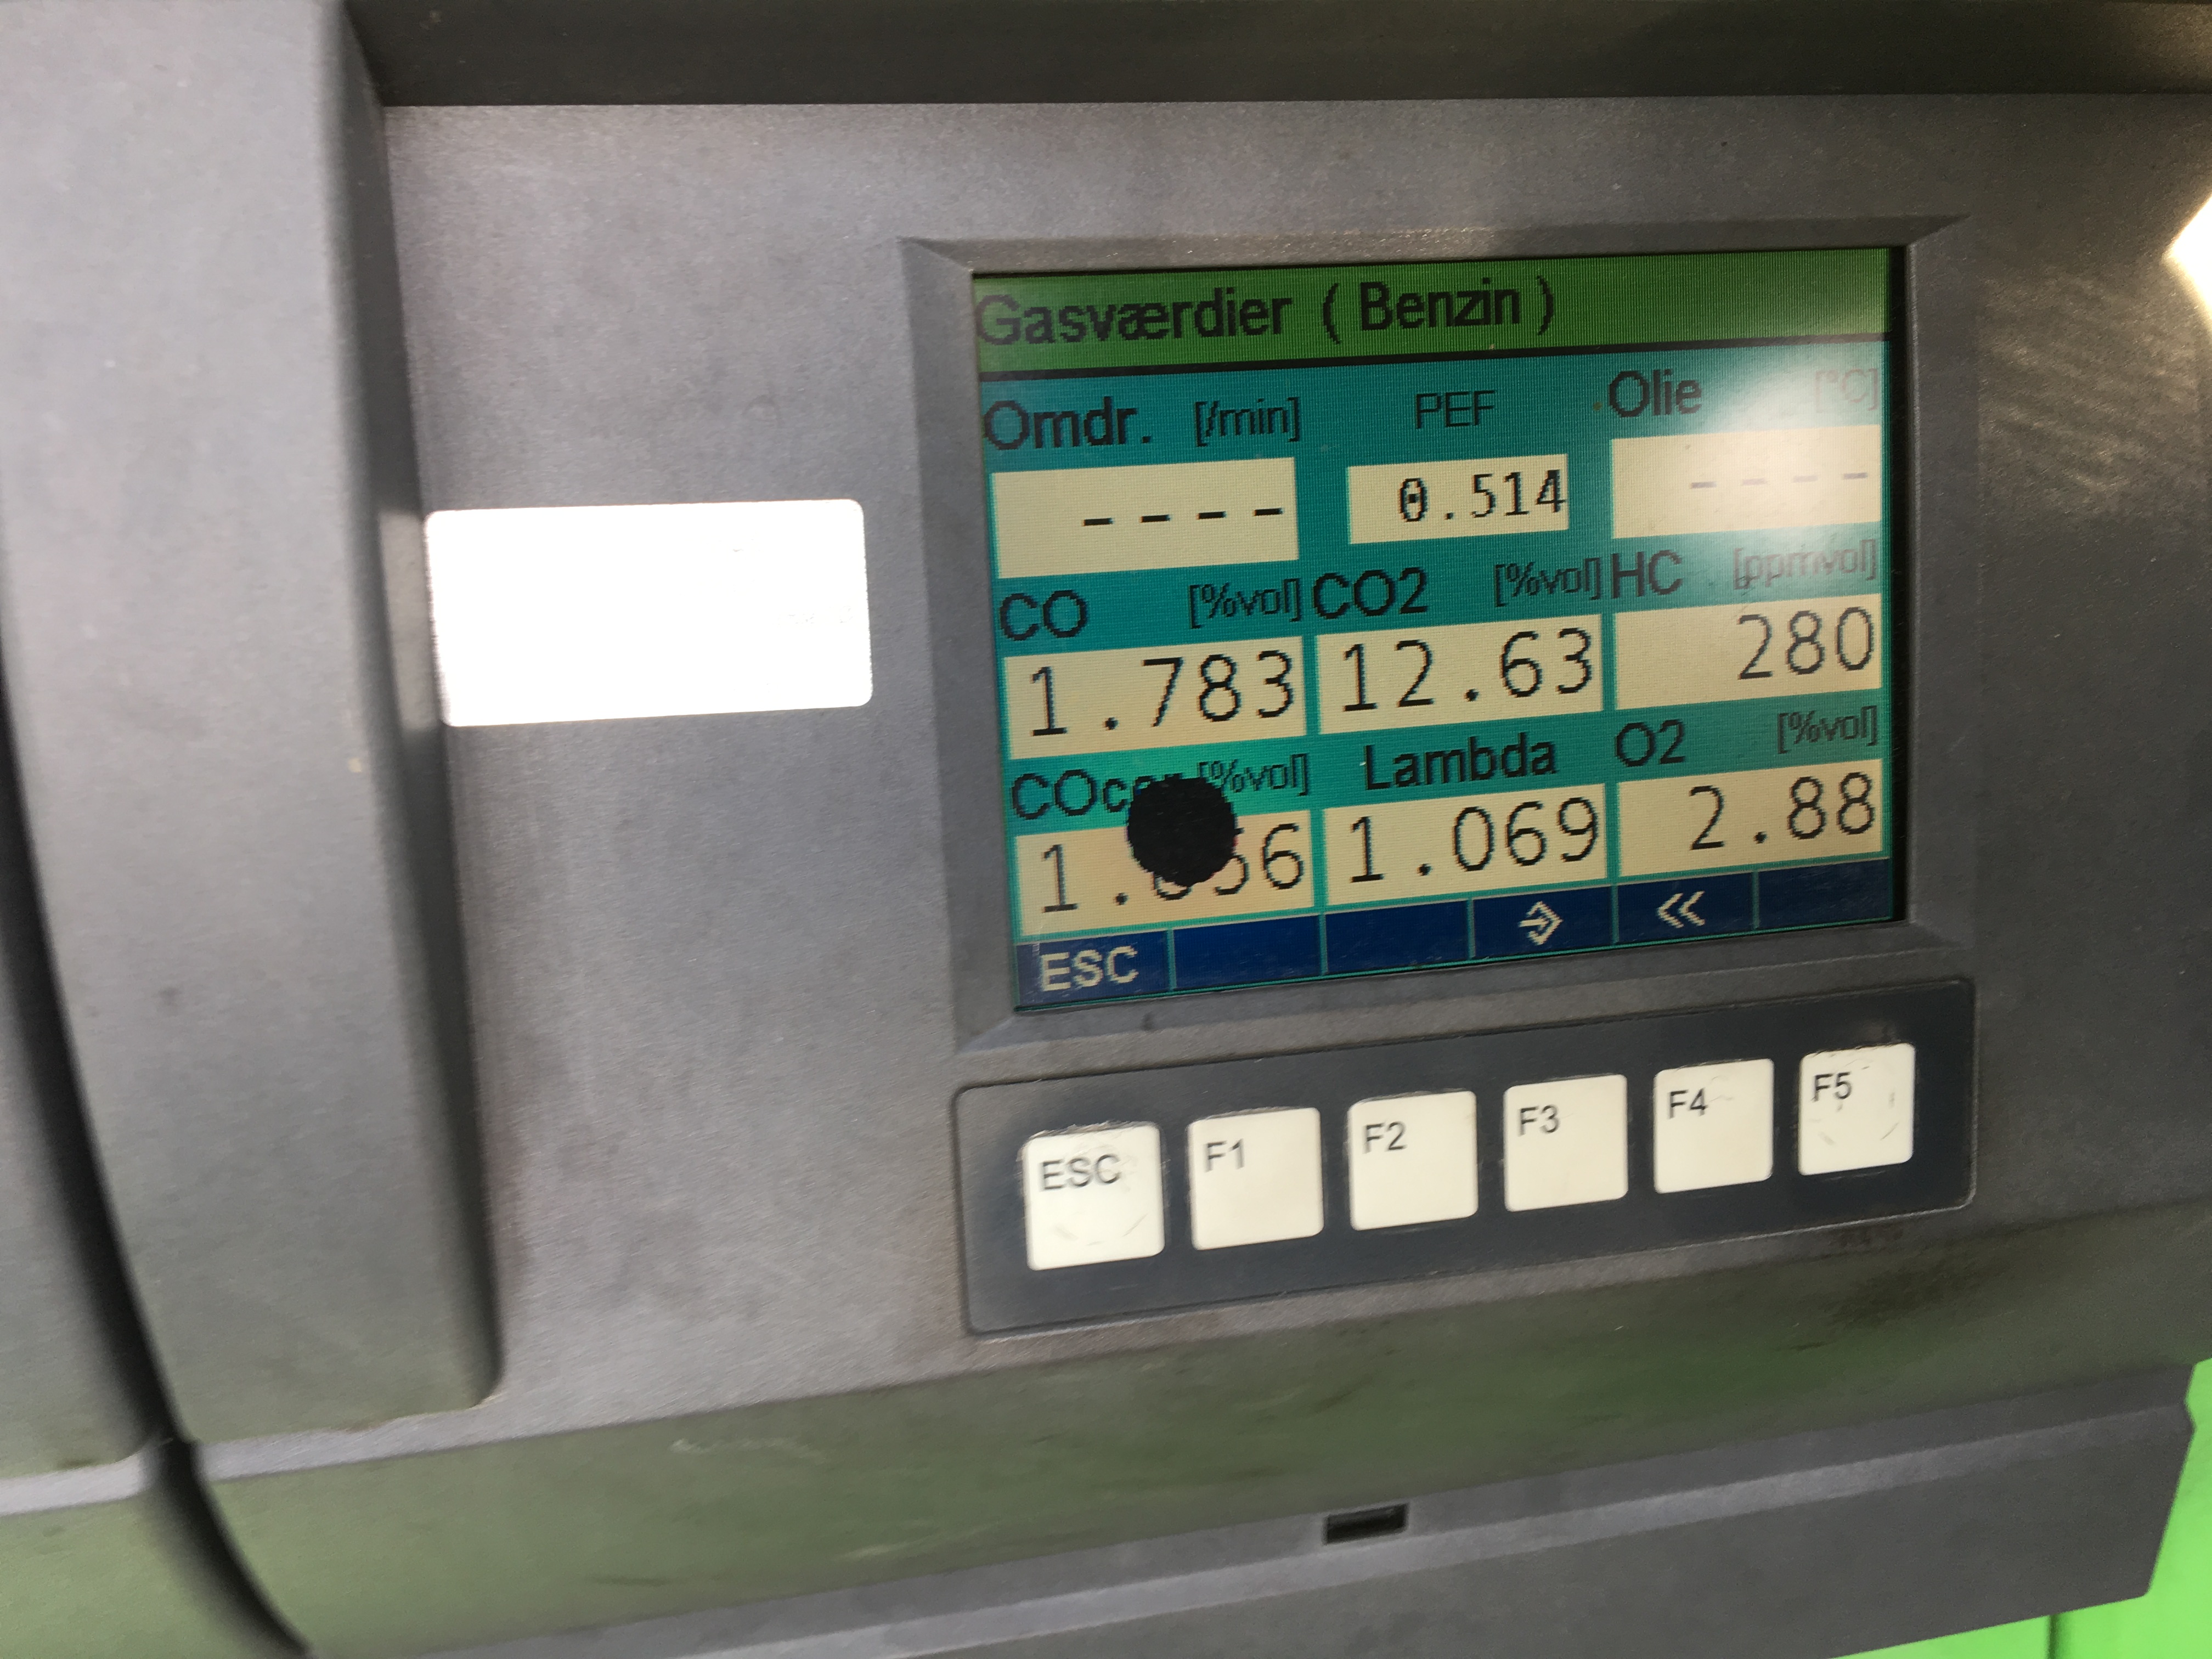
The car is still running rough at low RPM as soon as it gets warm. To avoid influence from other faulty systems I went through the entire vacuum system at the engine to find any leaks, that could influence the engine. Idle was too high (900-1000 RPM) with fully closed AAV when I started.
My method was first to disconnect vacuum tubes one by one and see if they could hold a vacuum and thereby were OK.
This resulted in finding a leak at the vacuum connection to the B-bank (LH) fuel pressure regulator at a broken connction piece. Replaced, no change in idle speed.
Next step was to block all possible air supply sources to the inlet manifolds. I had of course checked throttle plate clearance to be OK first (0.002″ = 0.05mm)
I found blocking the crankcase breather valve connection to reduce idle by 150 RPM. I opened the valve assembly and increased the spring preload by appr. 6mm. Succes
I also found the extra air solenoid valve placed at the RH air cleaner box at front end to be increasing the idle at A/C compressor load a lot more than needed. I made up a small brass bushing with a smaller opening, and that reduced idle speed with A/C on to be only slightly higher than with A/C off.
I now had the idle speed at around 650 RPM in N, lower than specified, and I could proceed my search for the rough running. Fixing the vacuum leaks had unfortunately not helped on that issue…
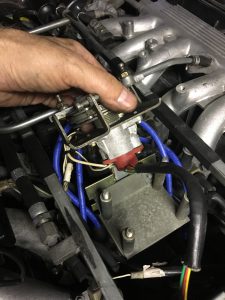
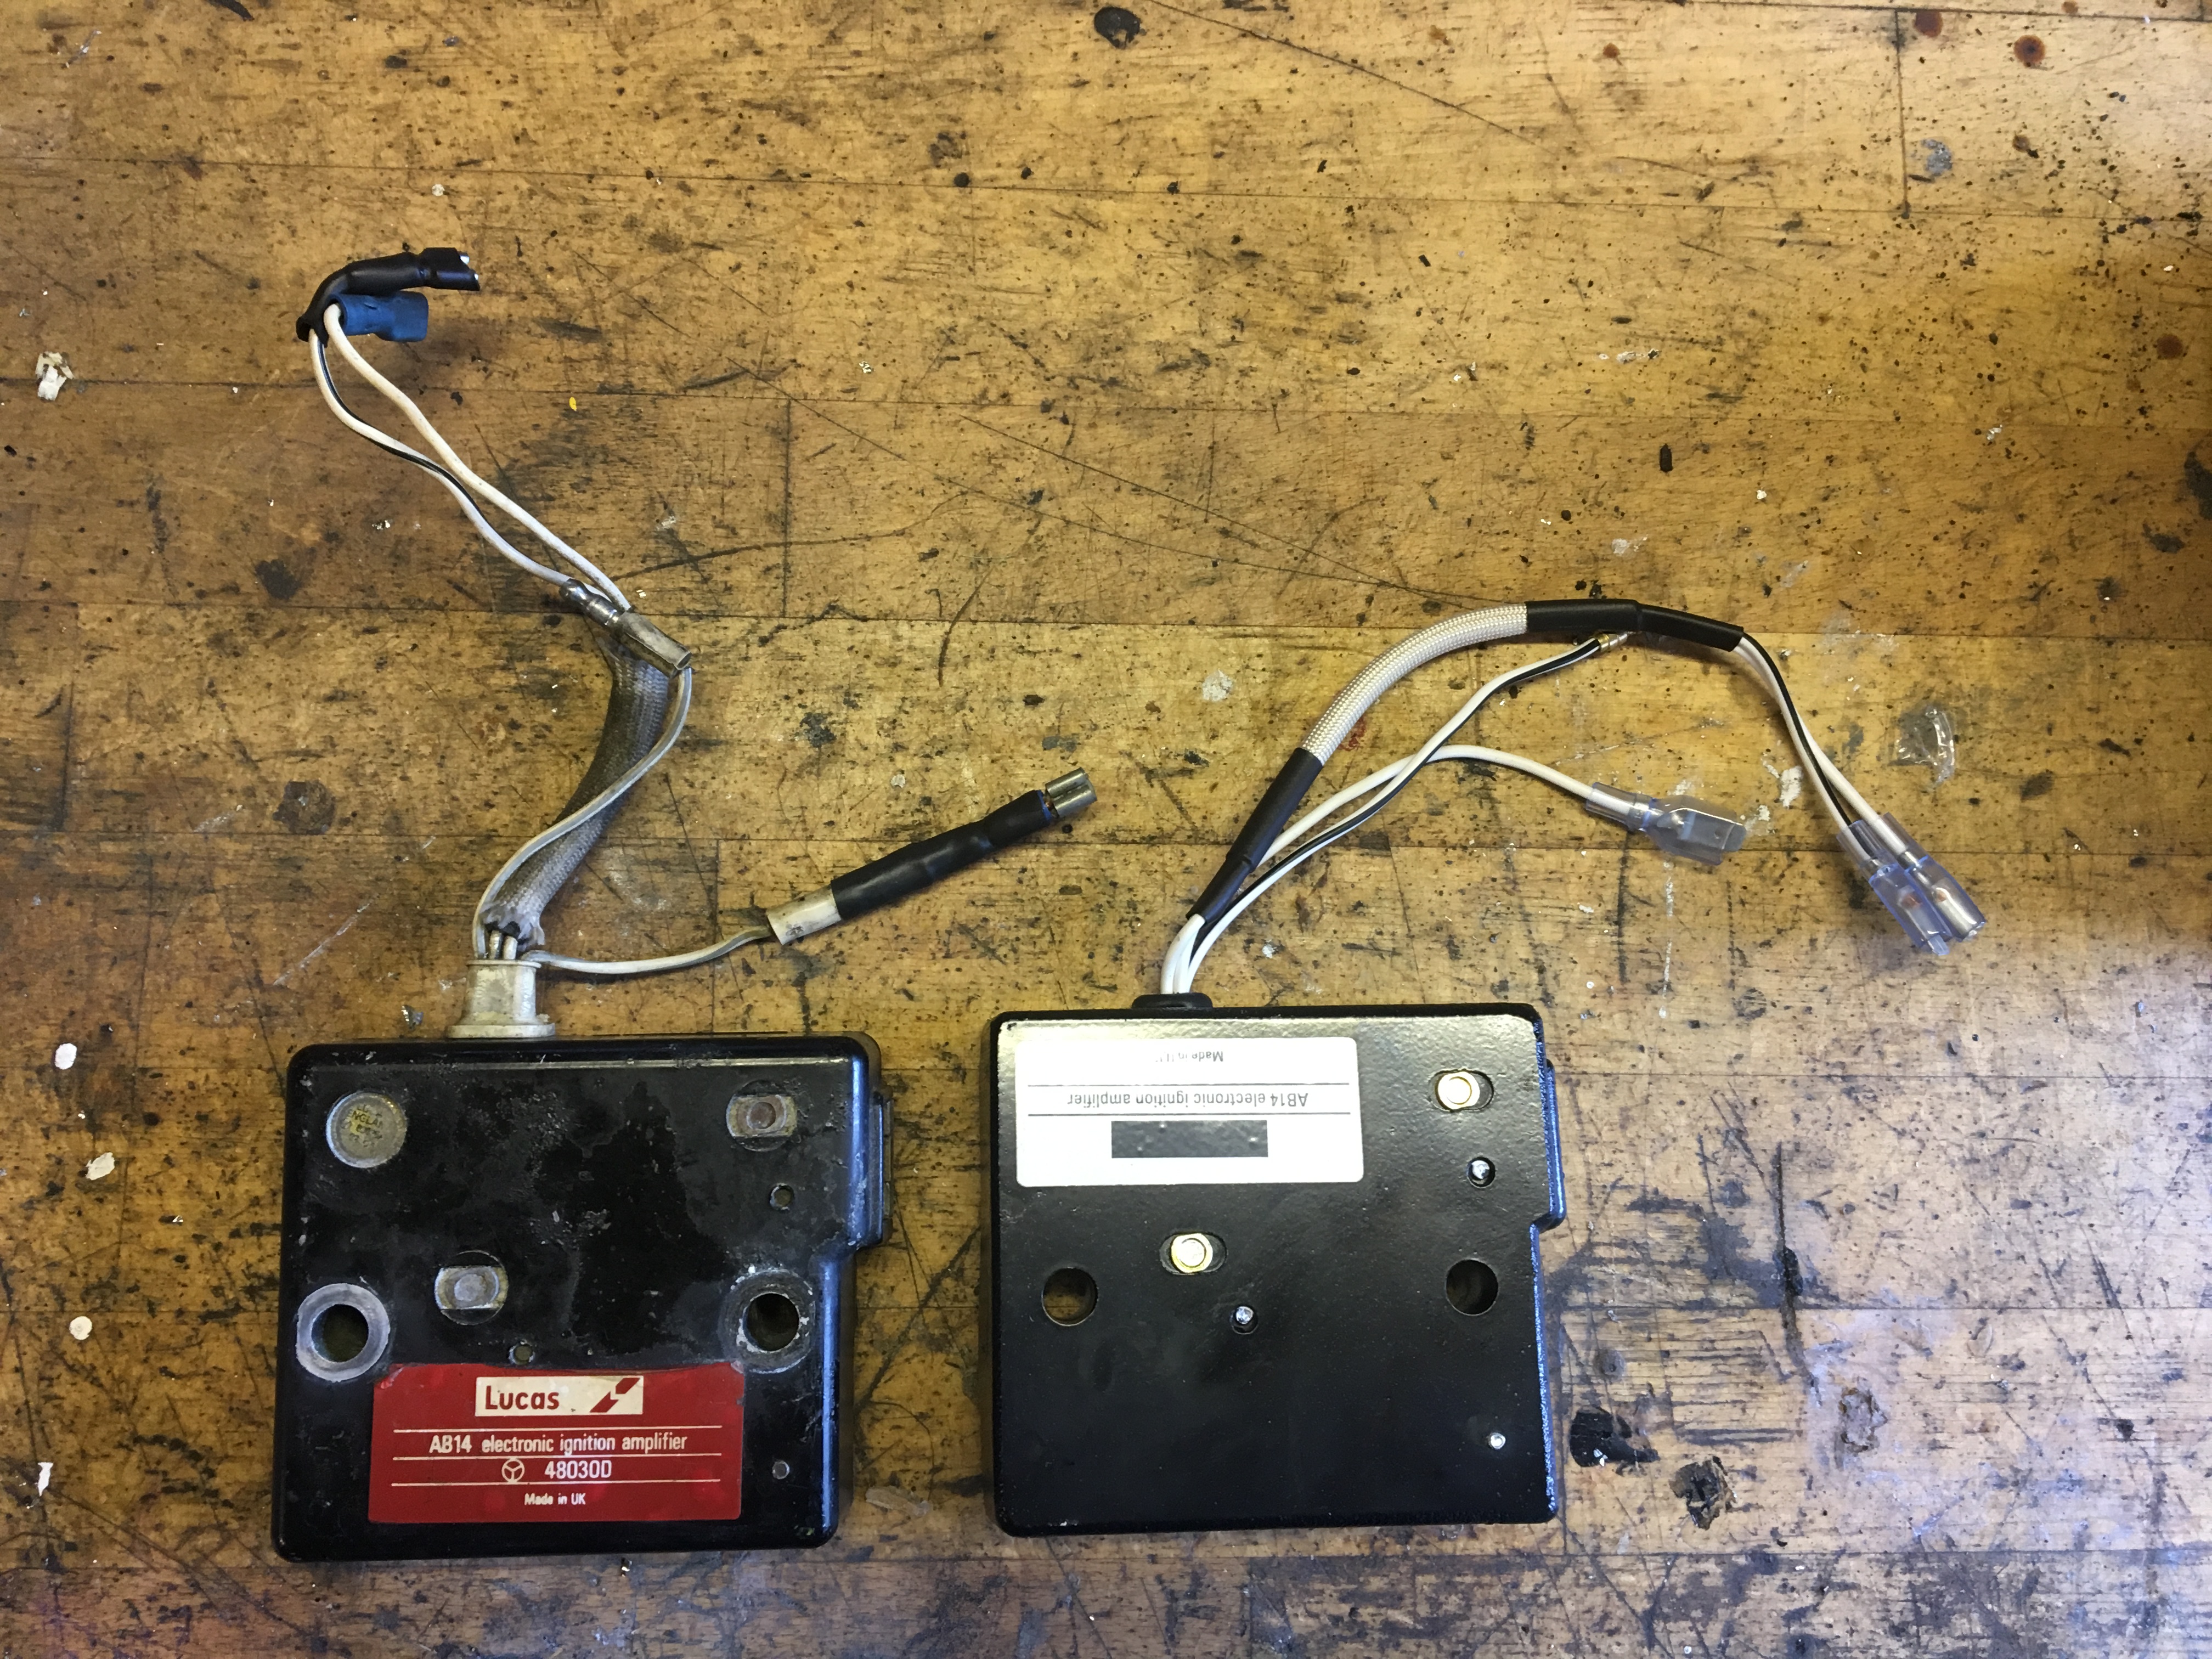
I now found out, that the ignition amplifier placed on LH inlet manifold actually gets warmer when the engine is idling/running slow. To avoid overheating of the ignition coil the amplifier ‘burns off’ excess power, when the engine speed is low. This fits perfectly with the issues I have, and a new amplifier did for sure solve the issue !
Several versions of the Lucas AB14 exists, and I did go for a slightly incorrect version due to much lower price. DAC2673. The only difference to the correct version was one spade connector being female instead of male, so it was not a big compromise to take to save 40% of appr. 1700 DKK.
November 15th 2018, start of winter period. Mileage not noted, but appr. 02300 km. The winter plans is to refurbish the fuel injection with ultrasonic cleaned injectors, new rubber hoses, injector filters and pintle caps, replace the brittle injector harness and to have the remaining old fuel hoses over rear axle replaced together with repositioning the fuel pump in the boot.
January 11th 2019. New fuel filler cover. Rover SD1 type fits and lockable version is available
January-February 2019:
Fuel injection rebuild. New fuel lines, injectors cleaned and tested and injectors harness changed.
Fuel lines from boot to front in RH side and return line in LH side partly exchanged. I first wanted just to exchange the rubber hose section over the IRS, but the steel tubing turned out to be too brittle and corroded to be reused.
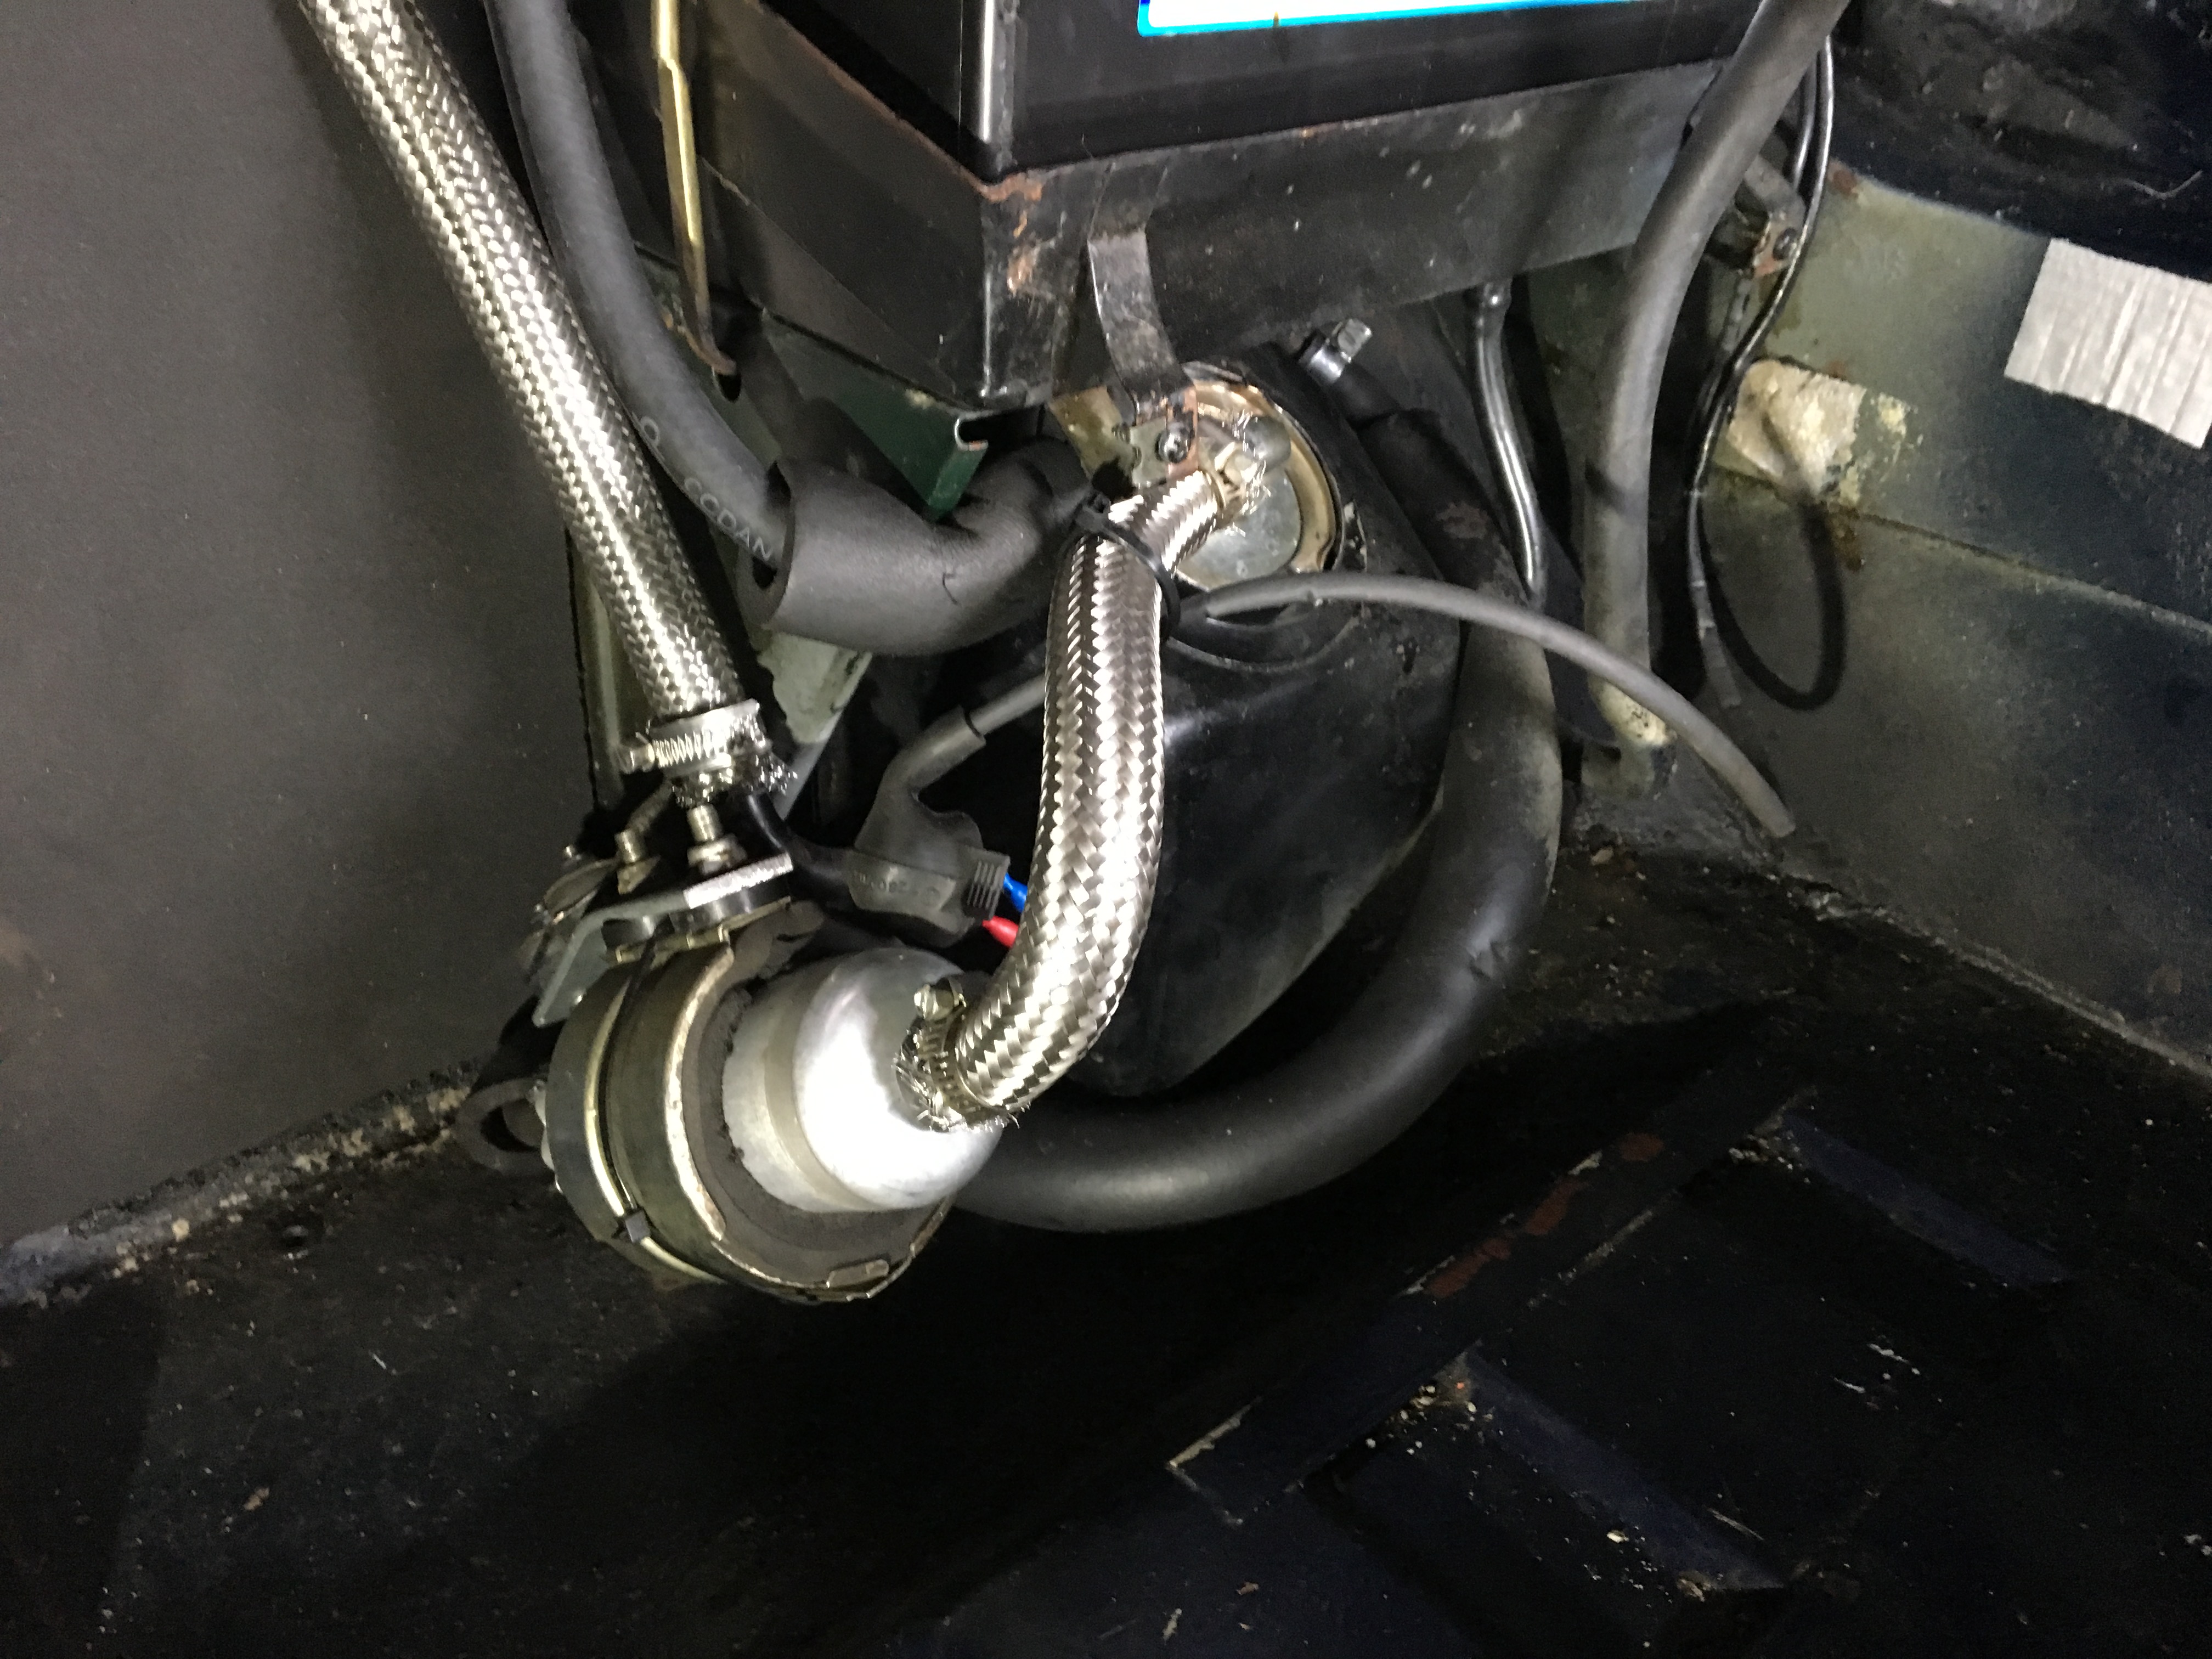
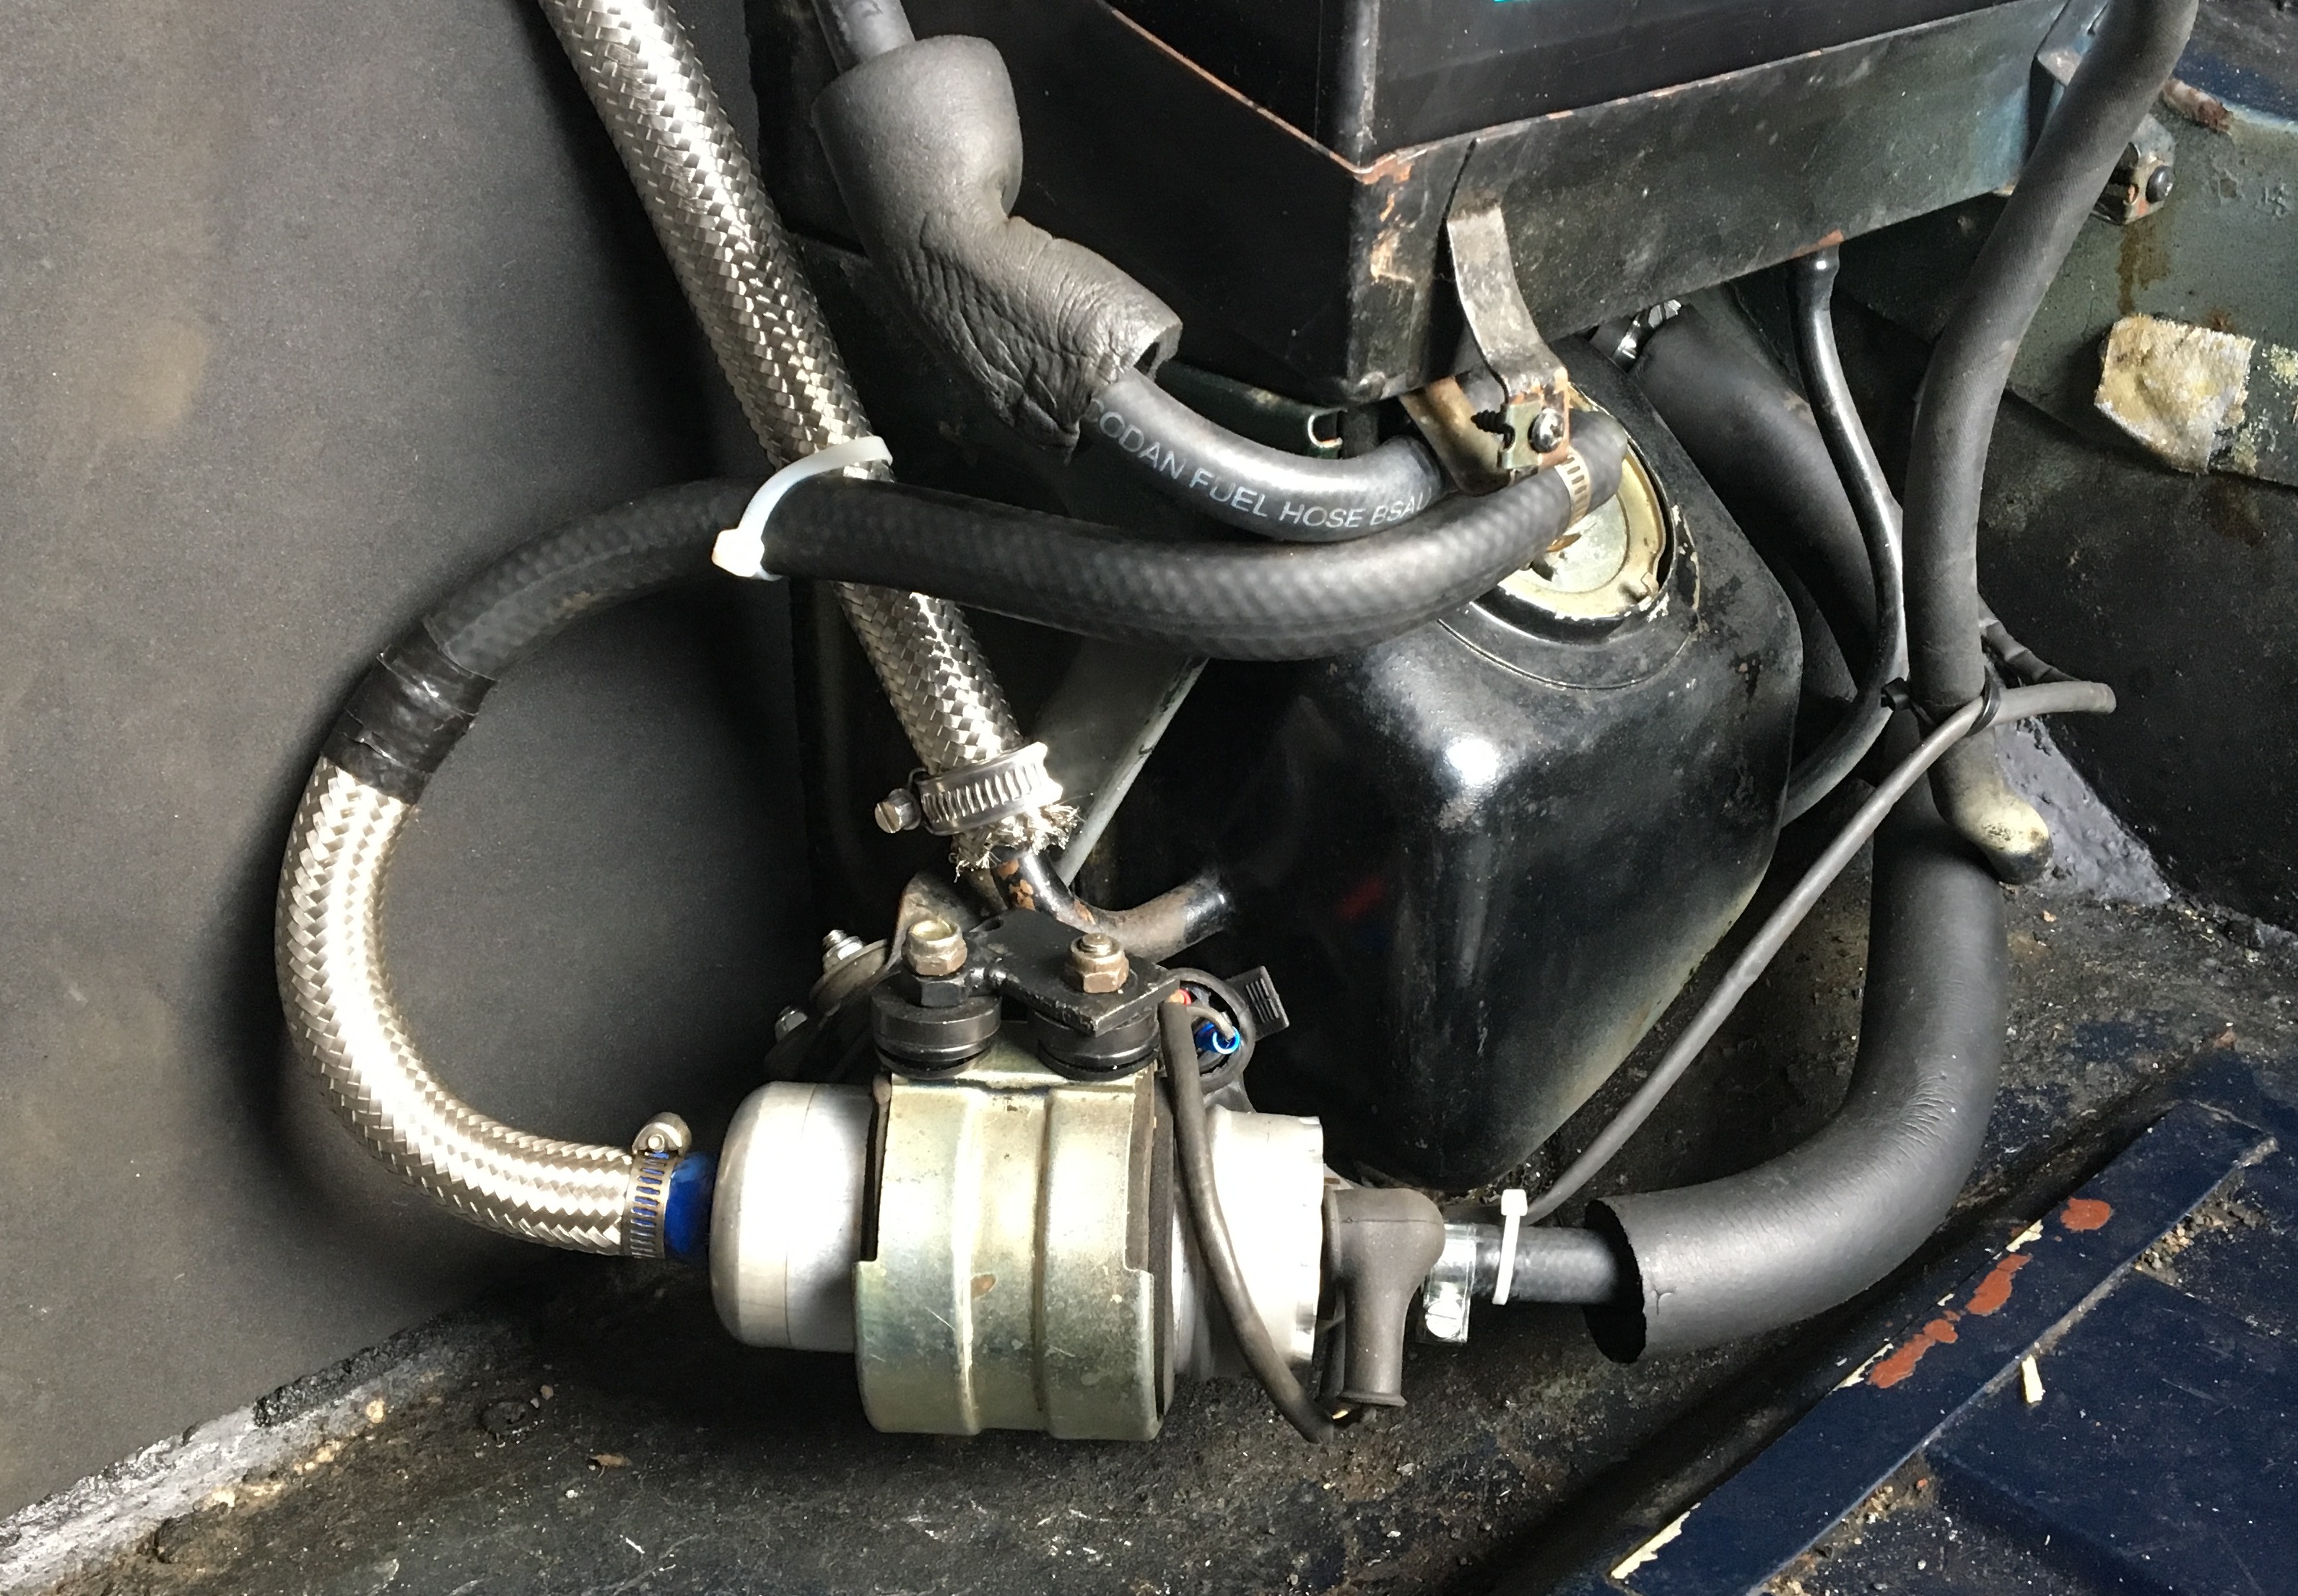
Febraury 2019: Fuel pump repositioned using a new, longer 1/2″ fuel hose from sump tank to fuel pump. I reused the steel braiding from the old hose to support the 180° bend, so what might look like 2 hoses joined together on the picture below is actually just one piece of hose with braiding on part of it.
Fuel pump capacity measured while I emptied the fuel tank: 3.0 liters/min
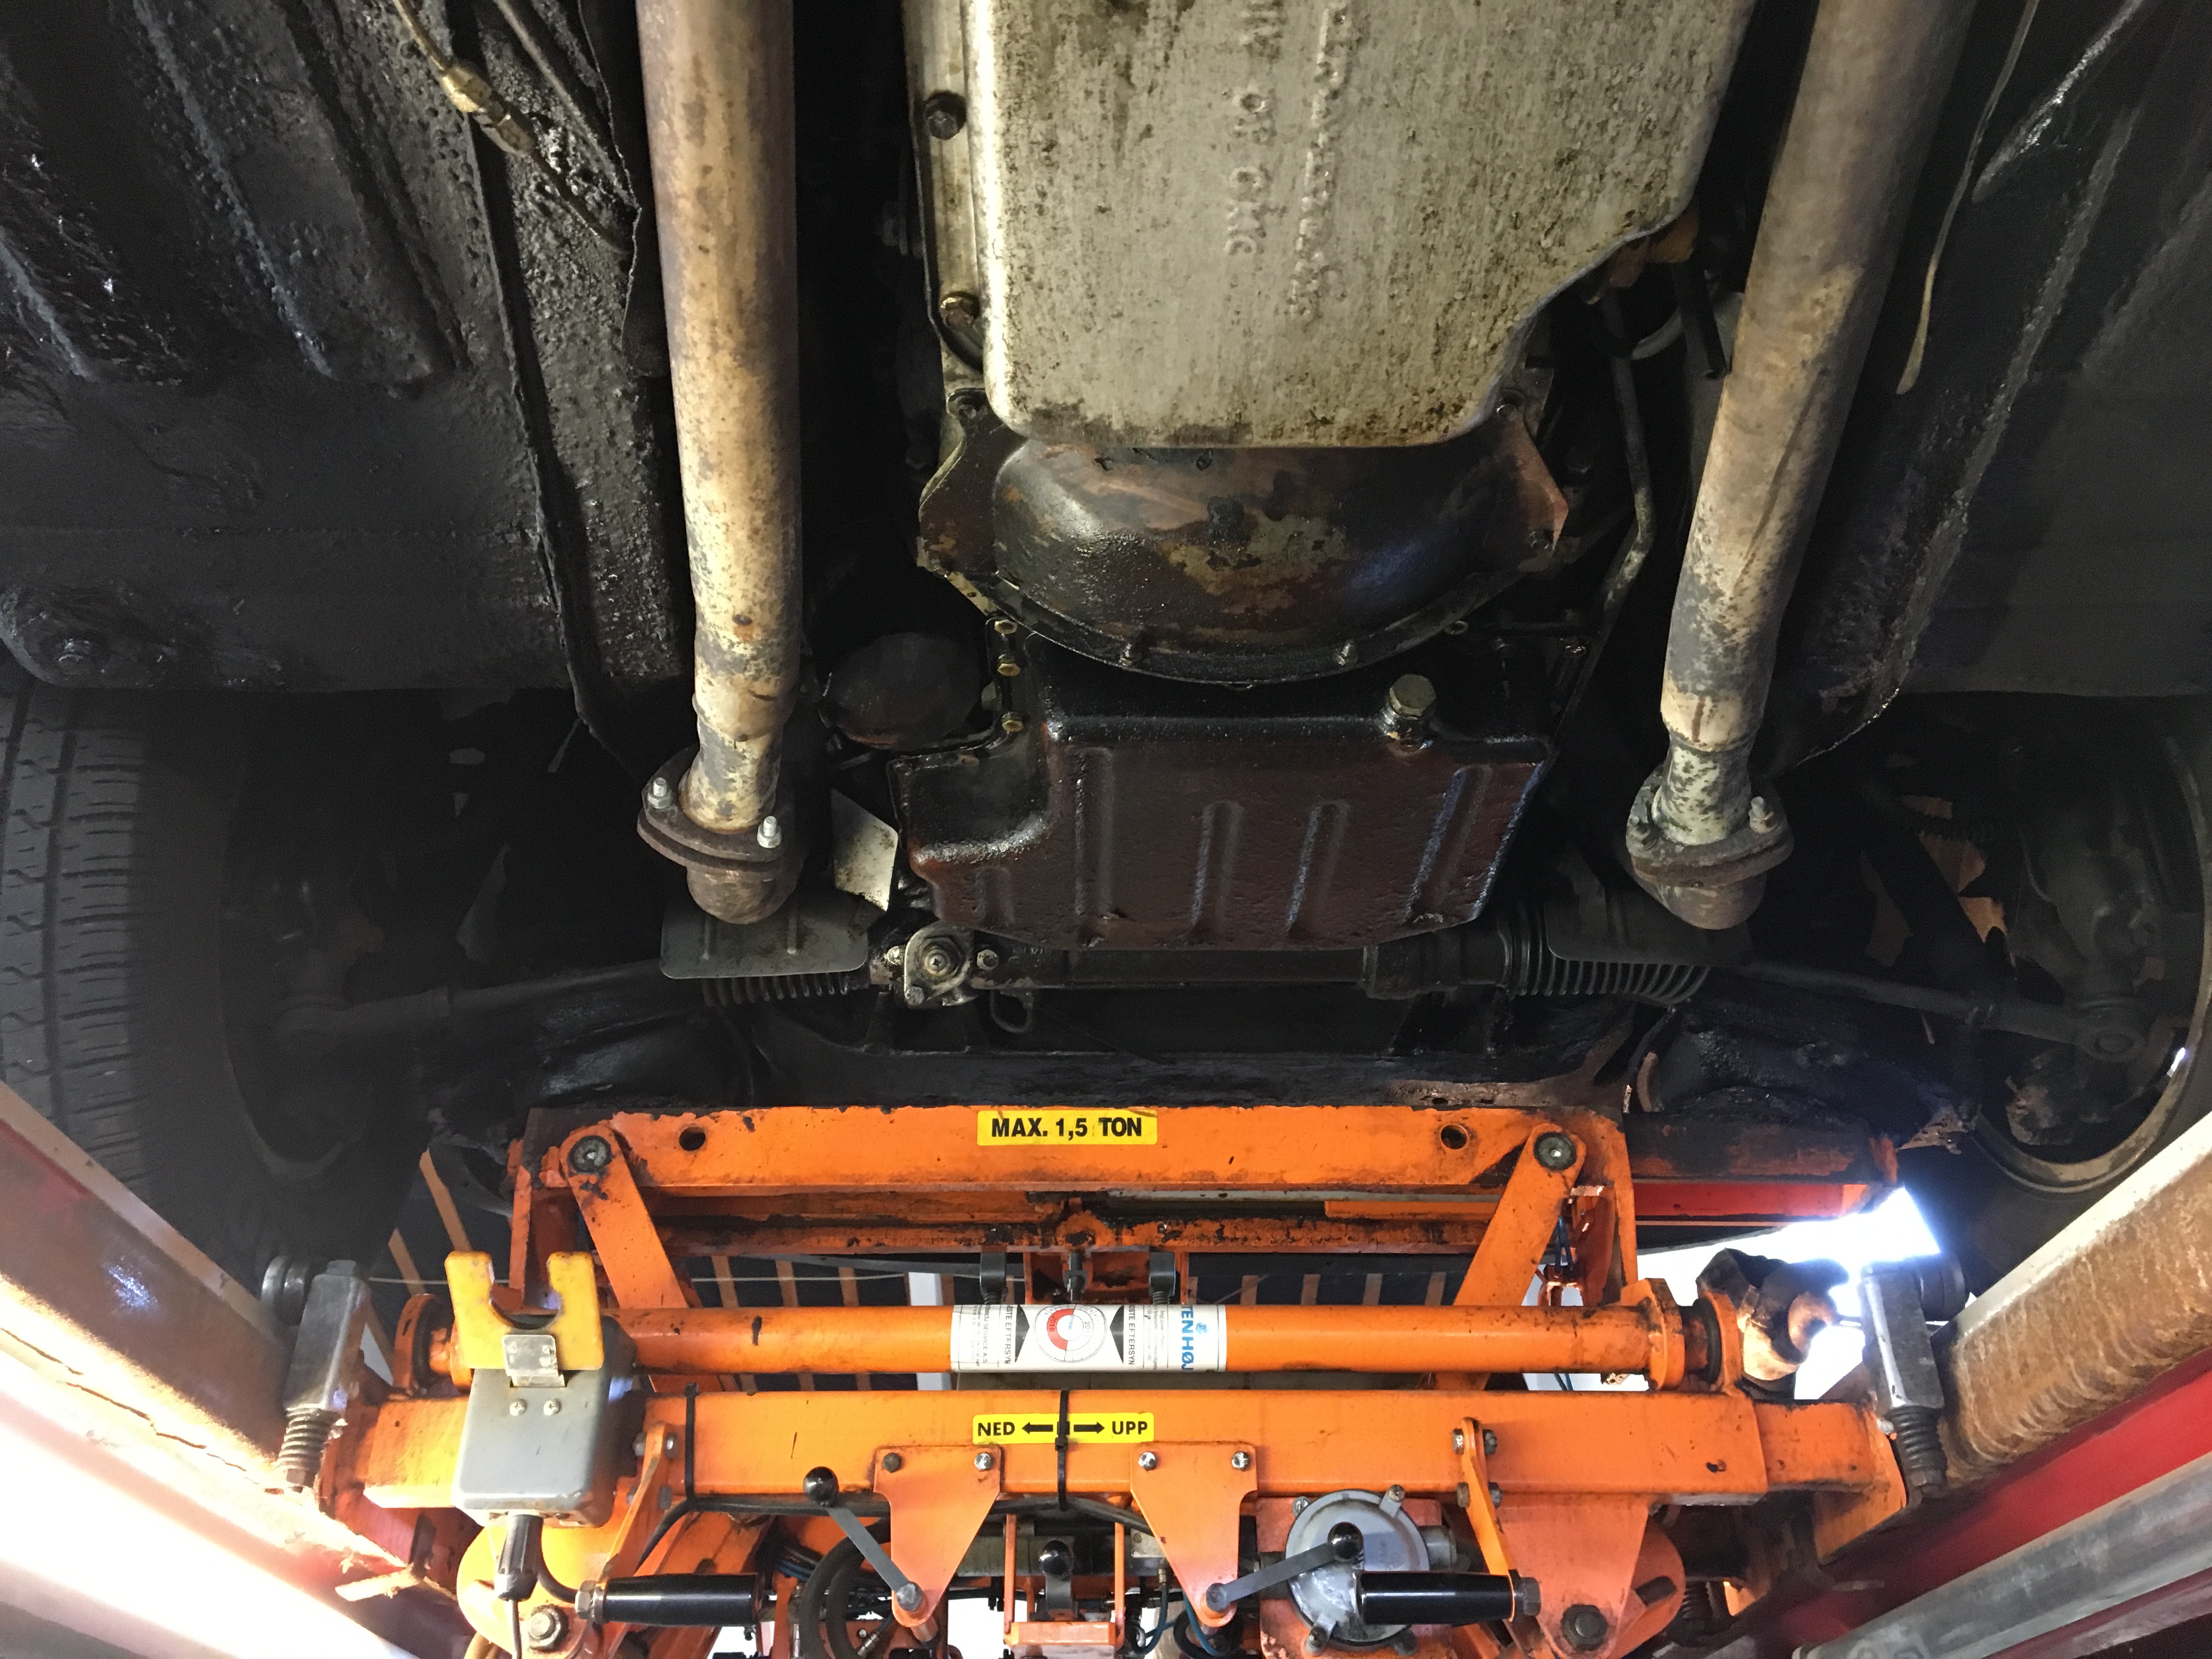
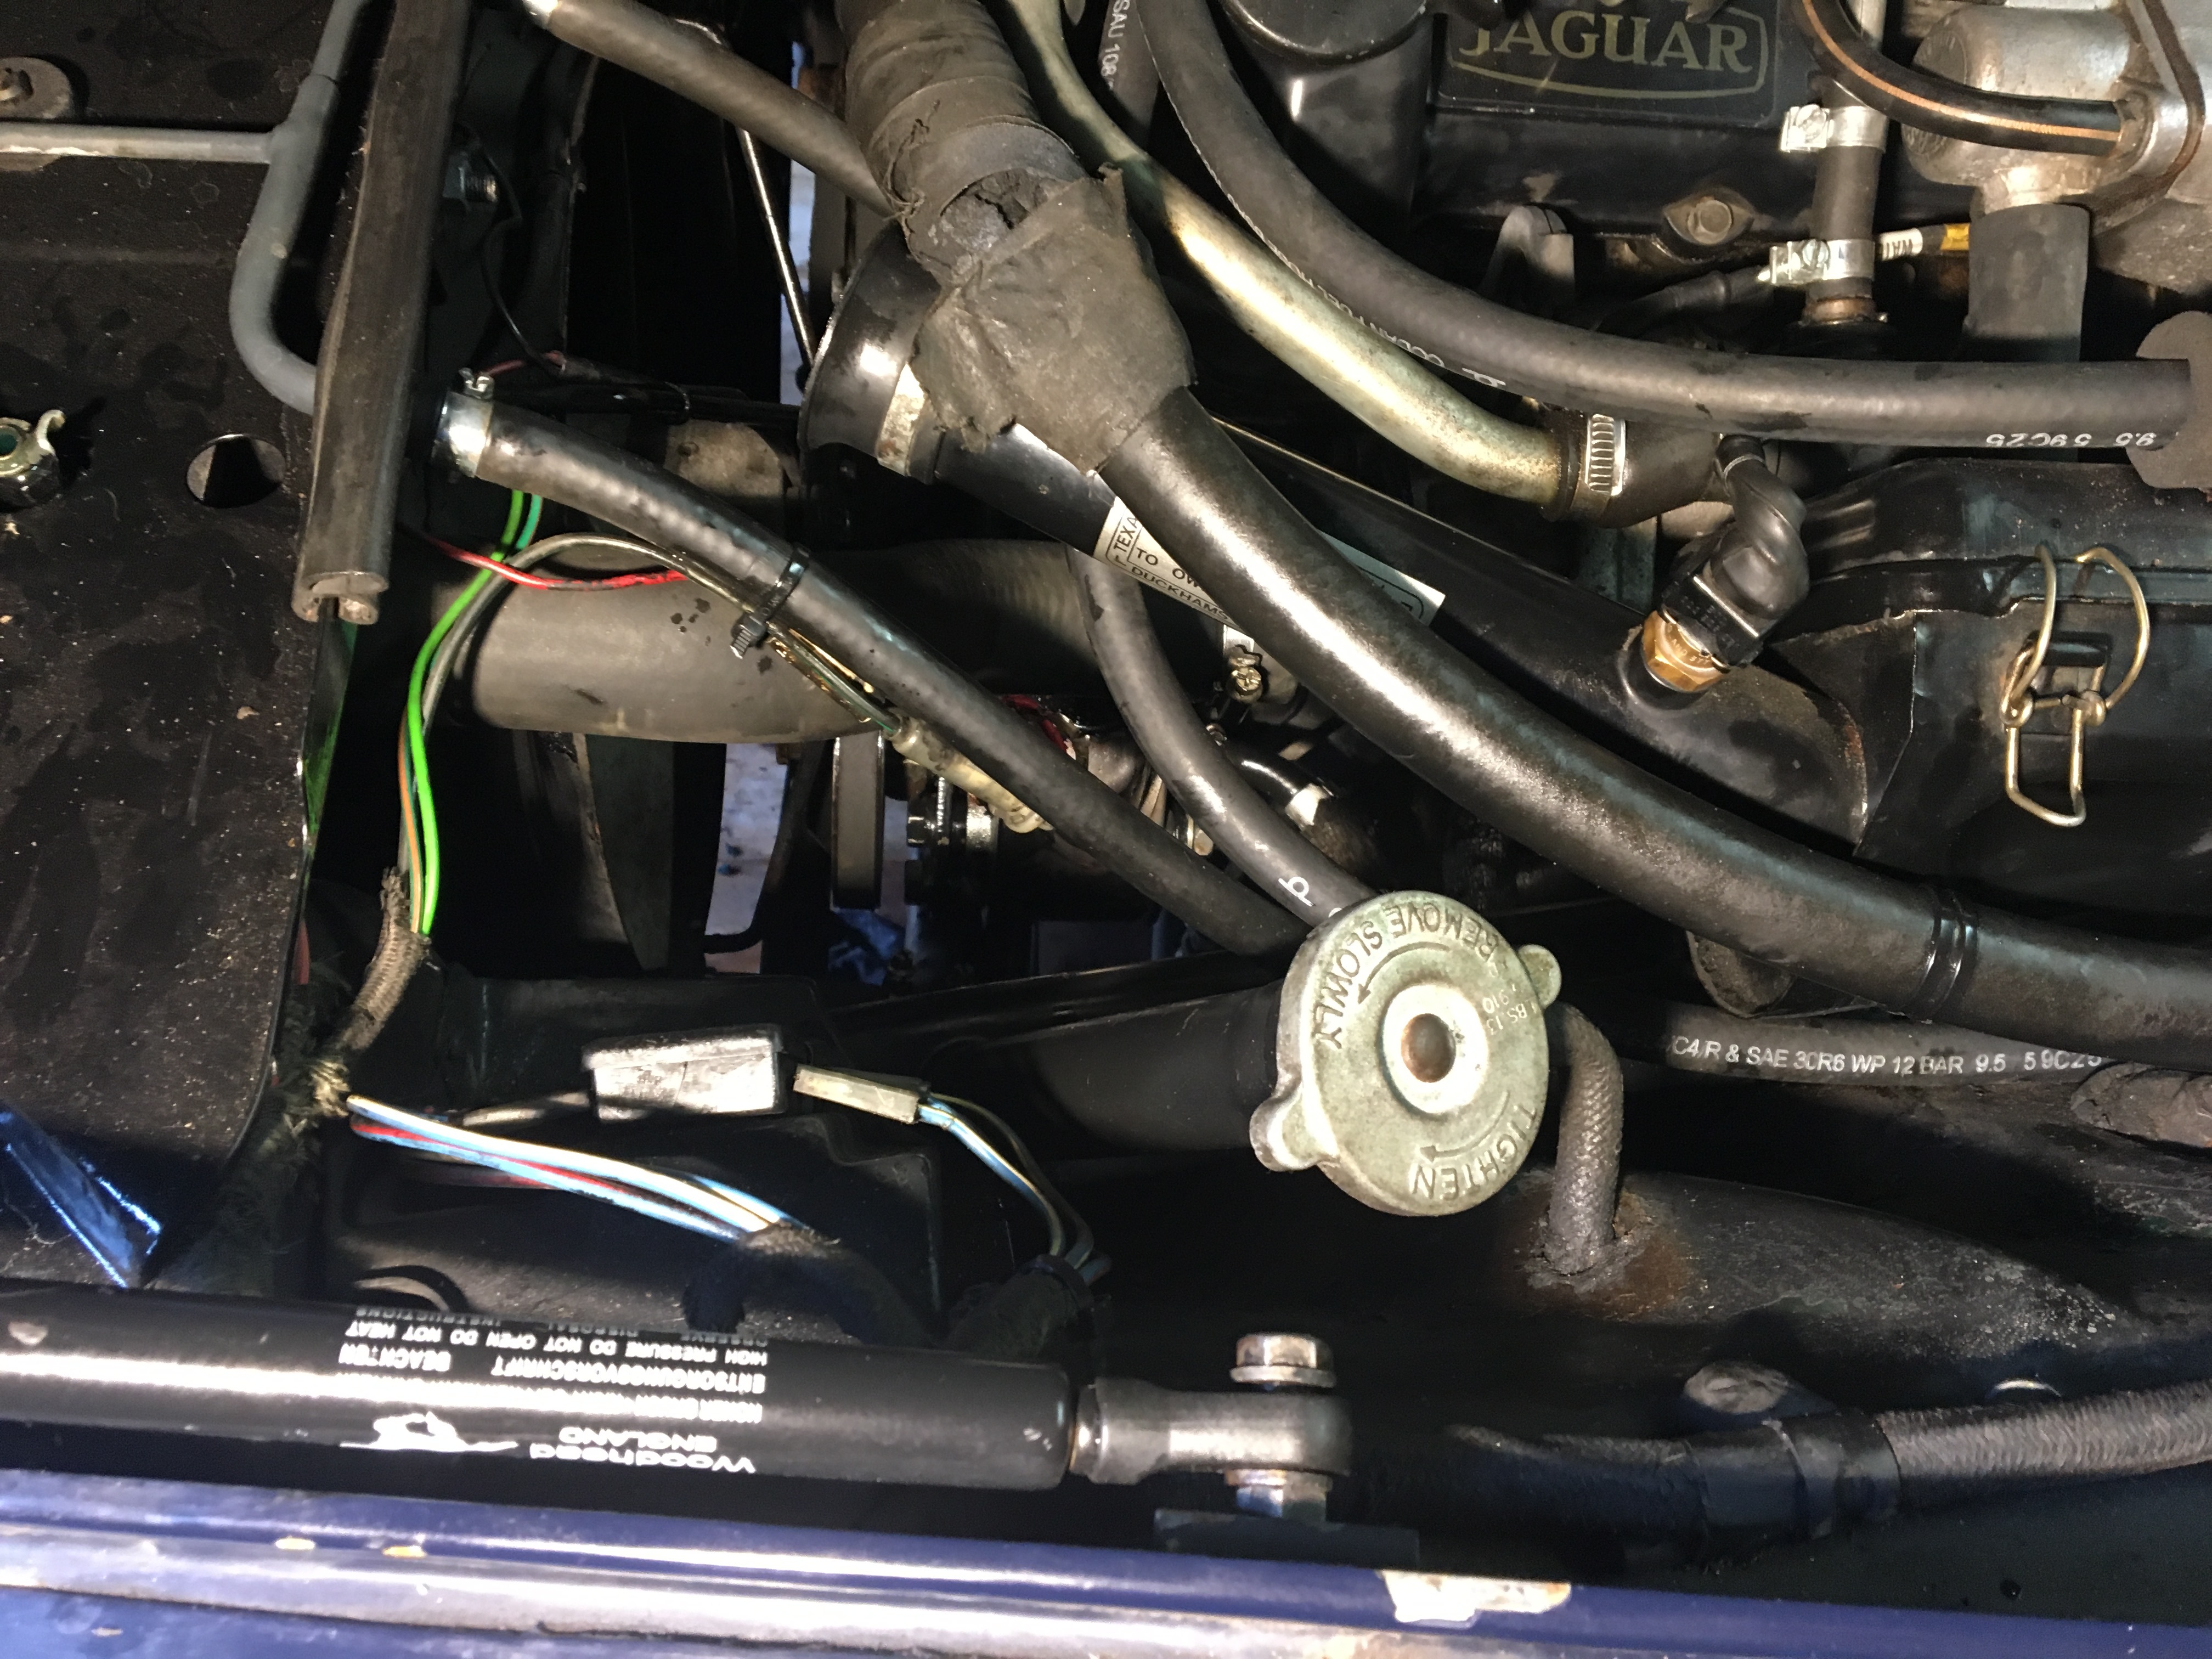
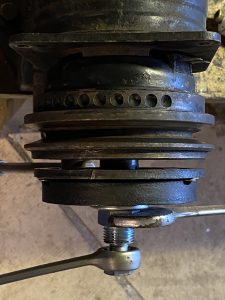
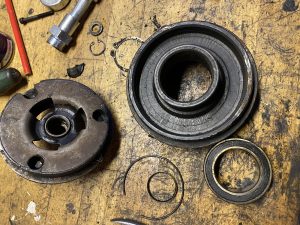
Next project was the leaky power steering pump. First raise the front of the car enough to remove LH front wheel. Some spannering will have to be done from under the car, so lift it enough and support it properly, for example under the front cross member.
To get access and to be able to remove the pump the coolant needs to be (partially) drained. LH top hose from the radiator needs to be detached at the engine end, and the coolant expansion tank needs to be removed.
To remove the pump first slacken the belt tensioner and remove the bolt attaching the tensioner to the pump. Then remove the drive belt and detach the oil lines and drain the PAS oil. Finally the single pivot bolt can be removed and the pump is ready to be removed from above.
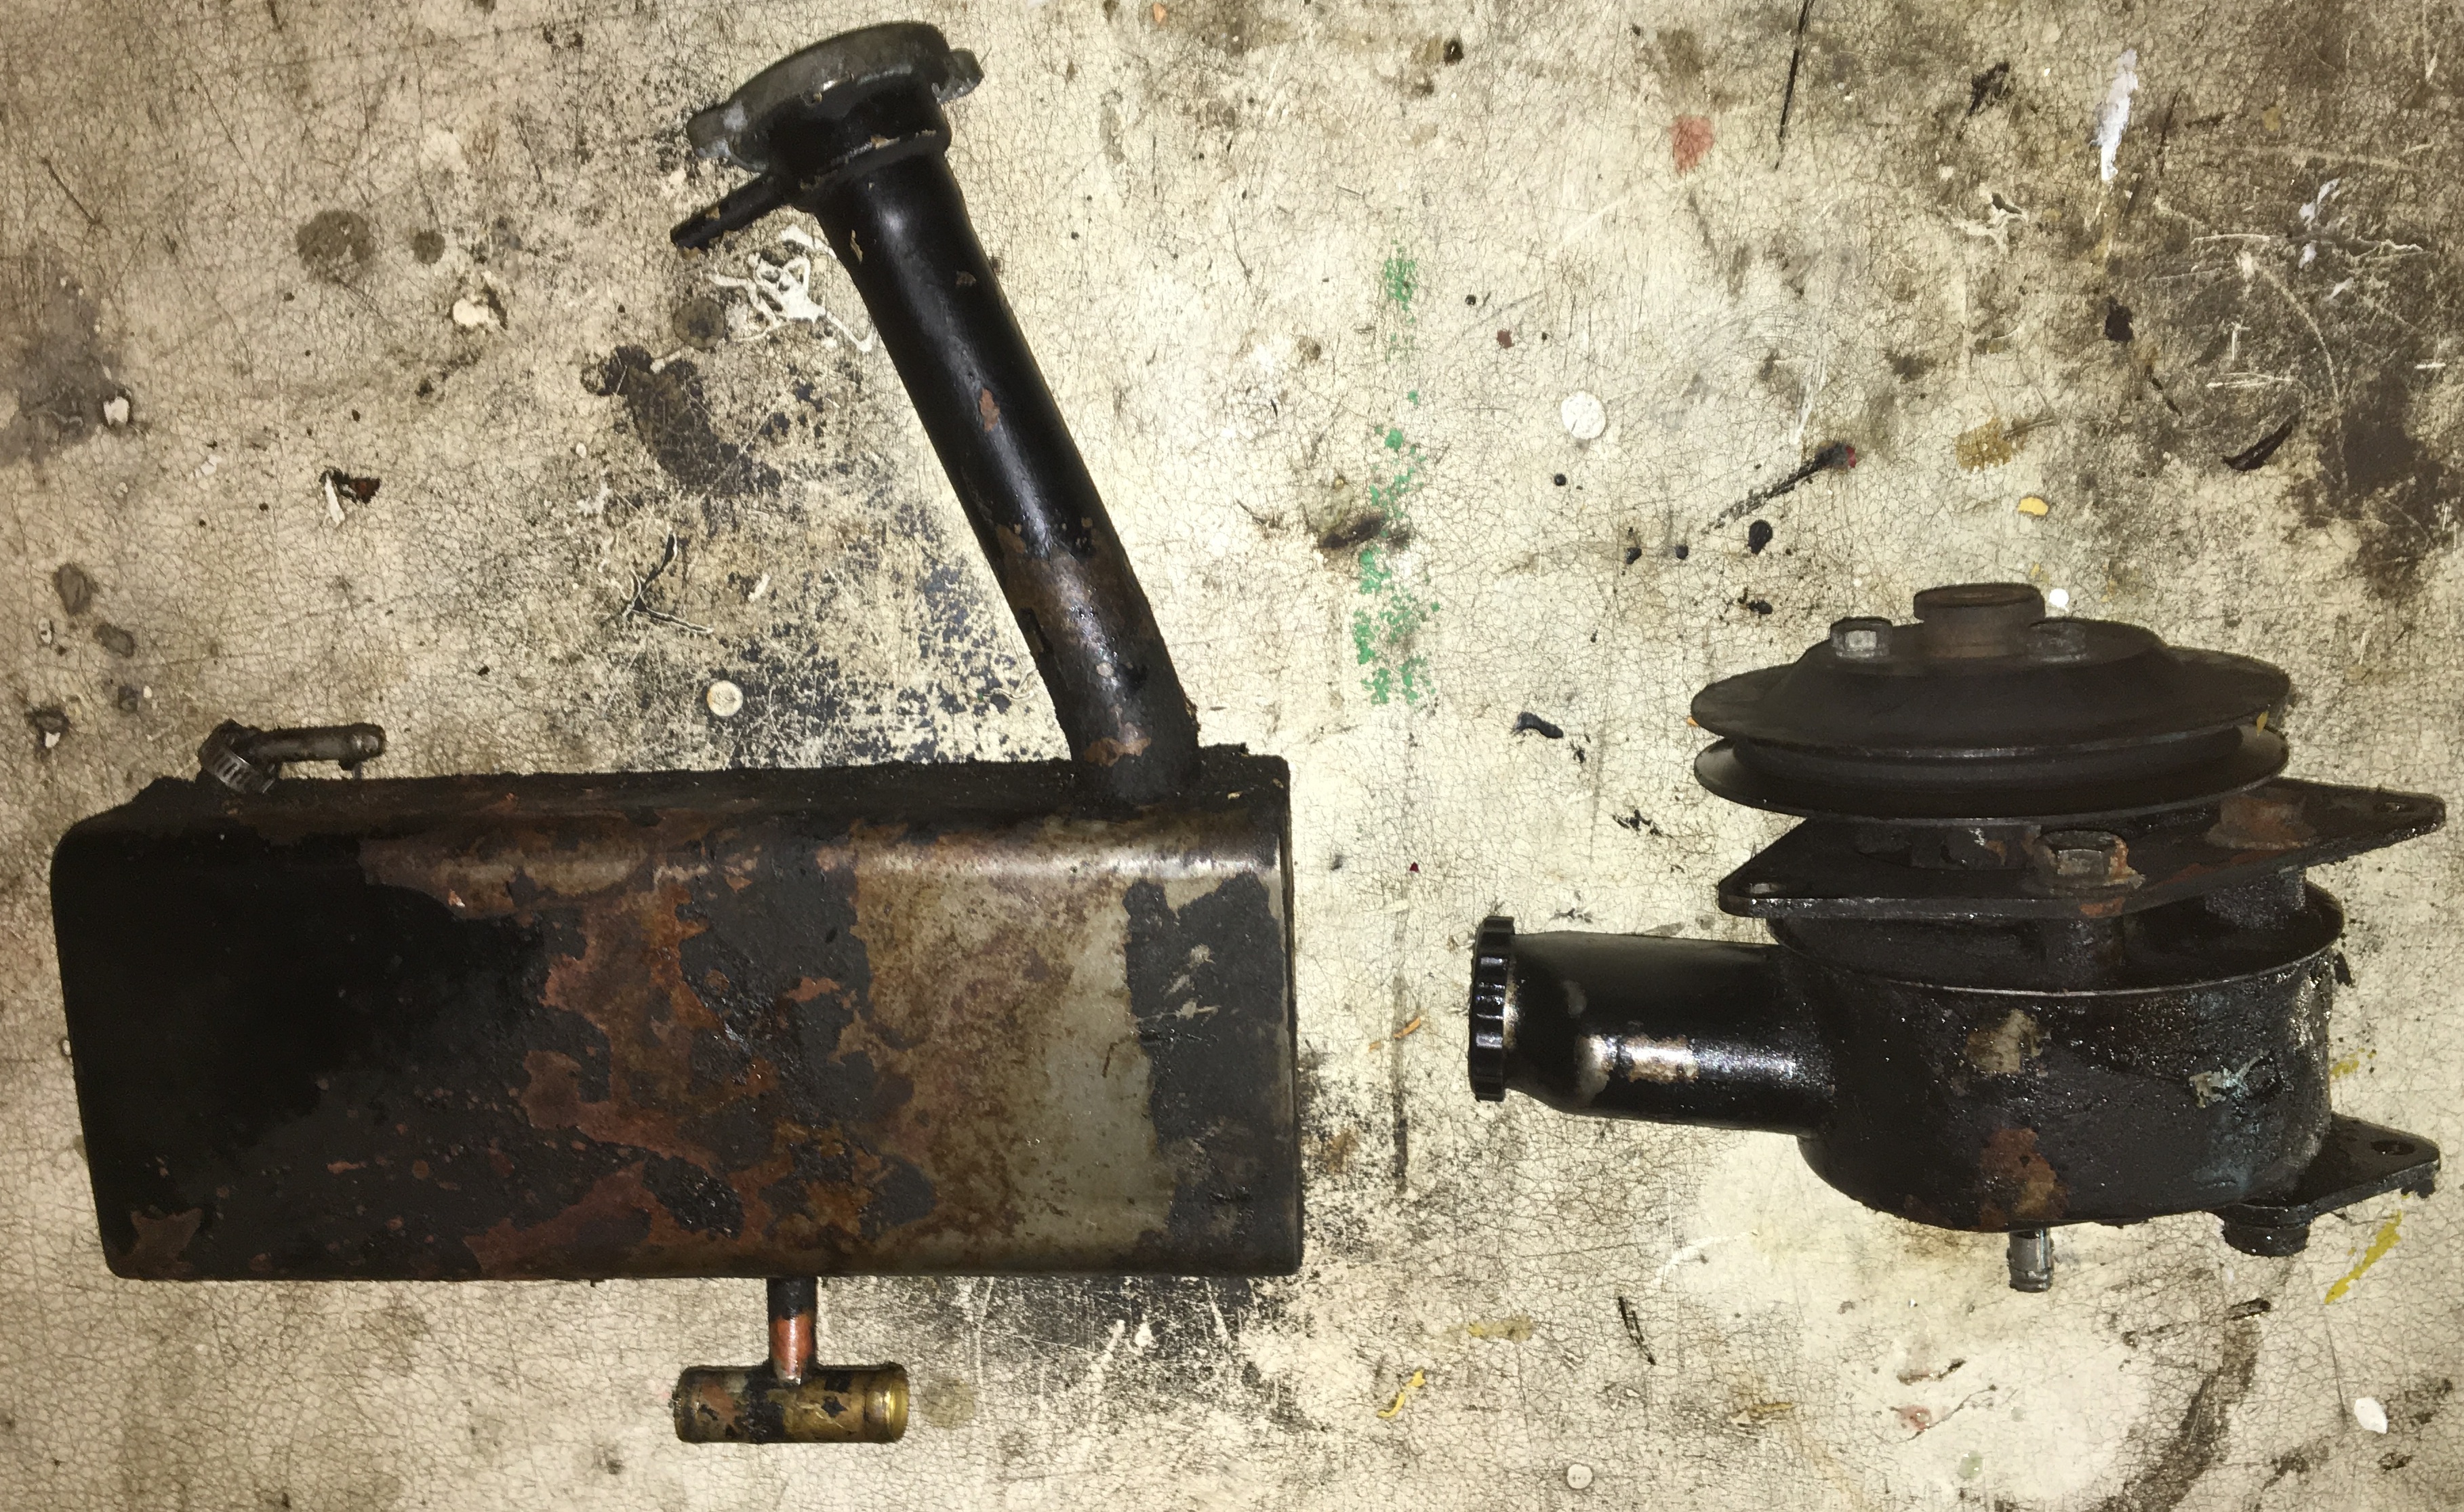
Pictures below:
1. Pump is hidden some 15-20cm down in in front left corner of the engine bay
2. Expansion tank and pump
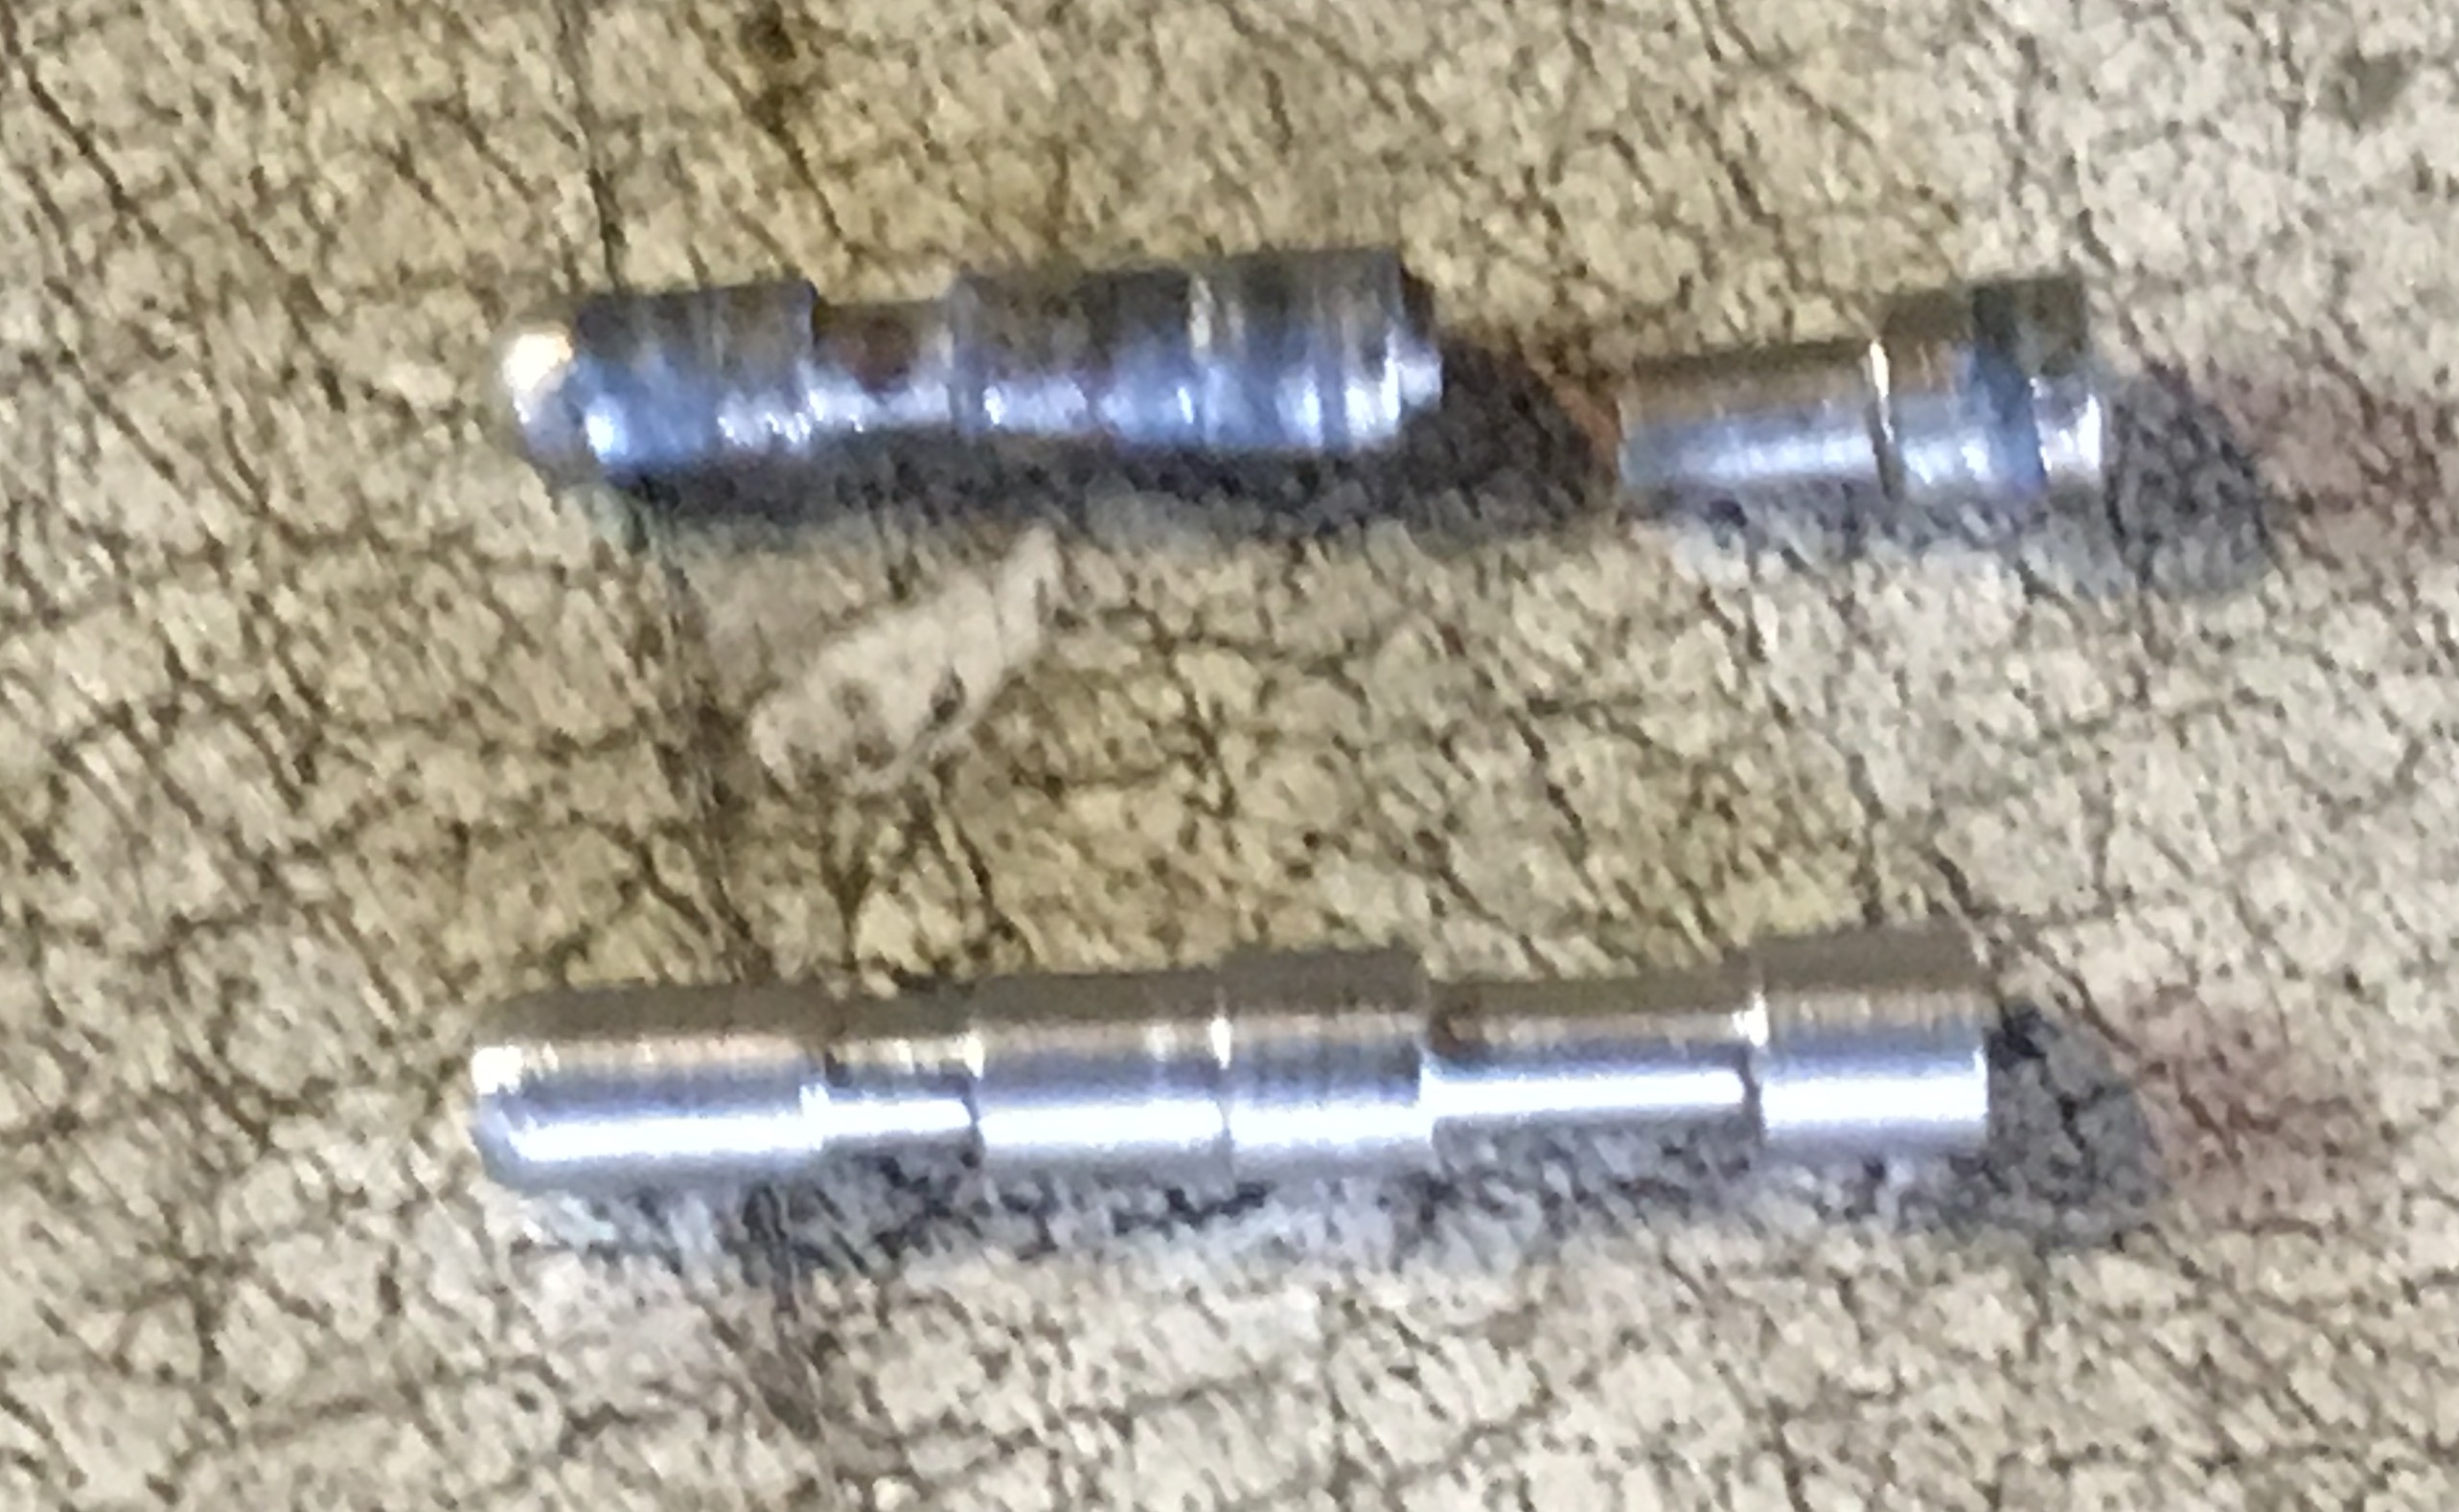
3. Pump. Brackets needs removing. I left the pully on, but it can be removed using a puller. It is just a mounted with press fit joint
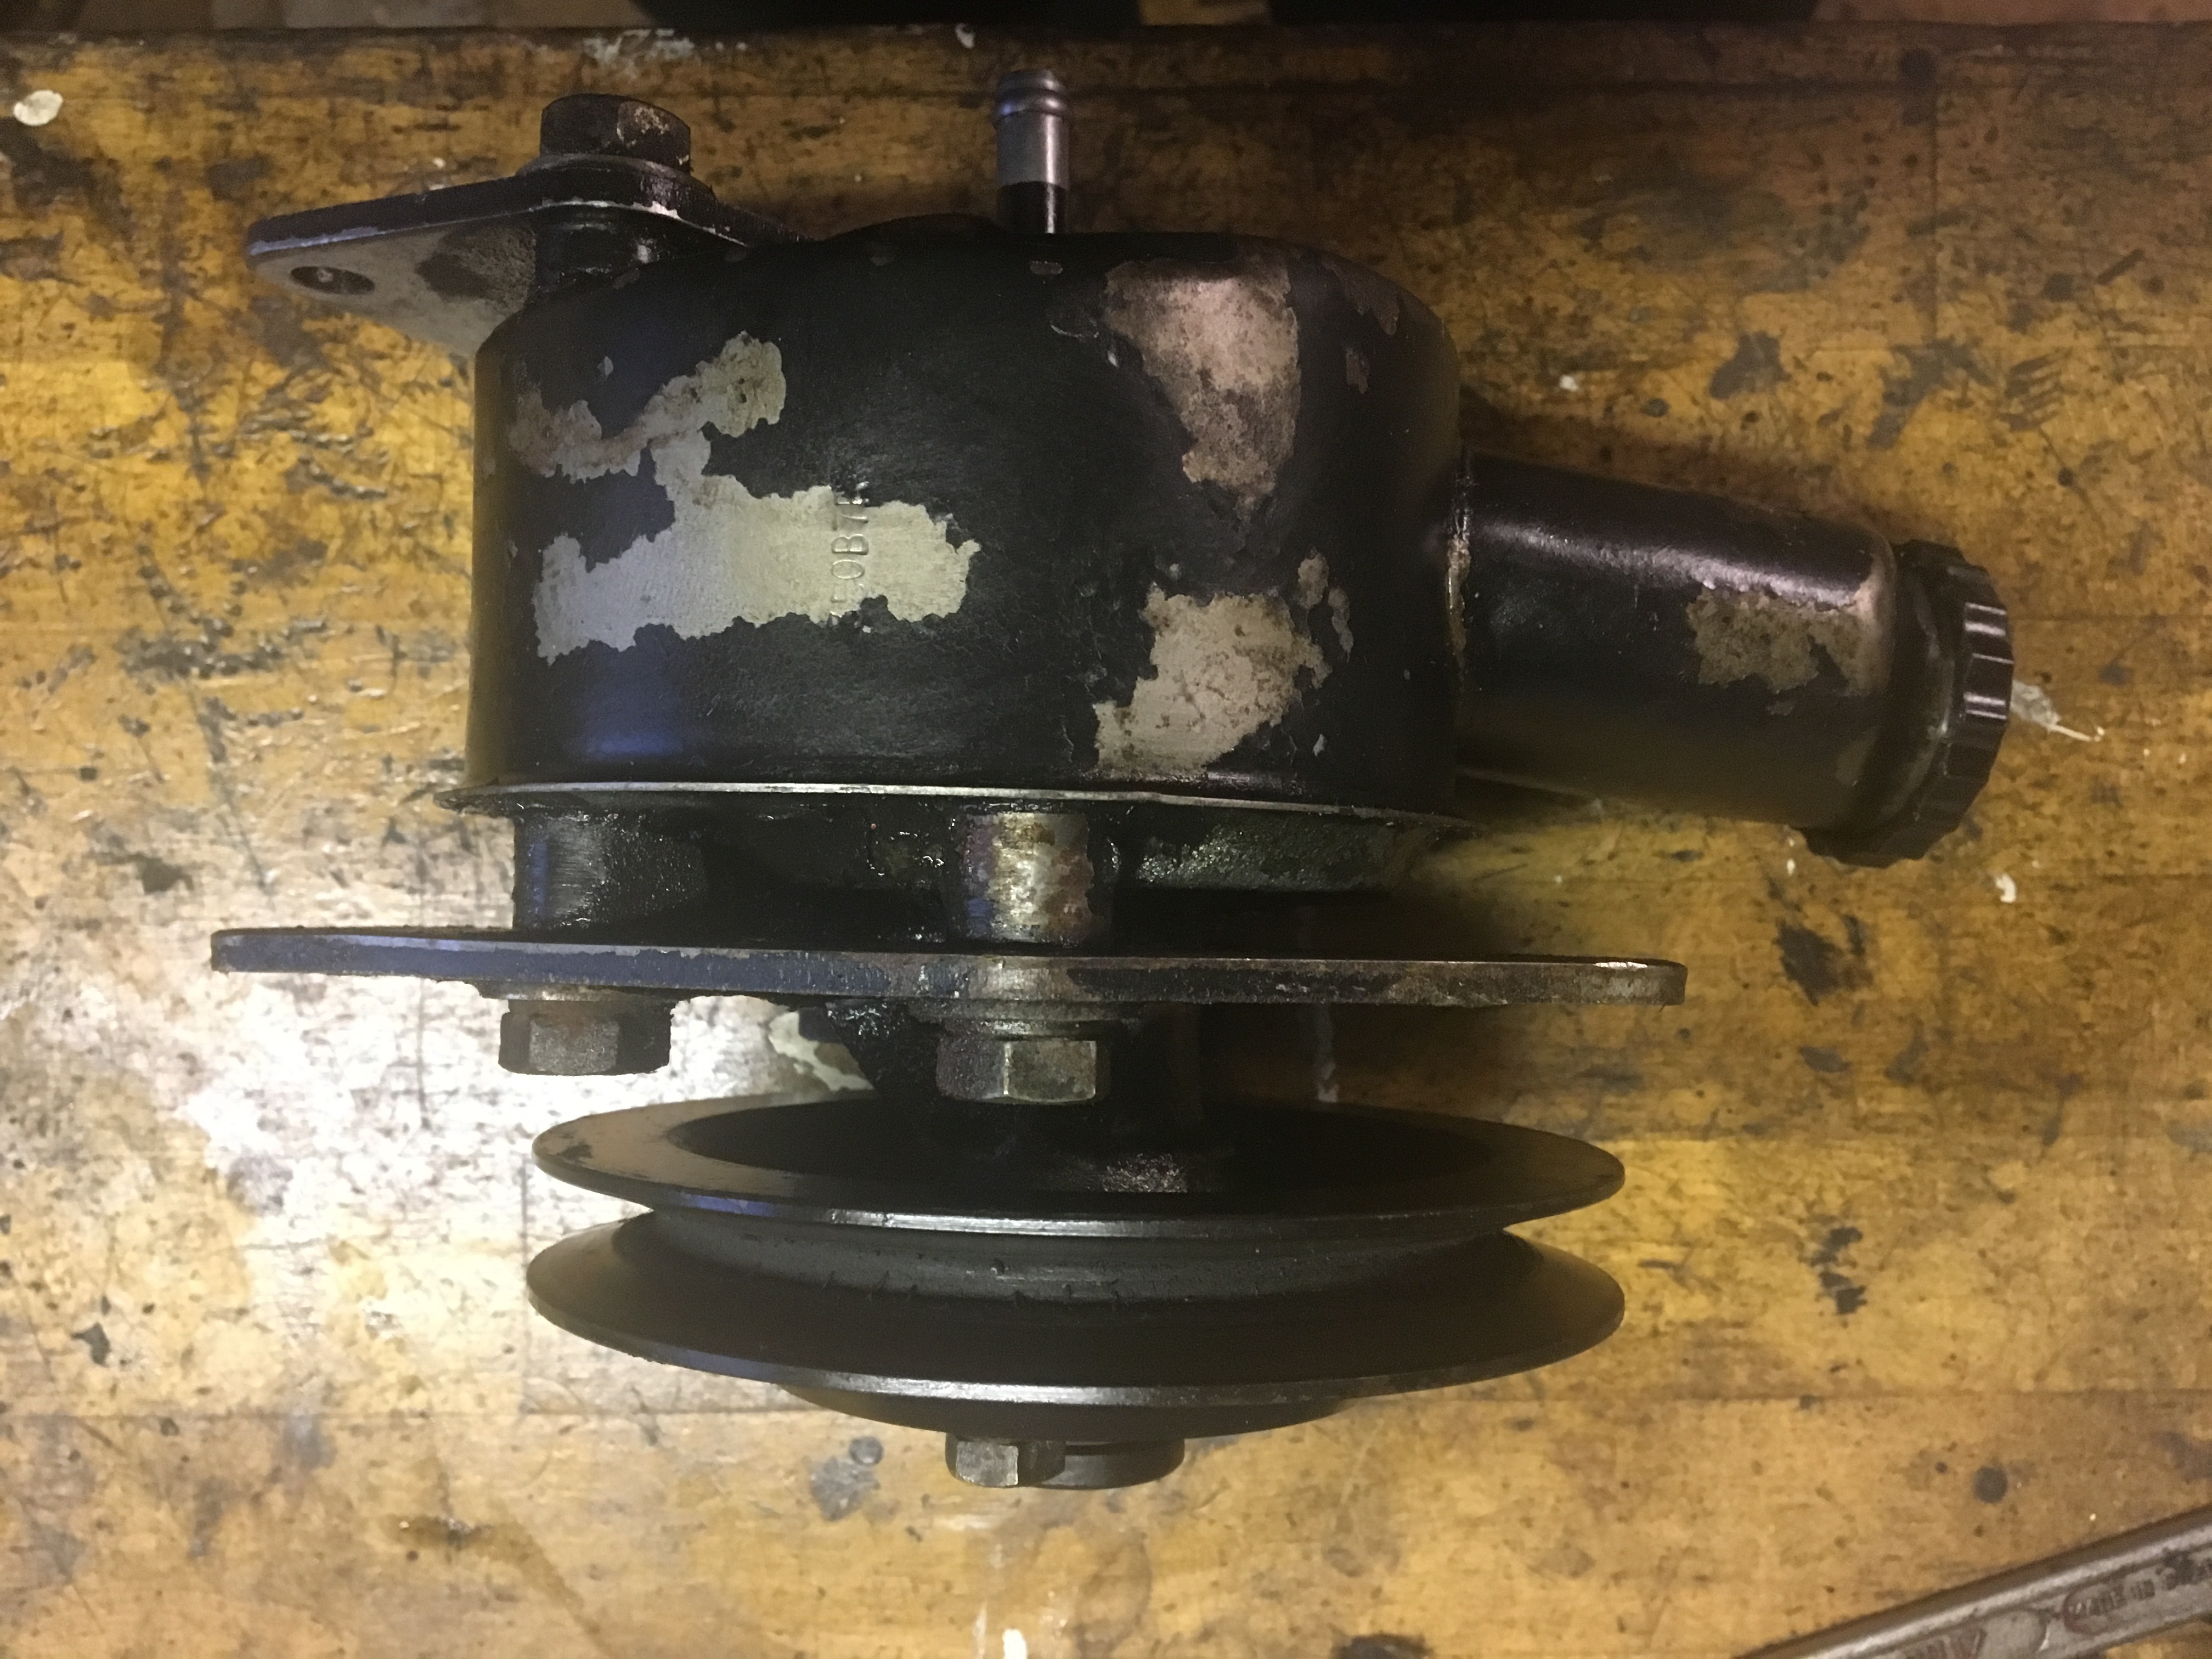
Disassembly of the pump is fairly straightforward, especially if you know how. One step on the way is to find out, that the pump brand is Saginaw and that it is used on many US cars tf the era.
Here is a PDF describing the operation: Saginaw rebuild
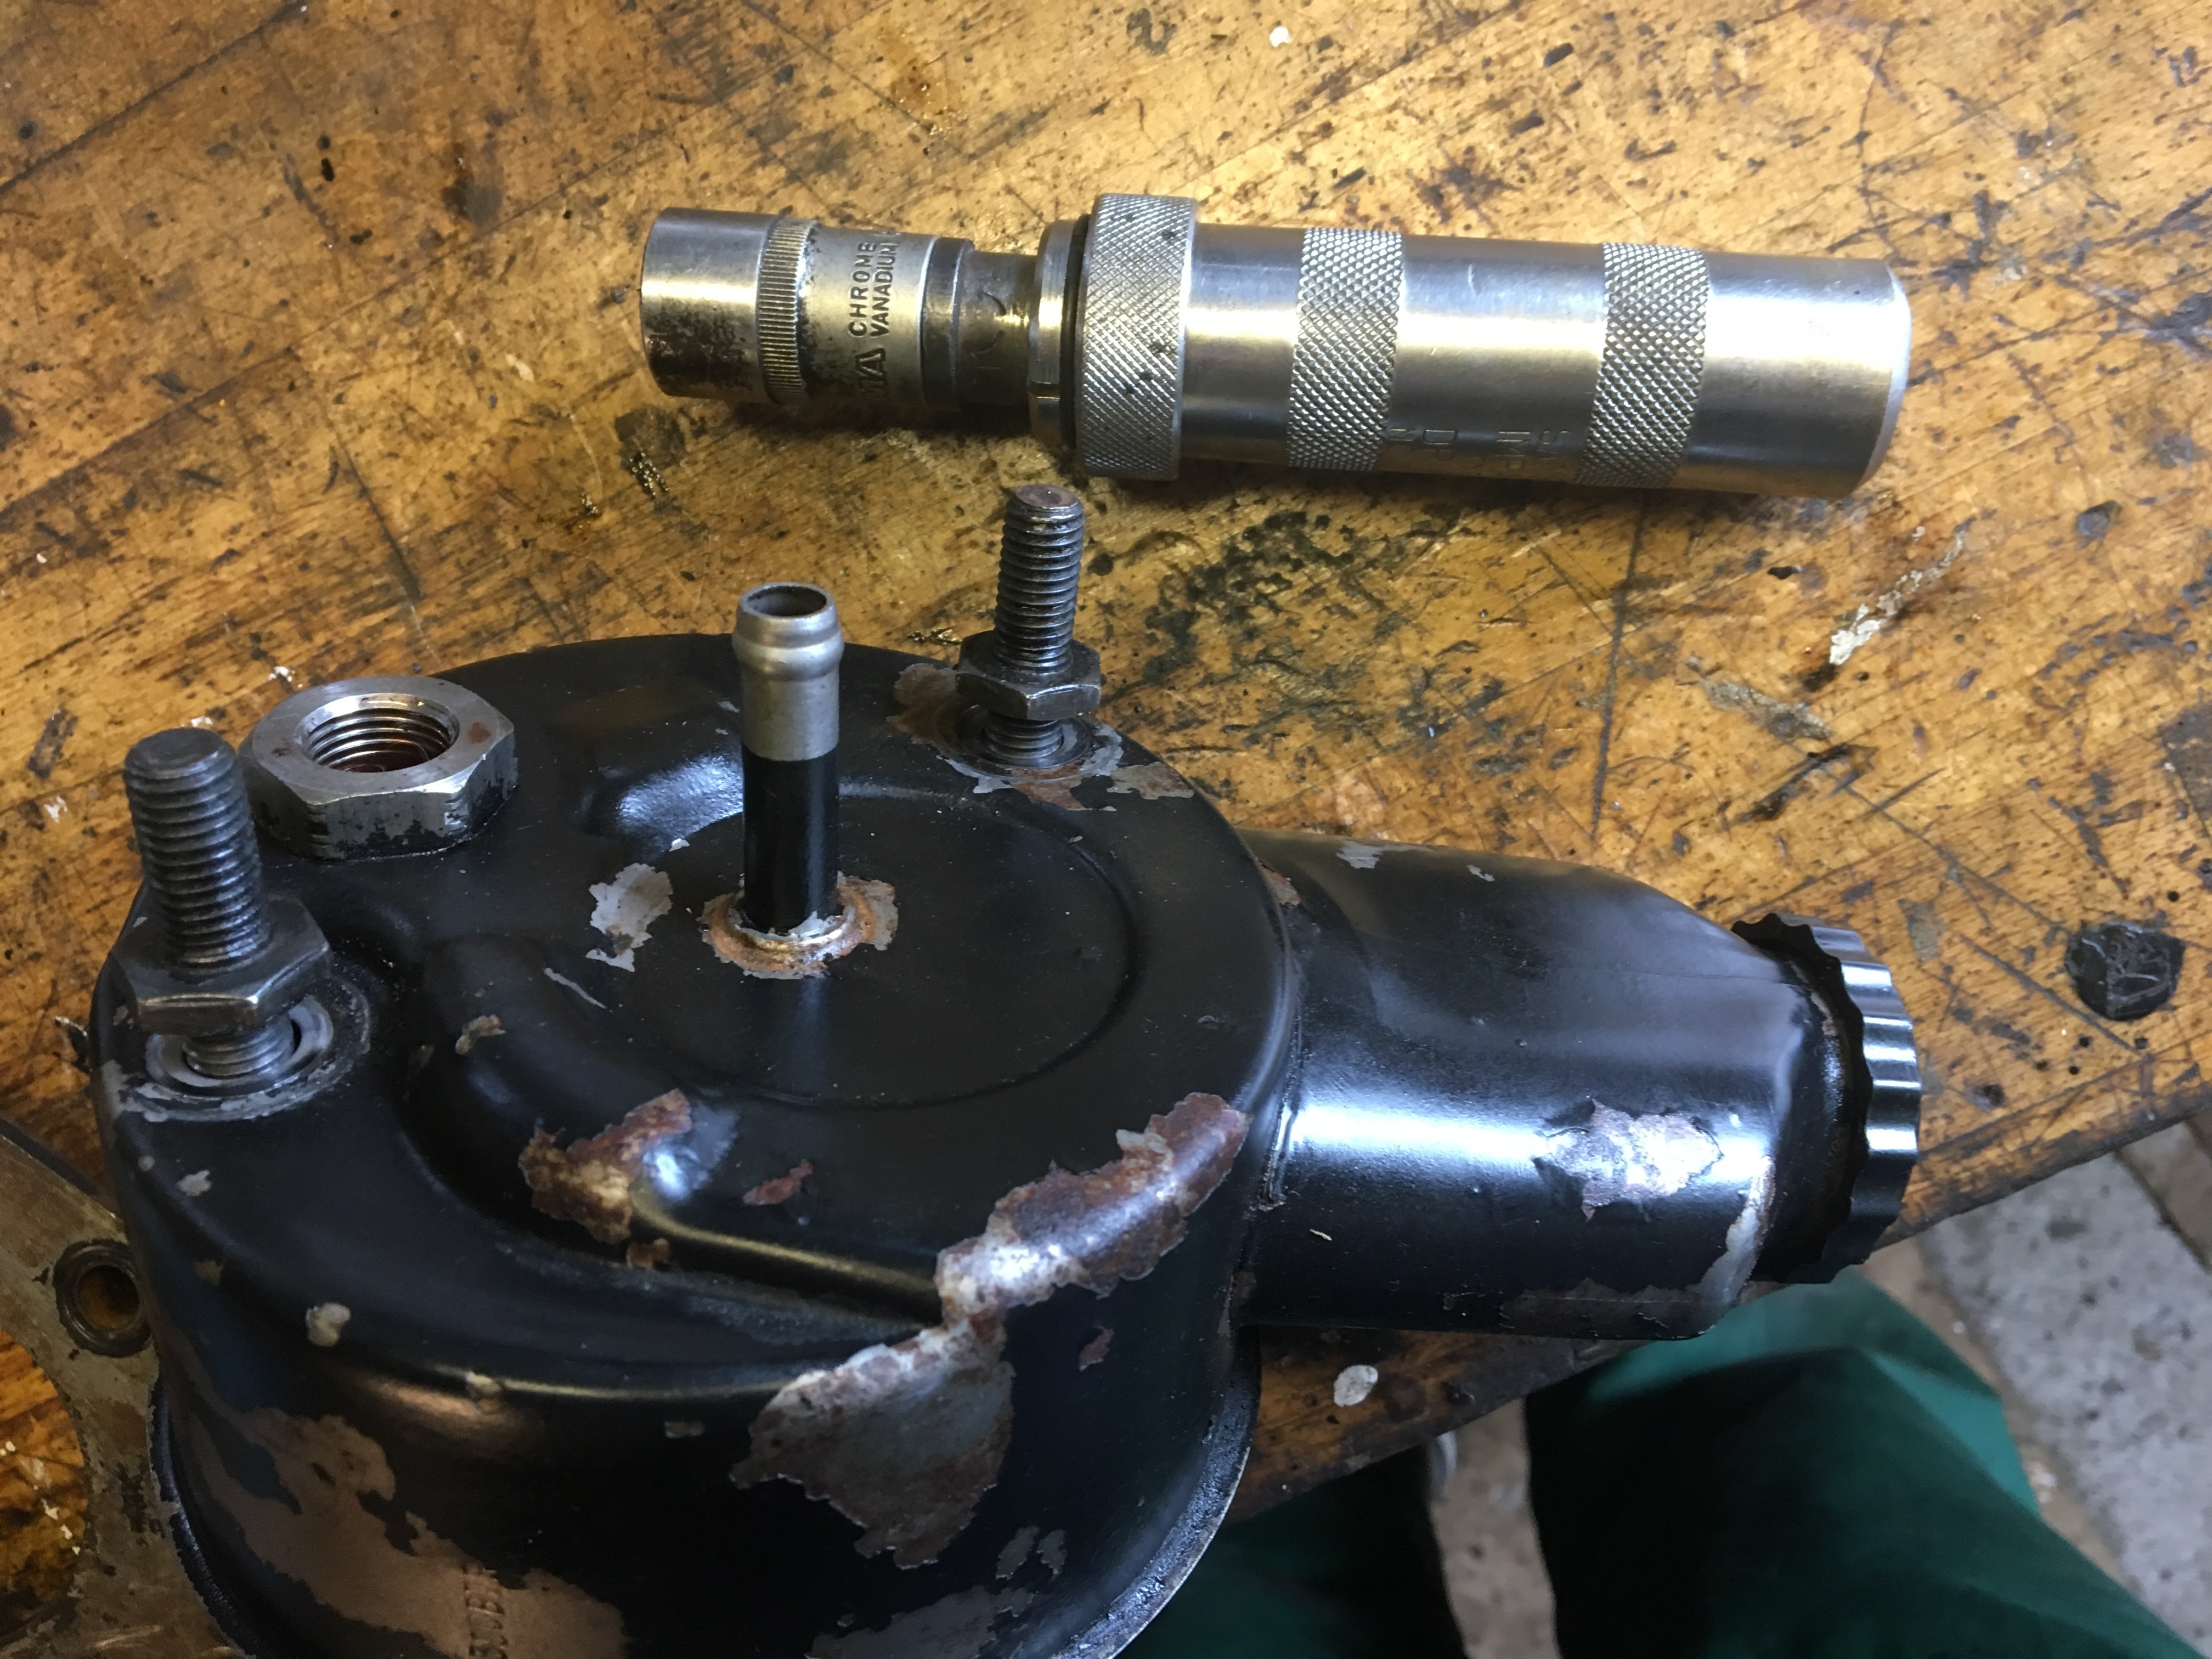
4. The 2 threaded studs also hold the cover/reservoir in place.
5. The outlet connector contains a some valve parts, probably to regulate pressure
6. The heart of the pump
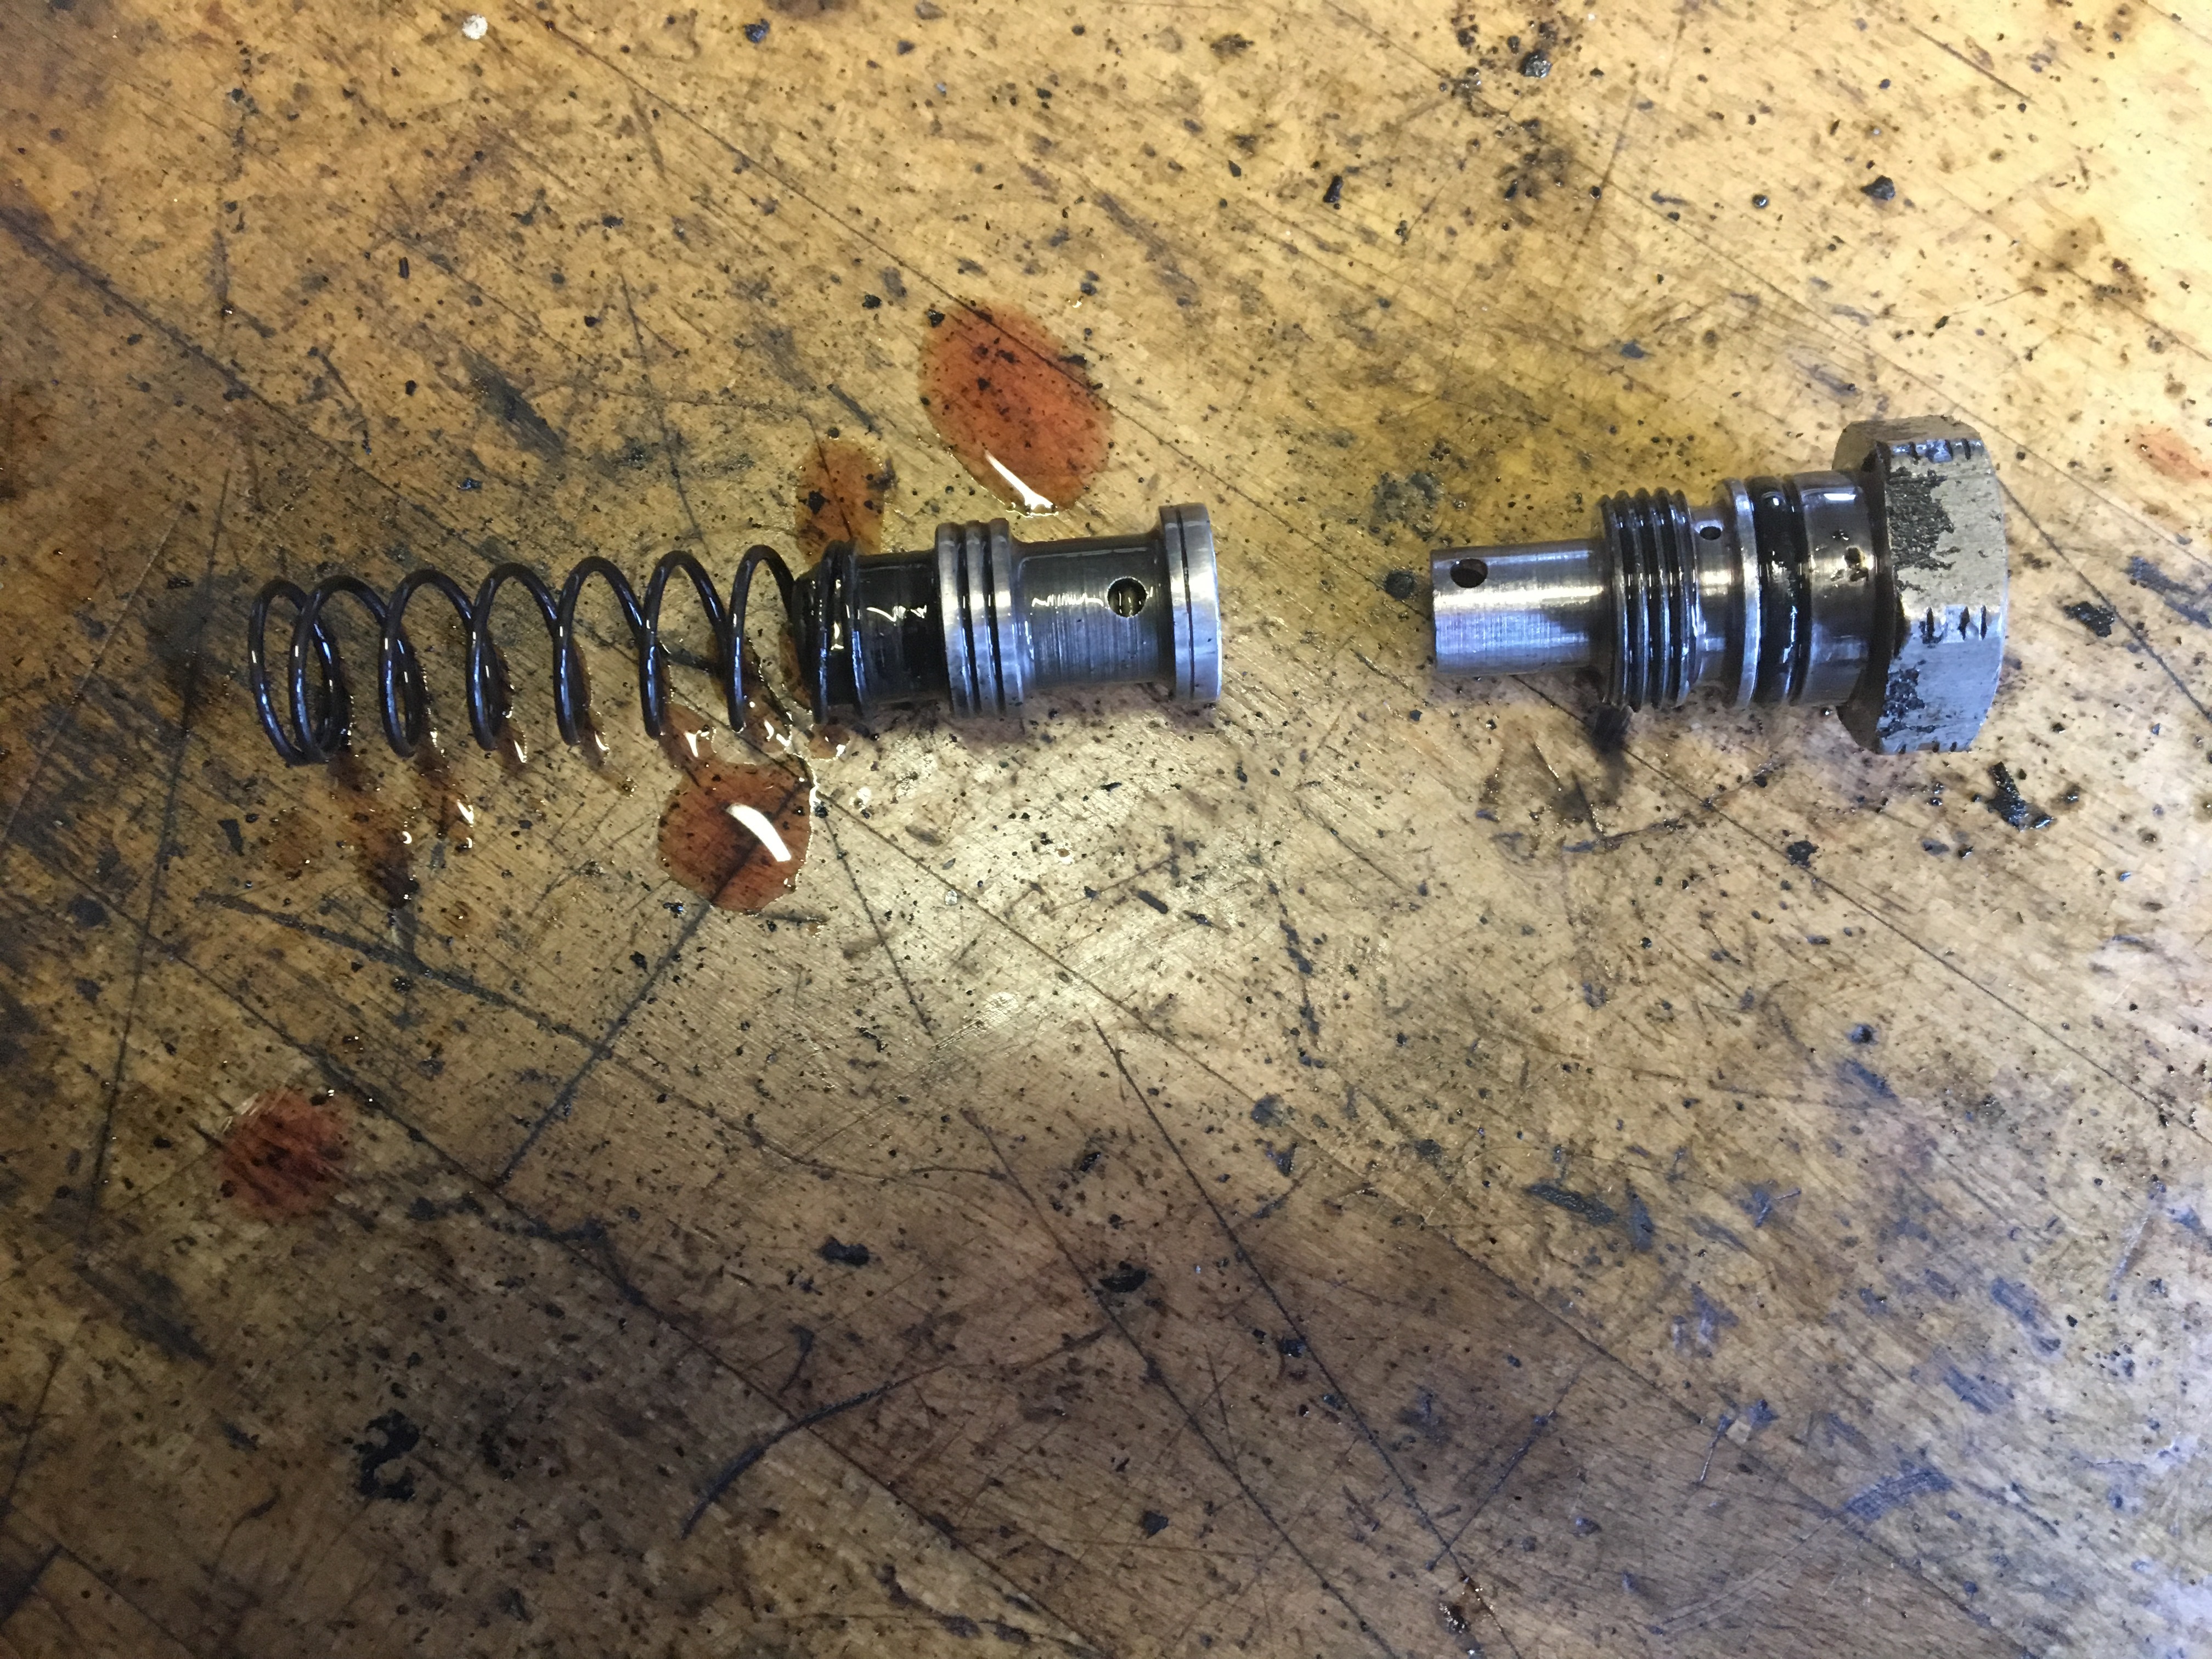
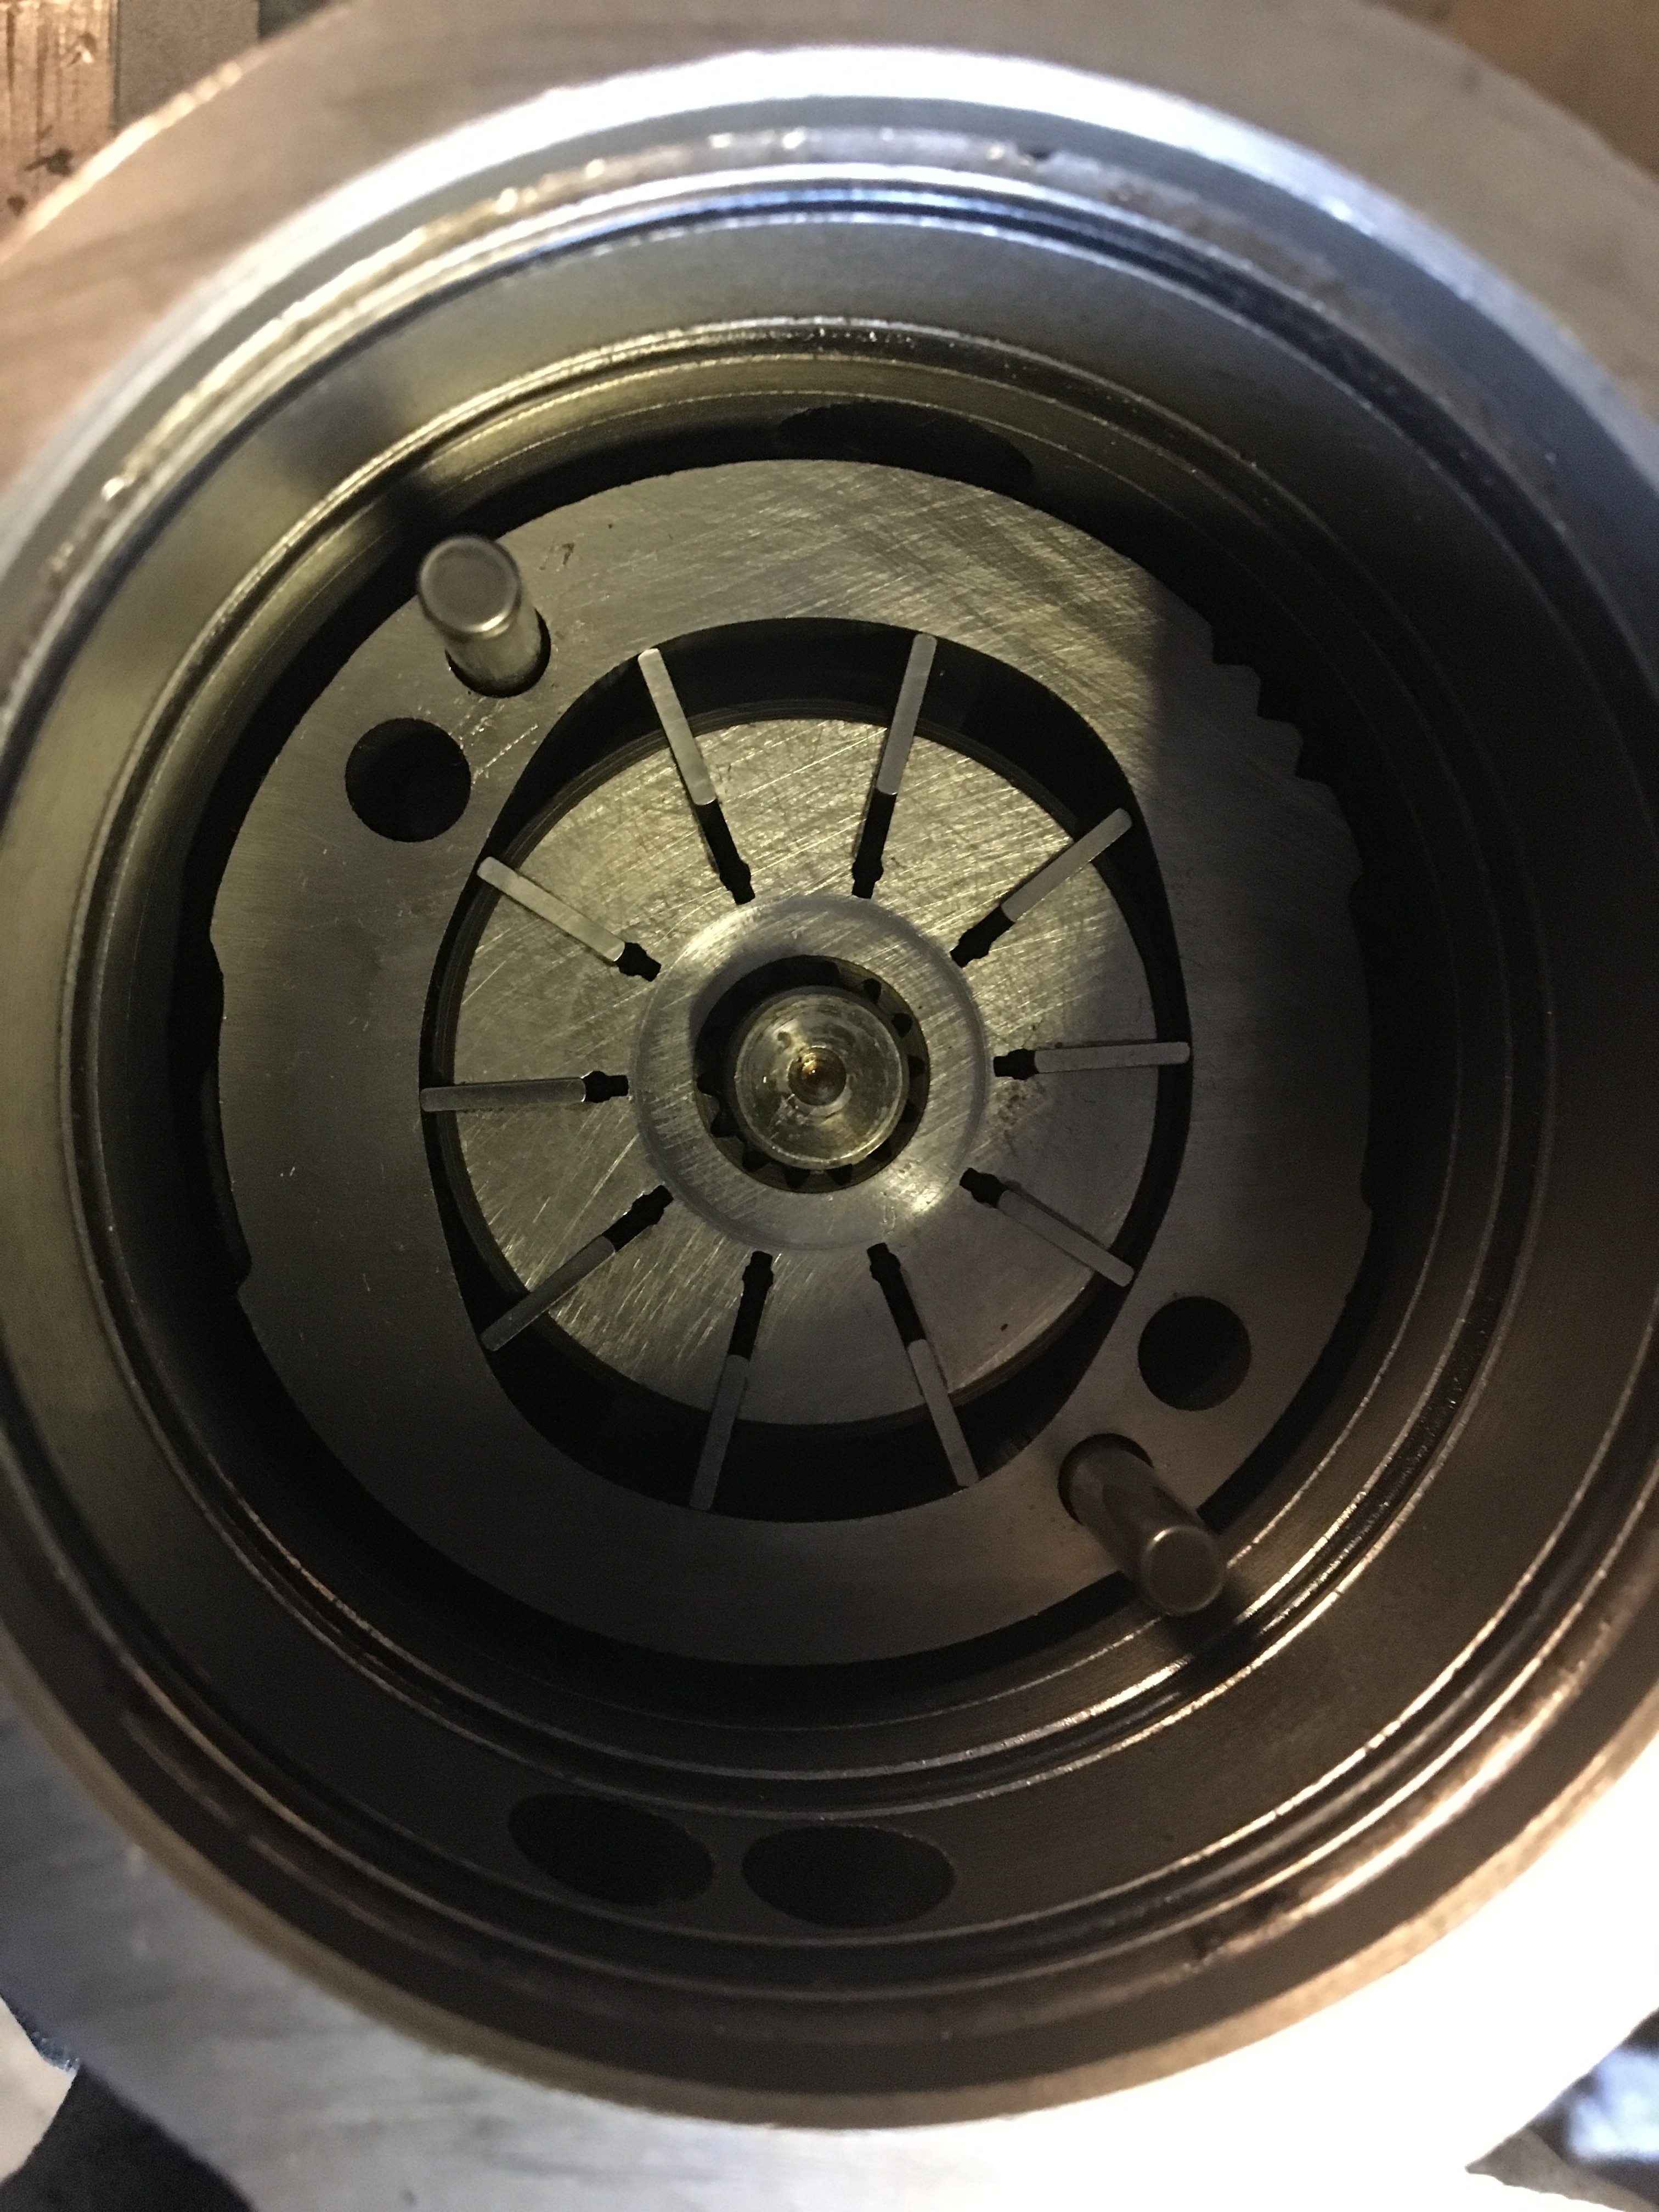
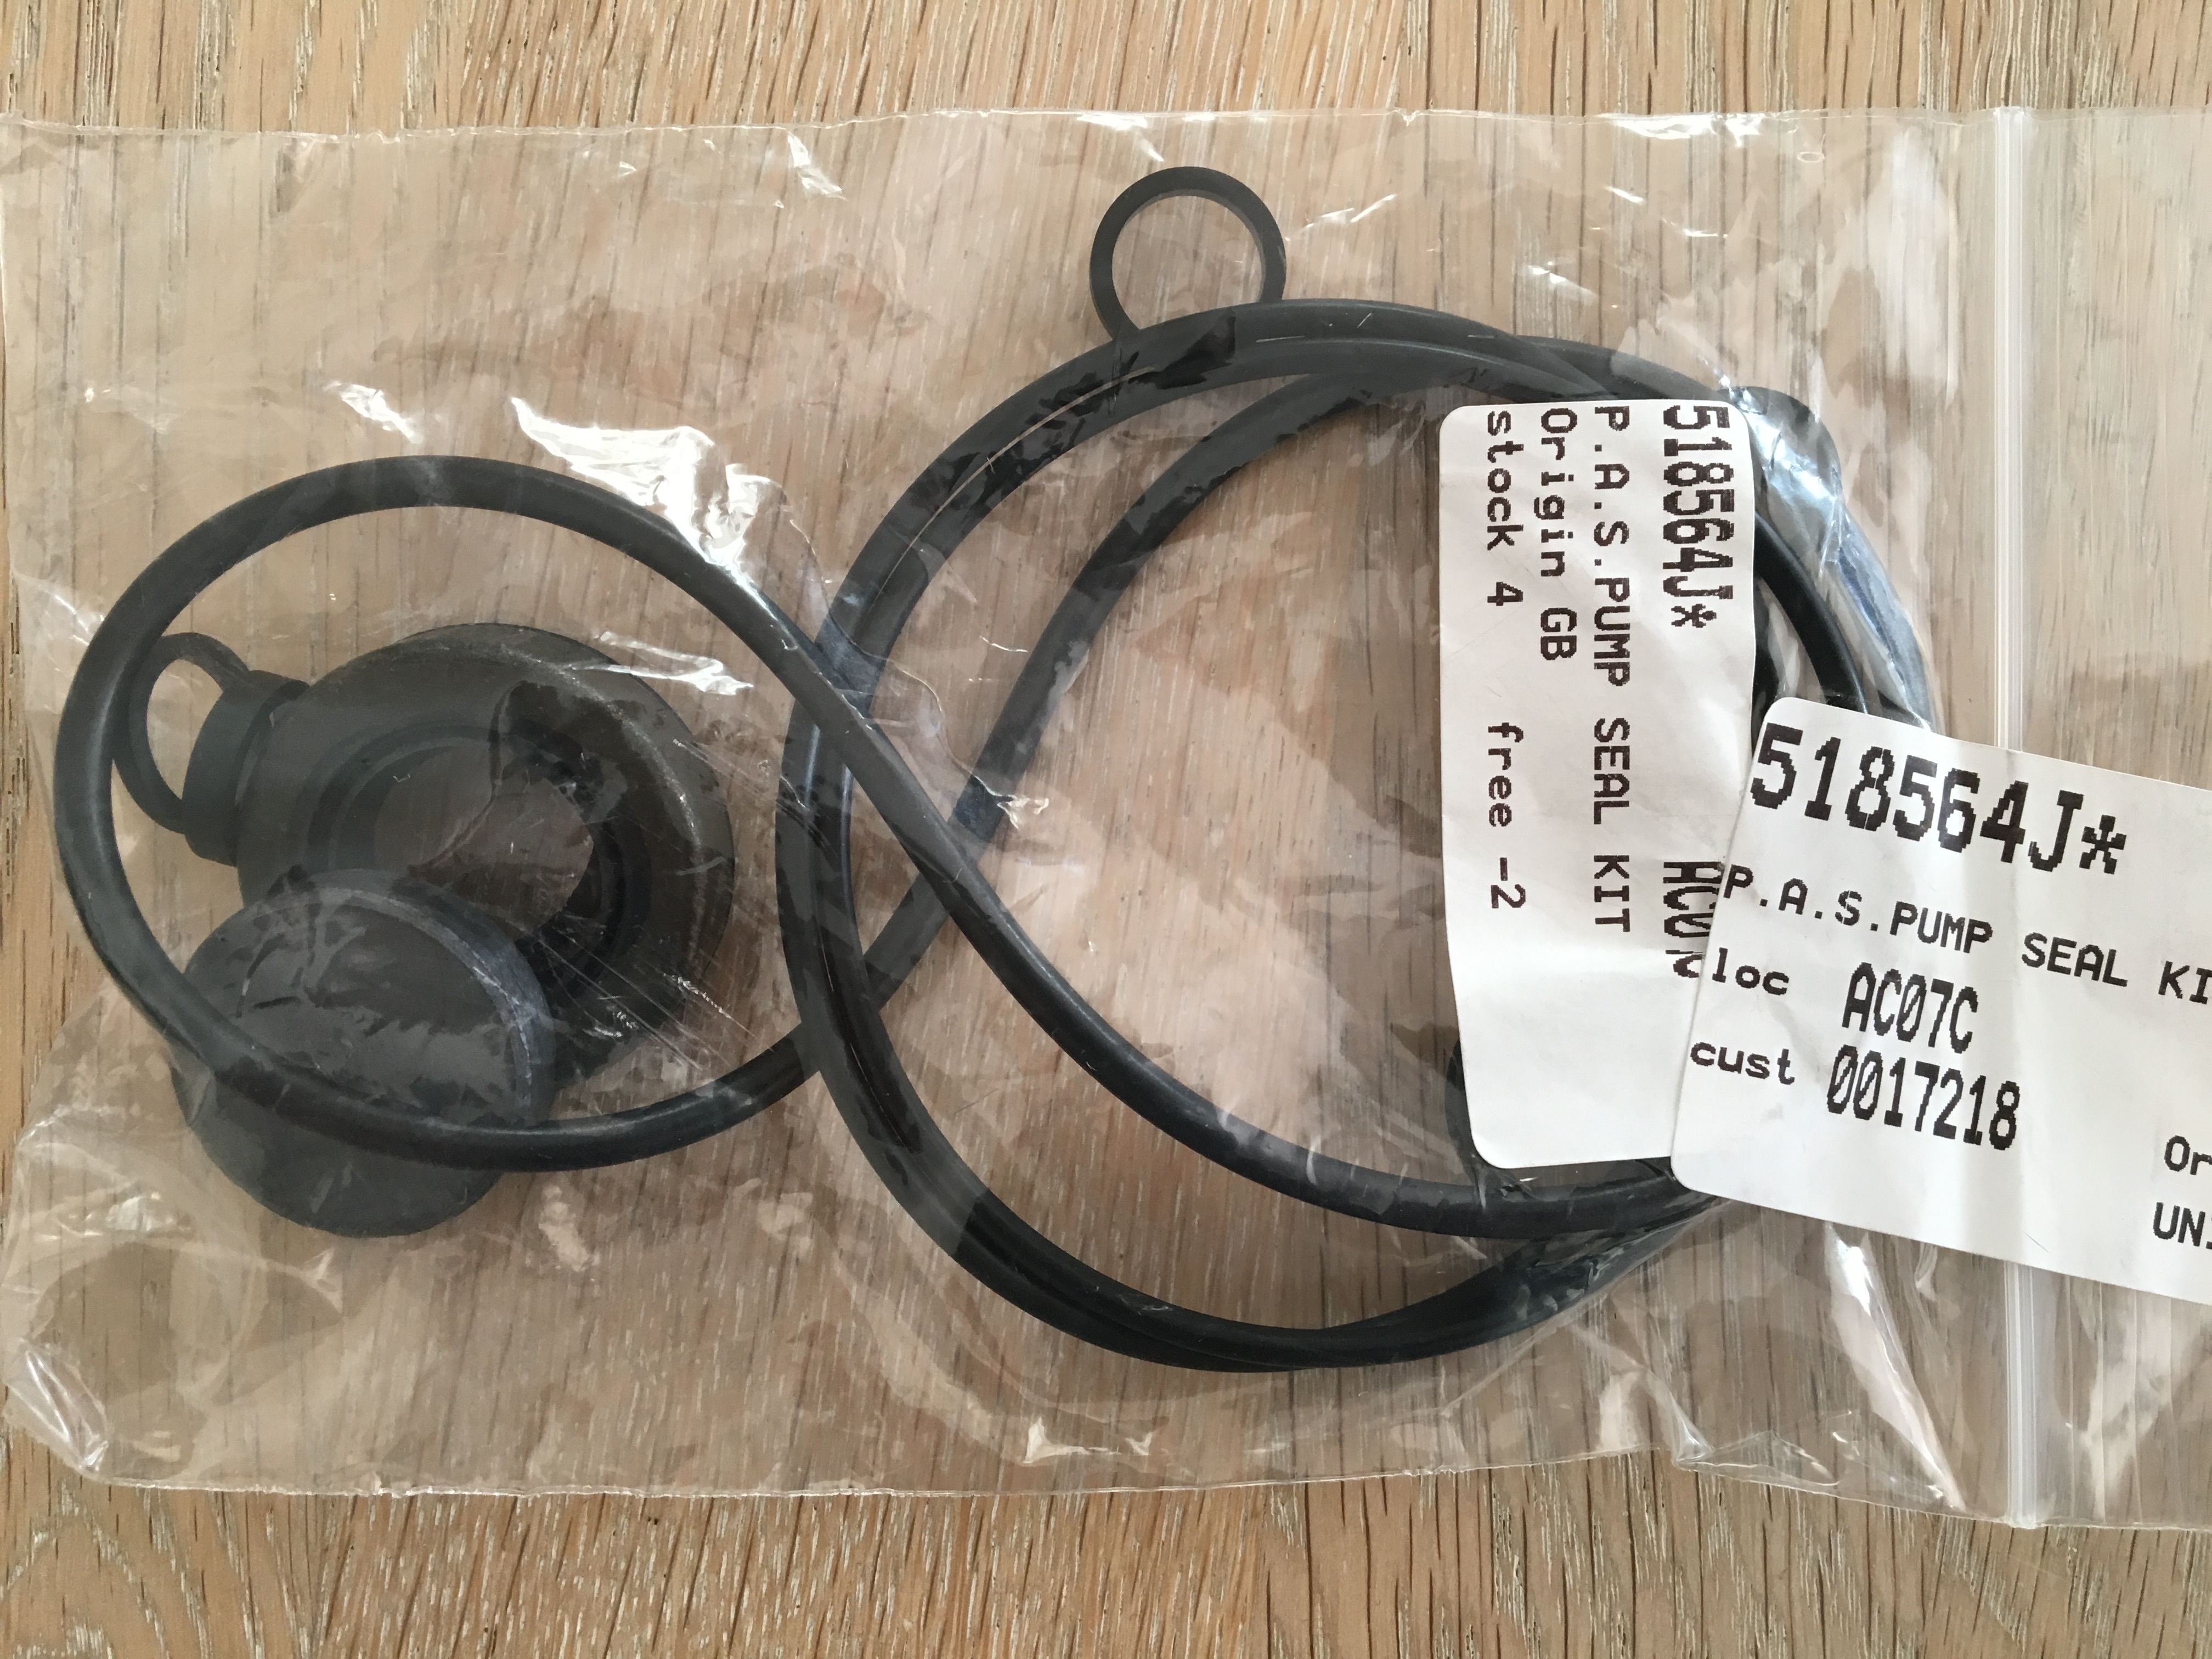
I bought a complete seal kit and replaced all seals. I ended up damaging the sheet metal reservoir and had to change it. This part is Jaguar specific and not available as sparepart, so I sourced it from an old pump.
I cleaned up the expansion tank, which turned out to be made of stainless steel and probably made by a garage at some point. I painted it satin black as this is the finish for painted steel parts in the engine bay.
After assembly and refilling the pump with Dexron 2 automatic transmission oil and the cooling system with new 50/50 mix of coolant and destilled water the systems needs bleeding.
For steering this is done by starting the engine, turning the steering fully 6-7 times, slowly and watching the oil level. No load on the wheels during the bleeding, so it needs to be done with the front end lifted.
For coolant bleeding the raised front made the process easy. That is normally not the case as the top of the radiator is lower than the top of the engine. Full heat on passenger compartment, let the engine run, fill both the expansion tank filler and the central filler. Now leave the expansion tank lid closed and fill only in the central filler. Open the radiator bleed screw on LH top side and wait for coolant to flow out here. Then close bleed screw, top up the central filler and close it and then just leave it closed !
2019 season
The big goal for 2019 was to go on summer holiday in the XJ-S ! The destination being Cornwall meant serious preparations was necessary.
April 2019: Front end damper top bushings and antiroll bar link bushings changed. ARB to chassis bushings postponed due to difficult access to fasteners.
May 2019: New front seat rubber diaphragms ordered from John Skinner, UK.
June 2019: Headlight bulbs changed. These are H4, not H1 as the handbook says for a 1977, probably due to the replacement of headlights in 1989. Osram Nightbreakers chosen for extra brightness.
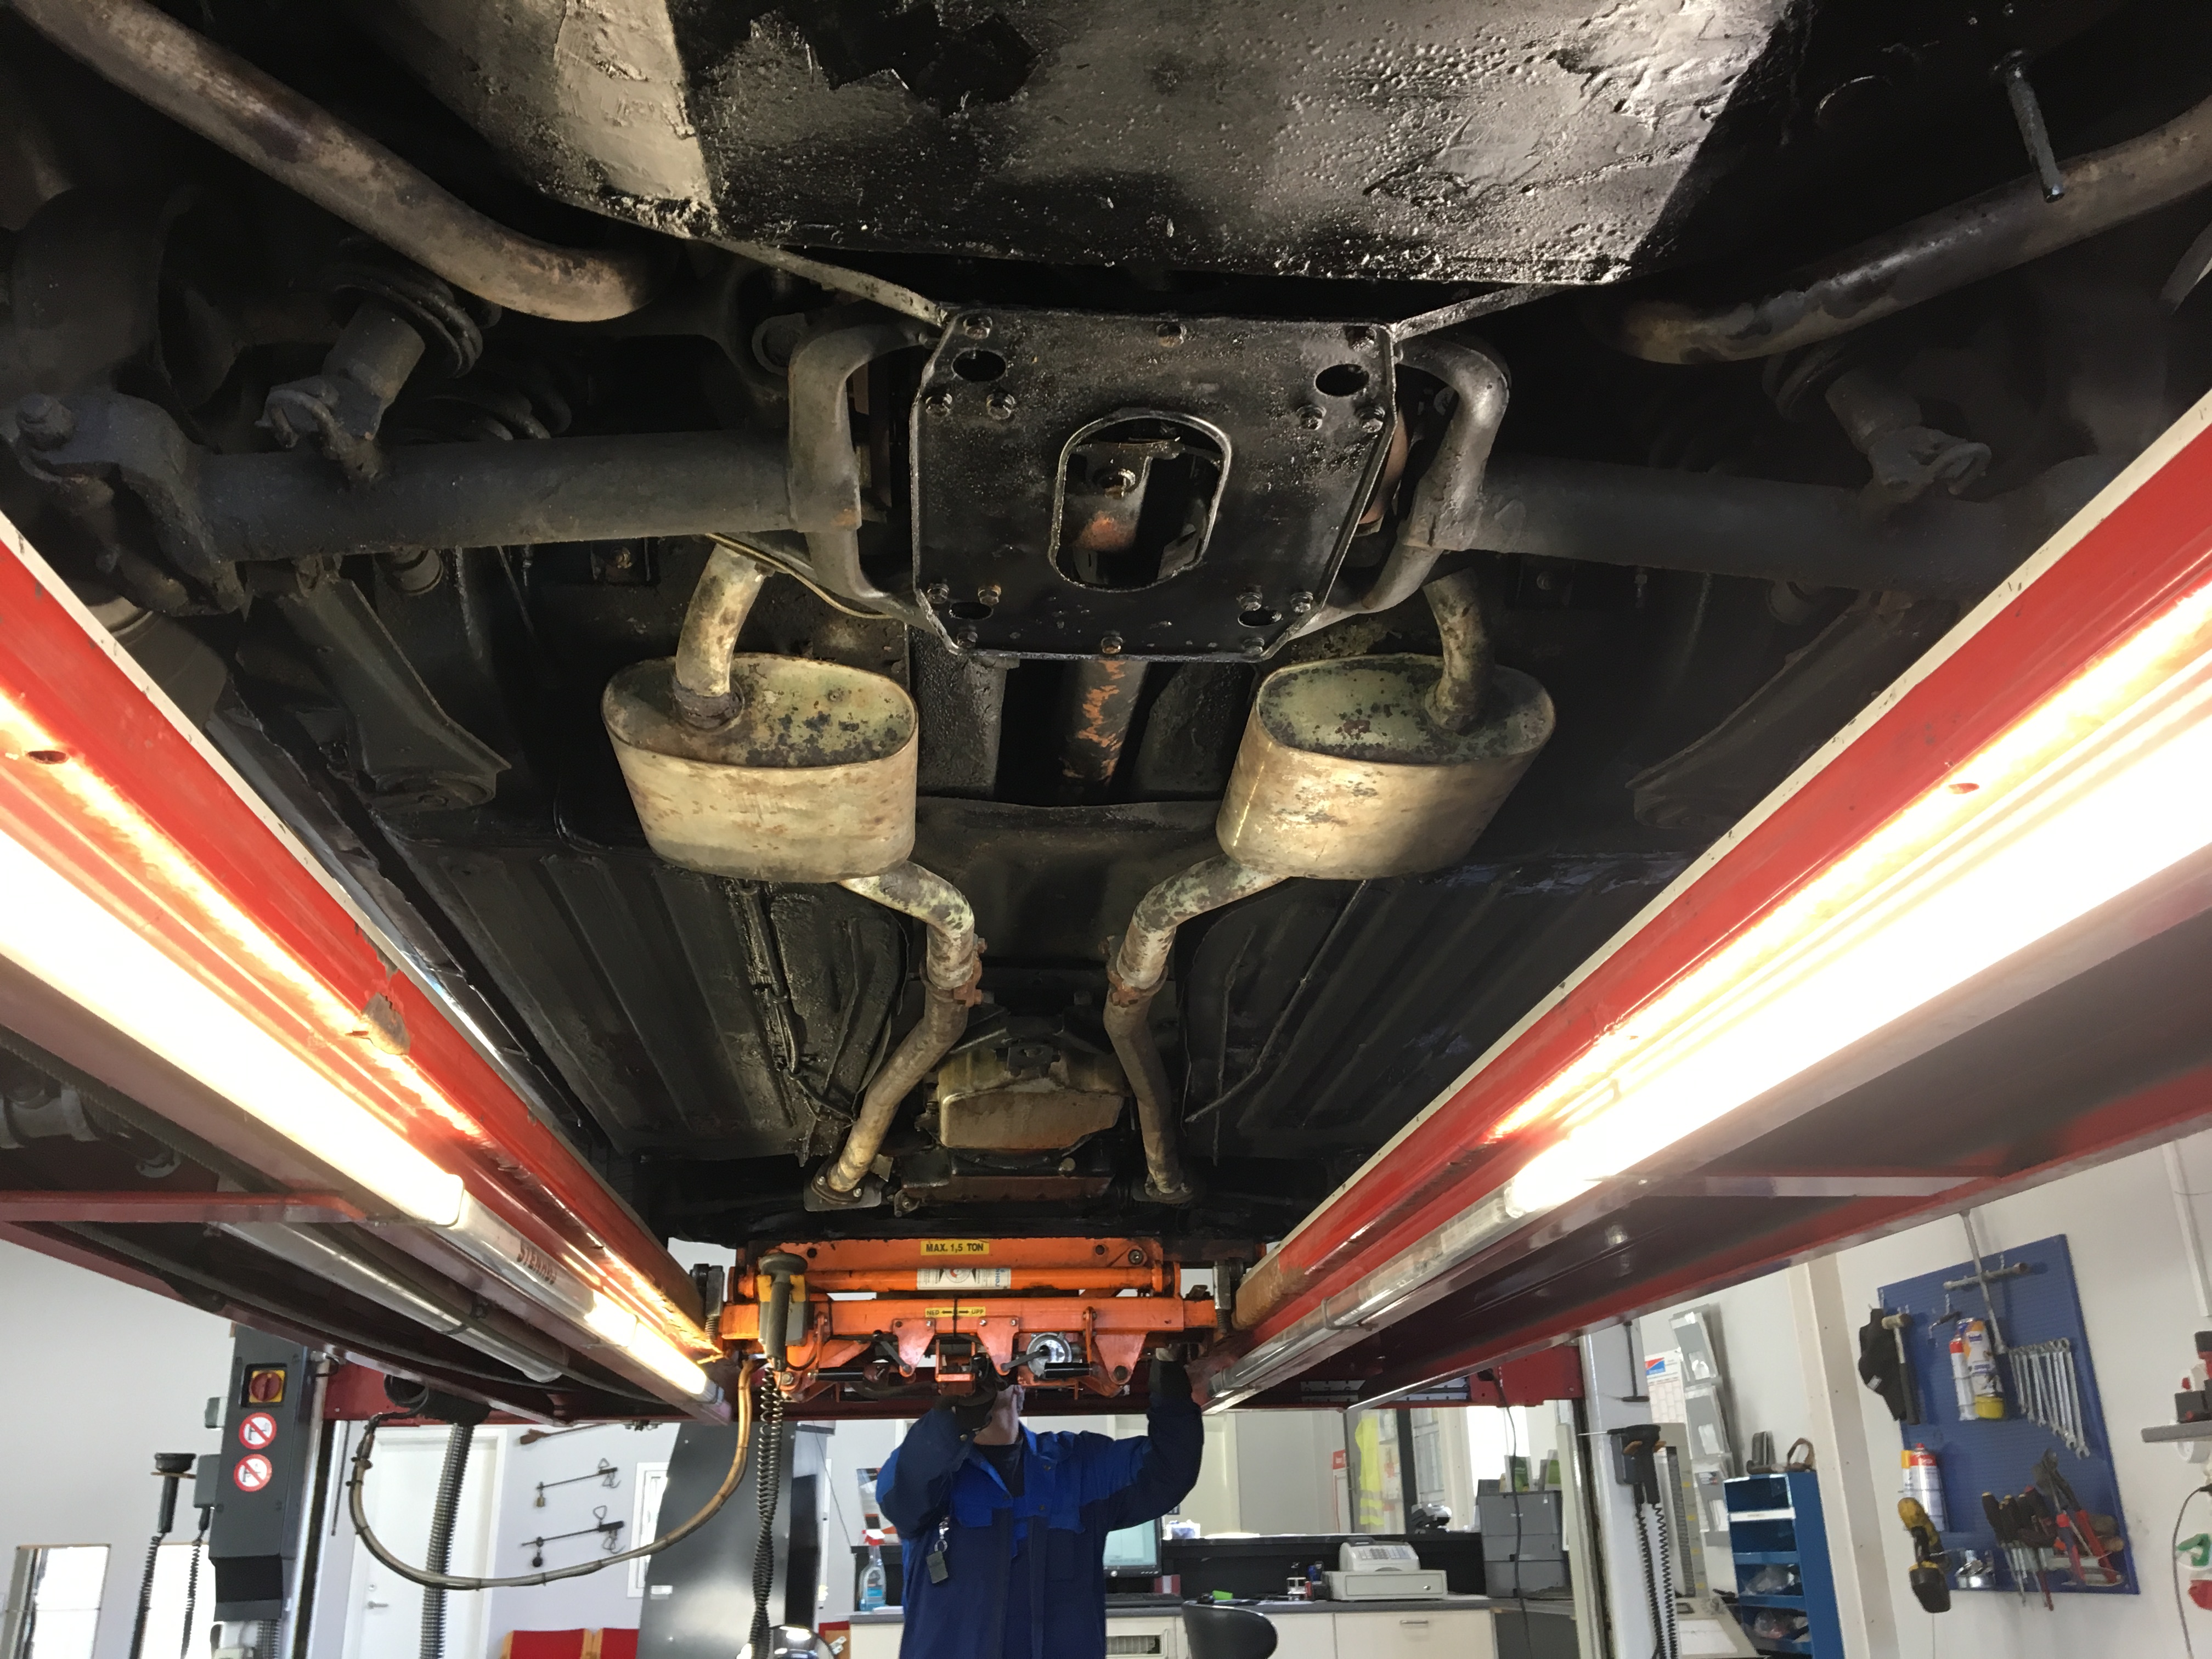
July 2019: RH rear muffler broken around inlet tube. Repaired by welding.
July 2019, ODO 3200 km:
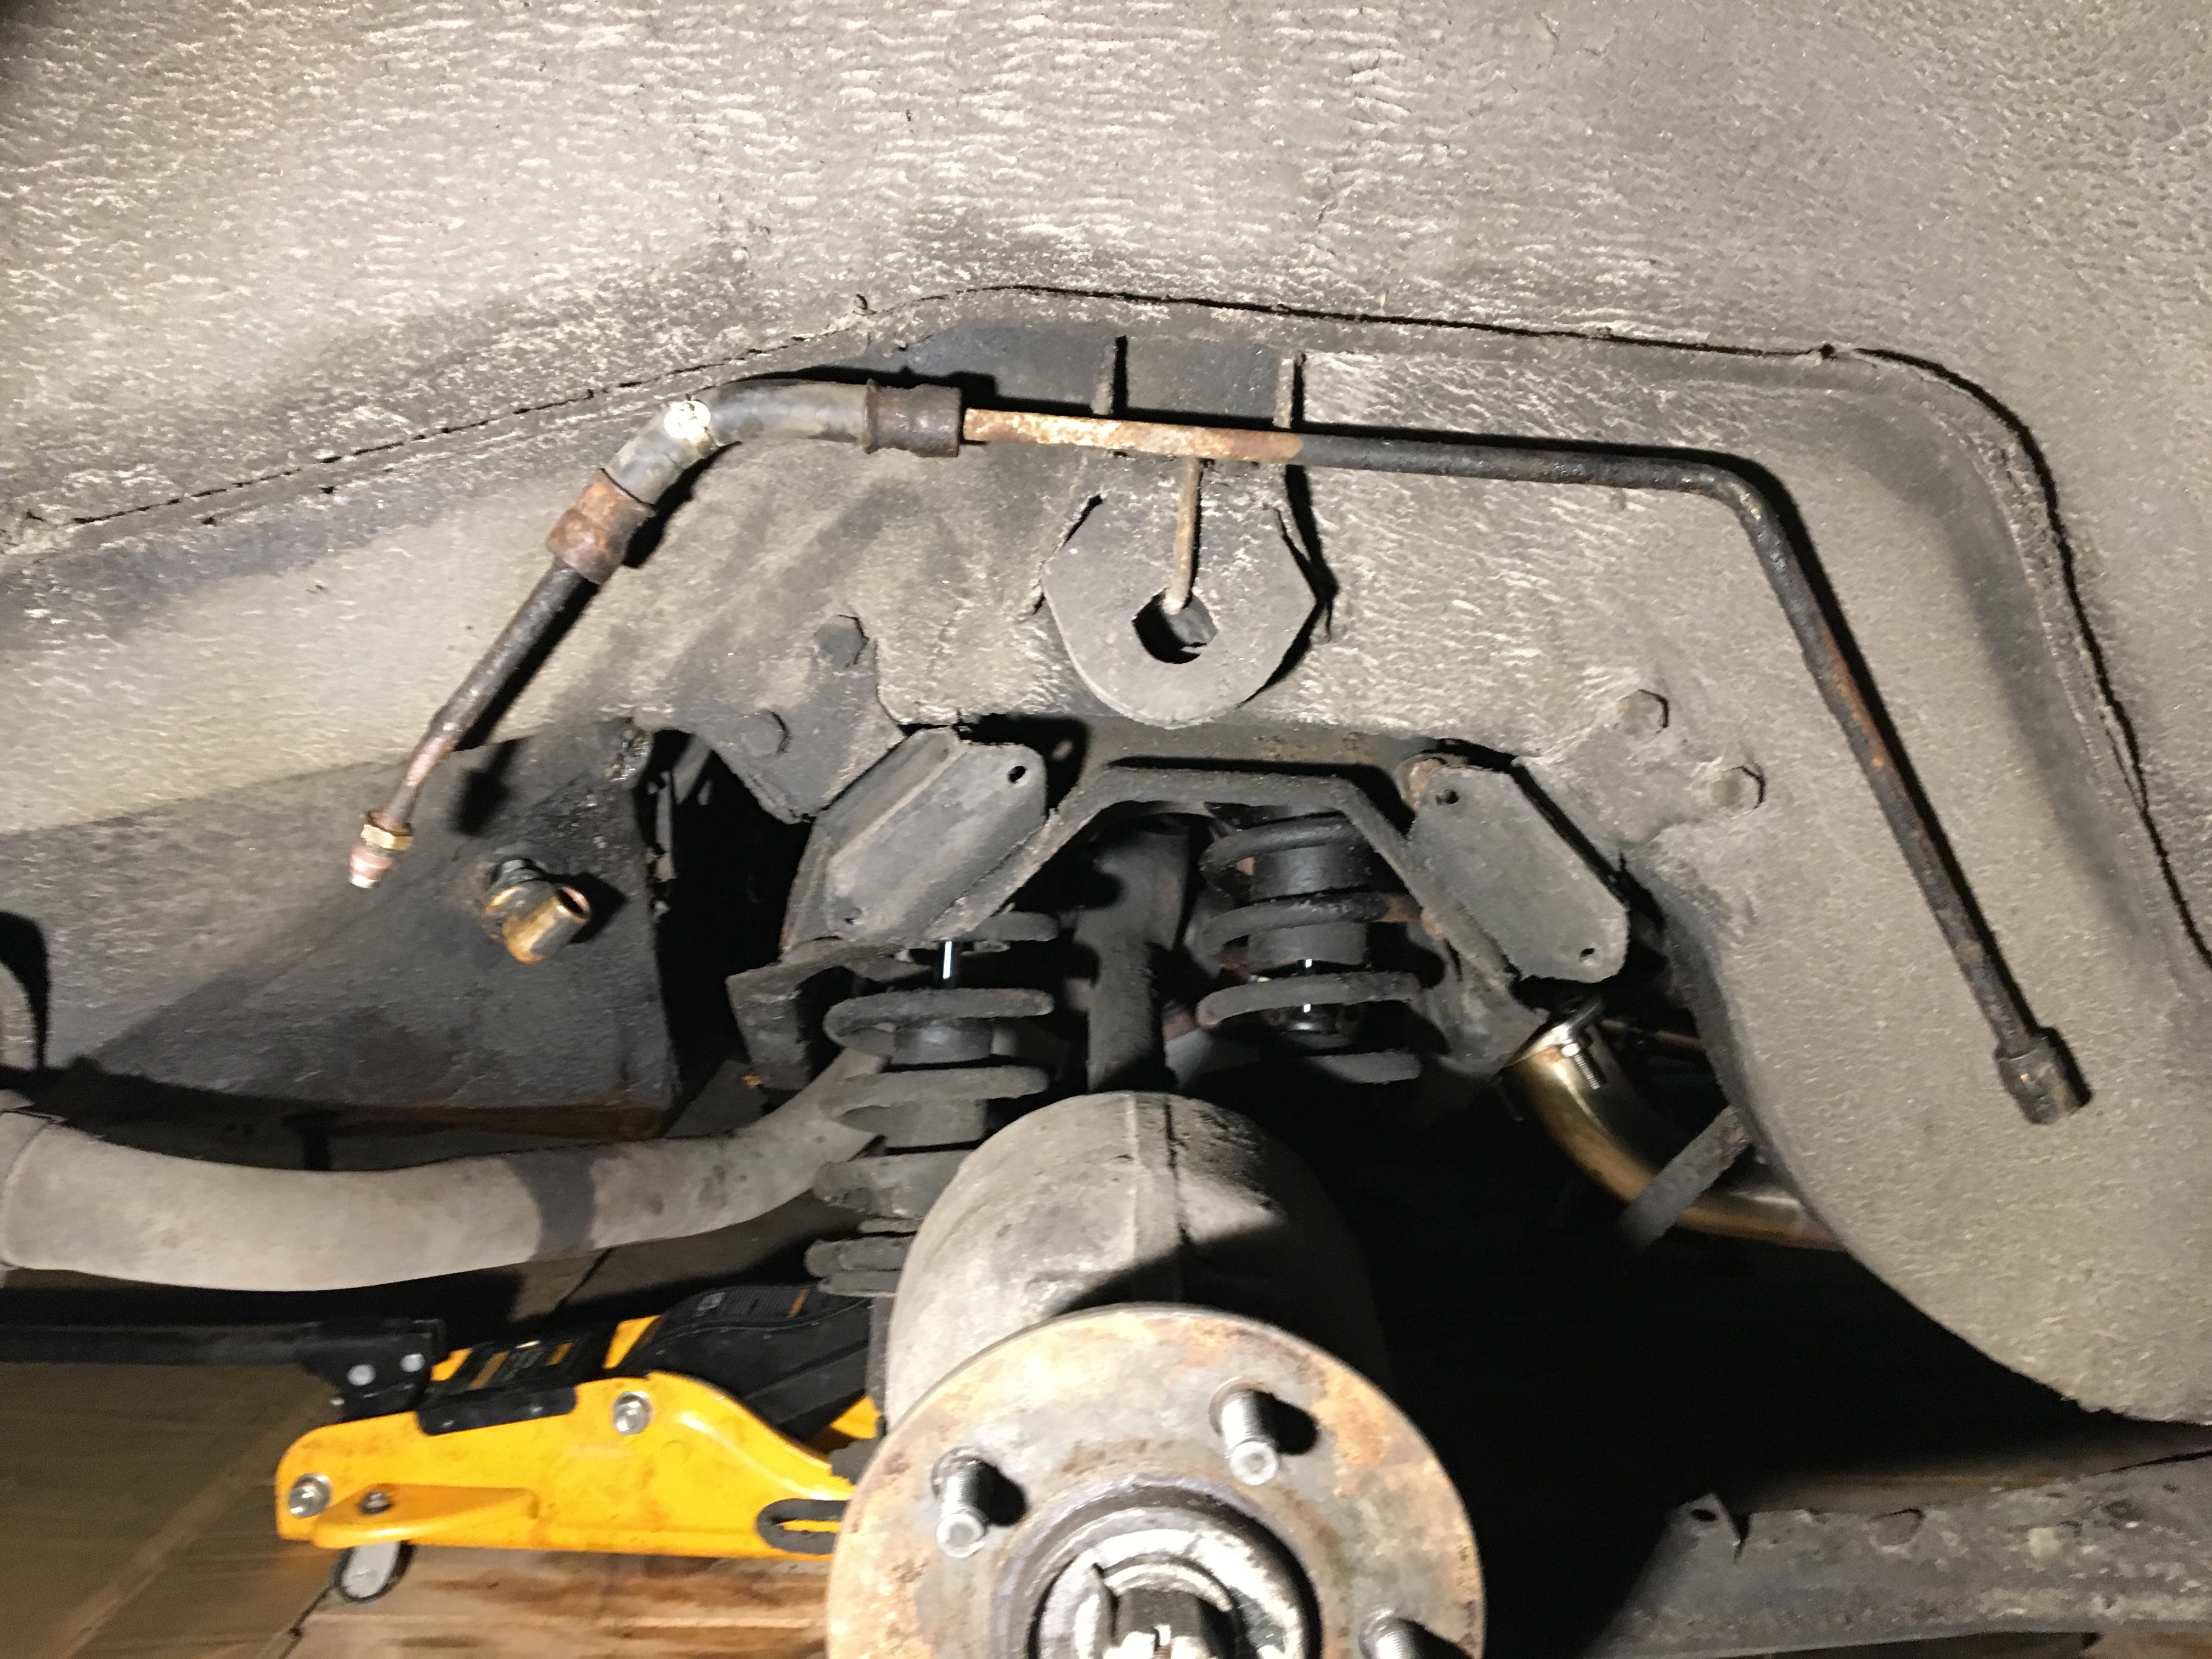
Front axle rebuild. This started as replacing the front 6-shot bushings and rear vee-mount isolating the front subframe from the chassis, but developed into changing suspension arm bushings (lower and upper), lower ball joints (changed to sealed type), stub axles and wheel bearings. The components were cleaned and painted before assembling with a layer of wax for further protection.
Front brake pad thickness 6-7 mm. Discs not measured, but looked almost like new. Indicated minimum thickness on front discs is 0.9 inches (22.86mm)
Front downpipes changed to a set from Simply Performance. The old LH downpipe was dented and had been bended, most likely to adapt the originally RHD engine to fit in this LHD car.
Front ARB bushes changed
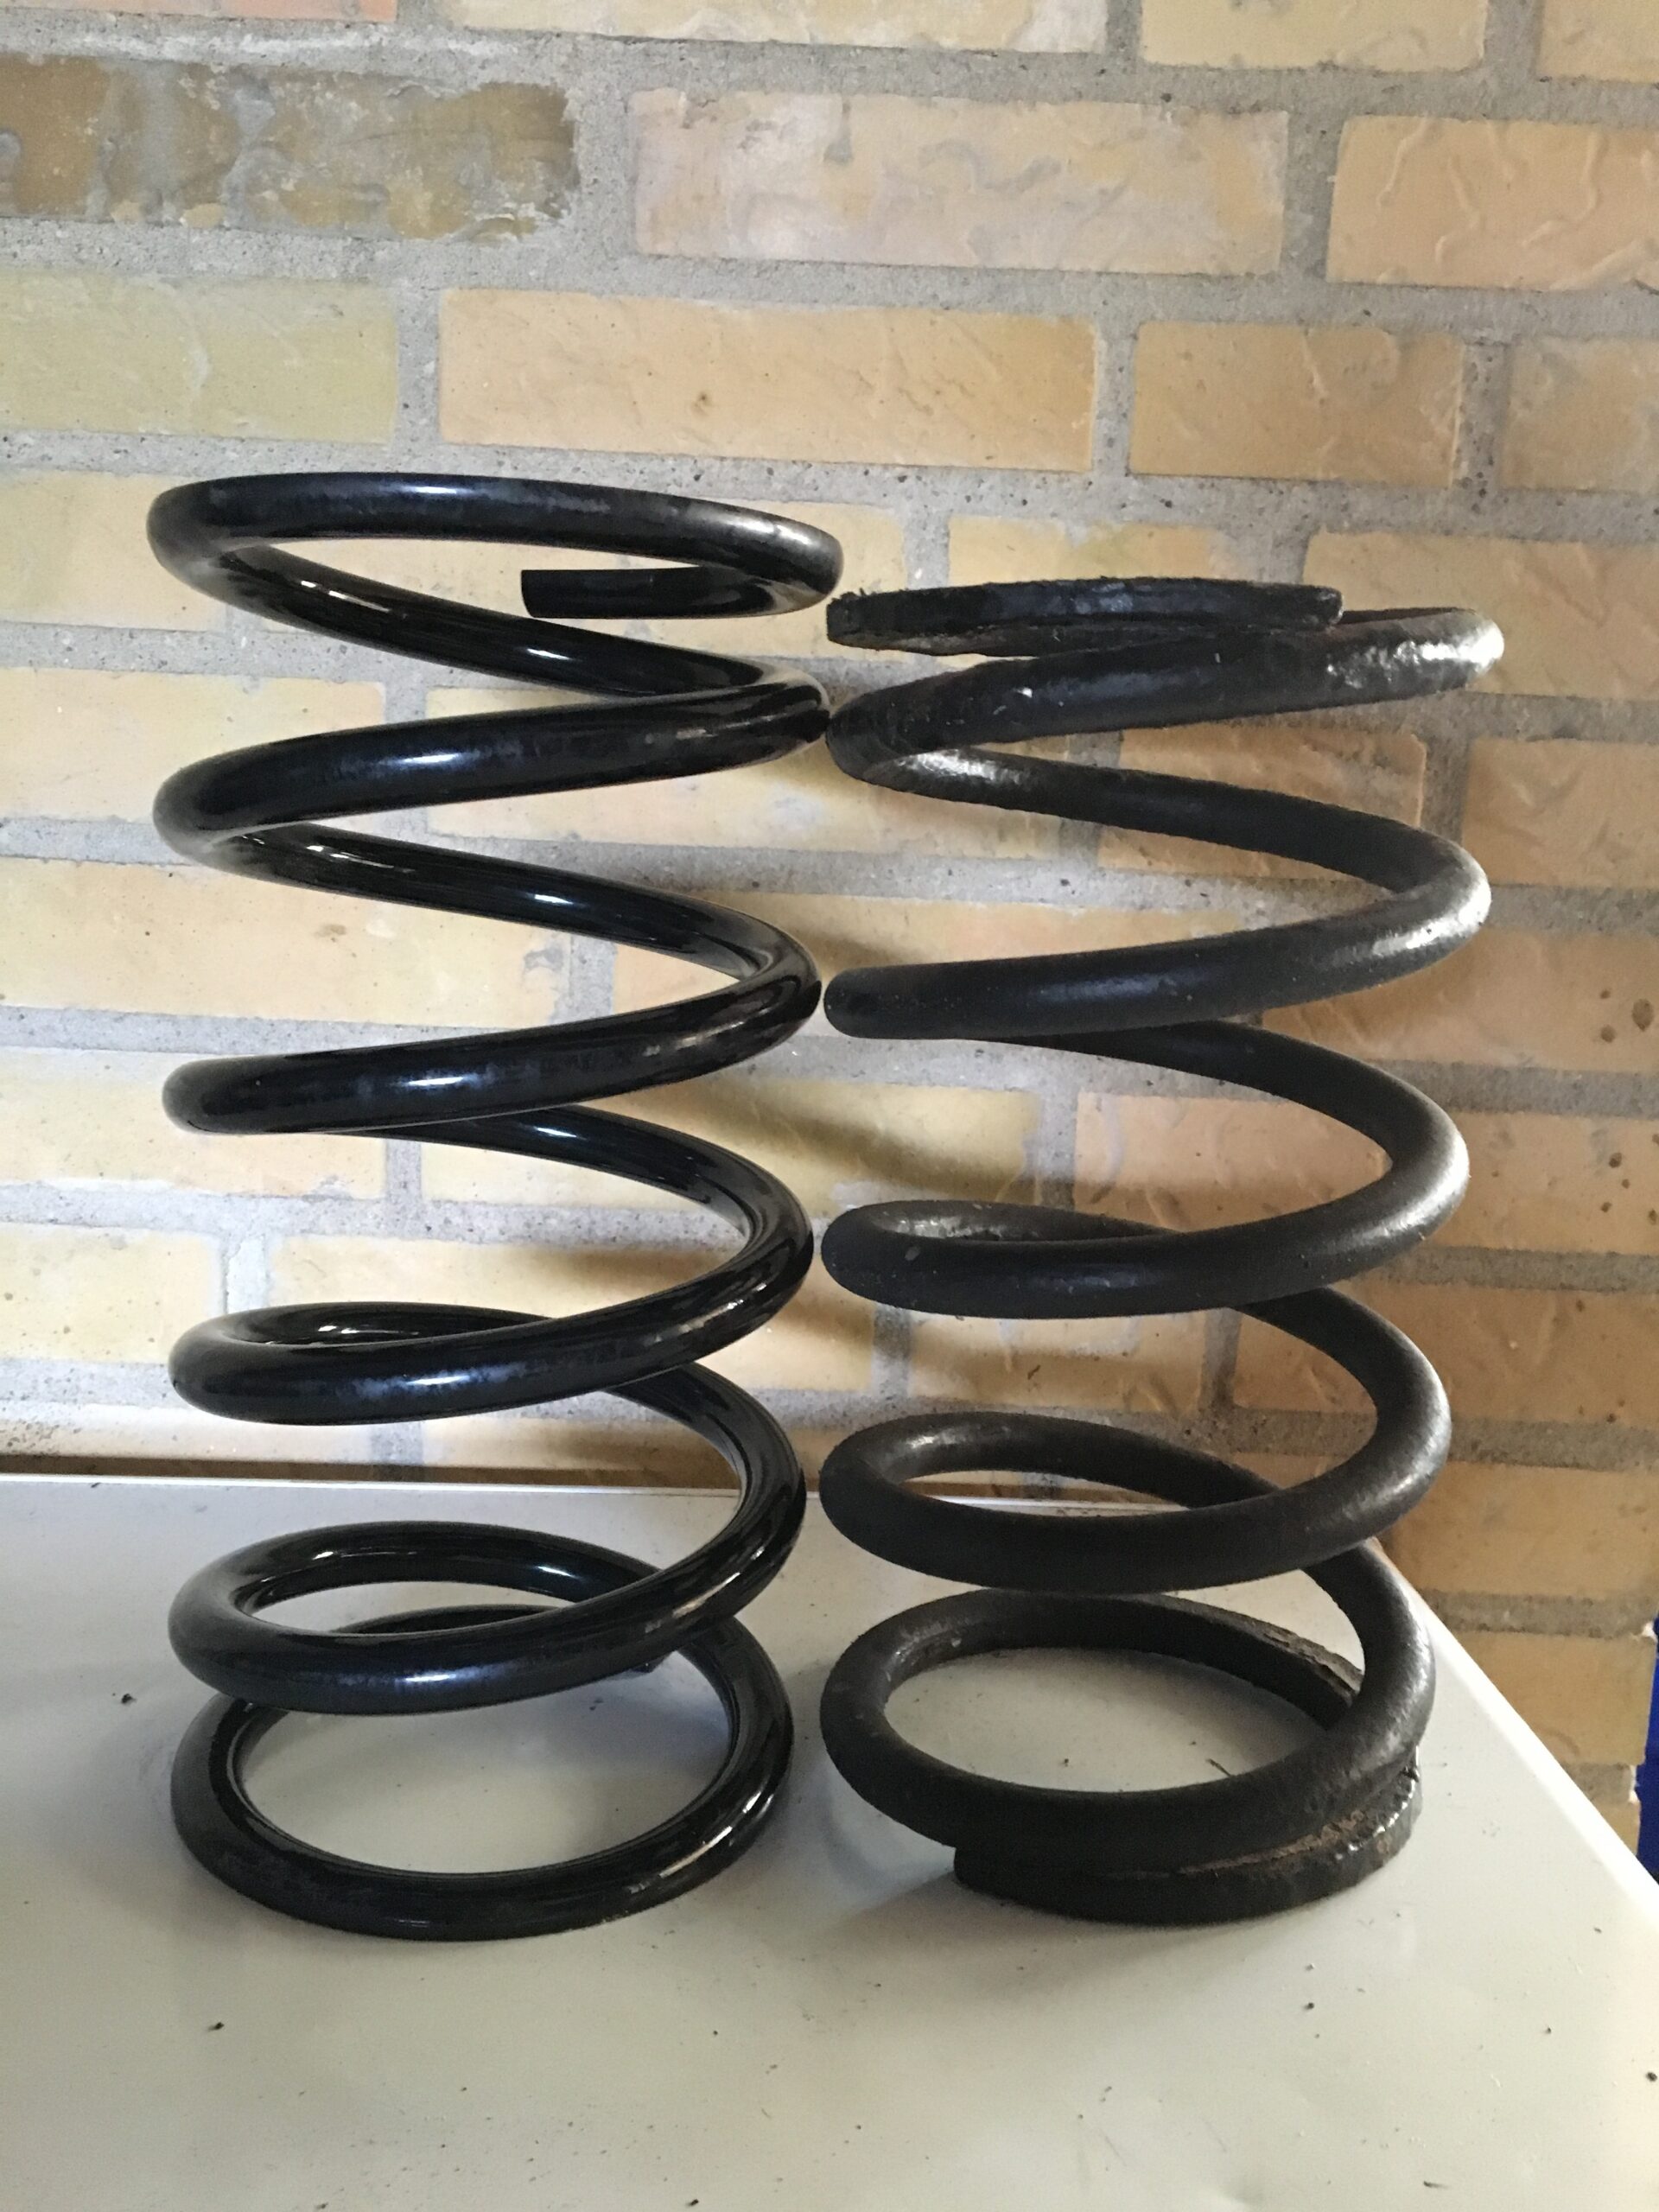
Front springs and shocks was not in too good condition, but evaluated to be OK for the planned trip
Ignition amp moved out in front of the radiator using a extension harness after it turned out the engine was still running irregularly when ambient temperature was exceeding 30°C. A quick test using a bag of frozen greens to cool down the amp placed on the intake plenum determined that overheating amp was the issue. This mod has since proven it’s worth for 7000 km without trouble.
Drain hoses from fuel filler changed using 3/8″ and 1/2″ fuel hose. The correct size hose should be appr 11mm internally, but that was not available with short notice before our departure to France-England
July 28th 2019. 03835 km: Departure for the Grand Tour
Normandy and Southern England Tour description HERE
August 17th. 09705 km: Back home from France and UK
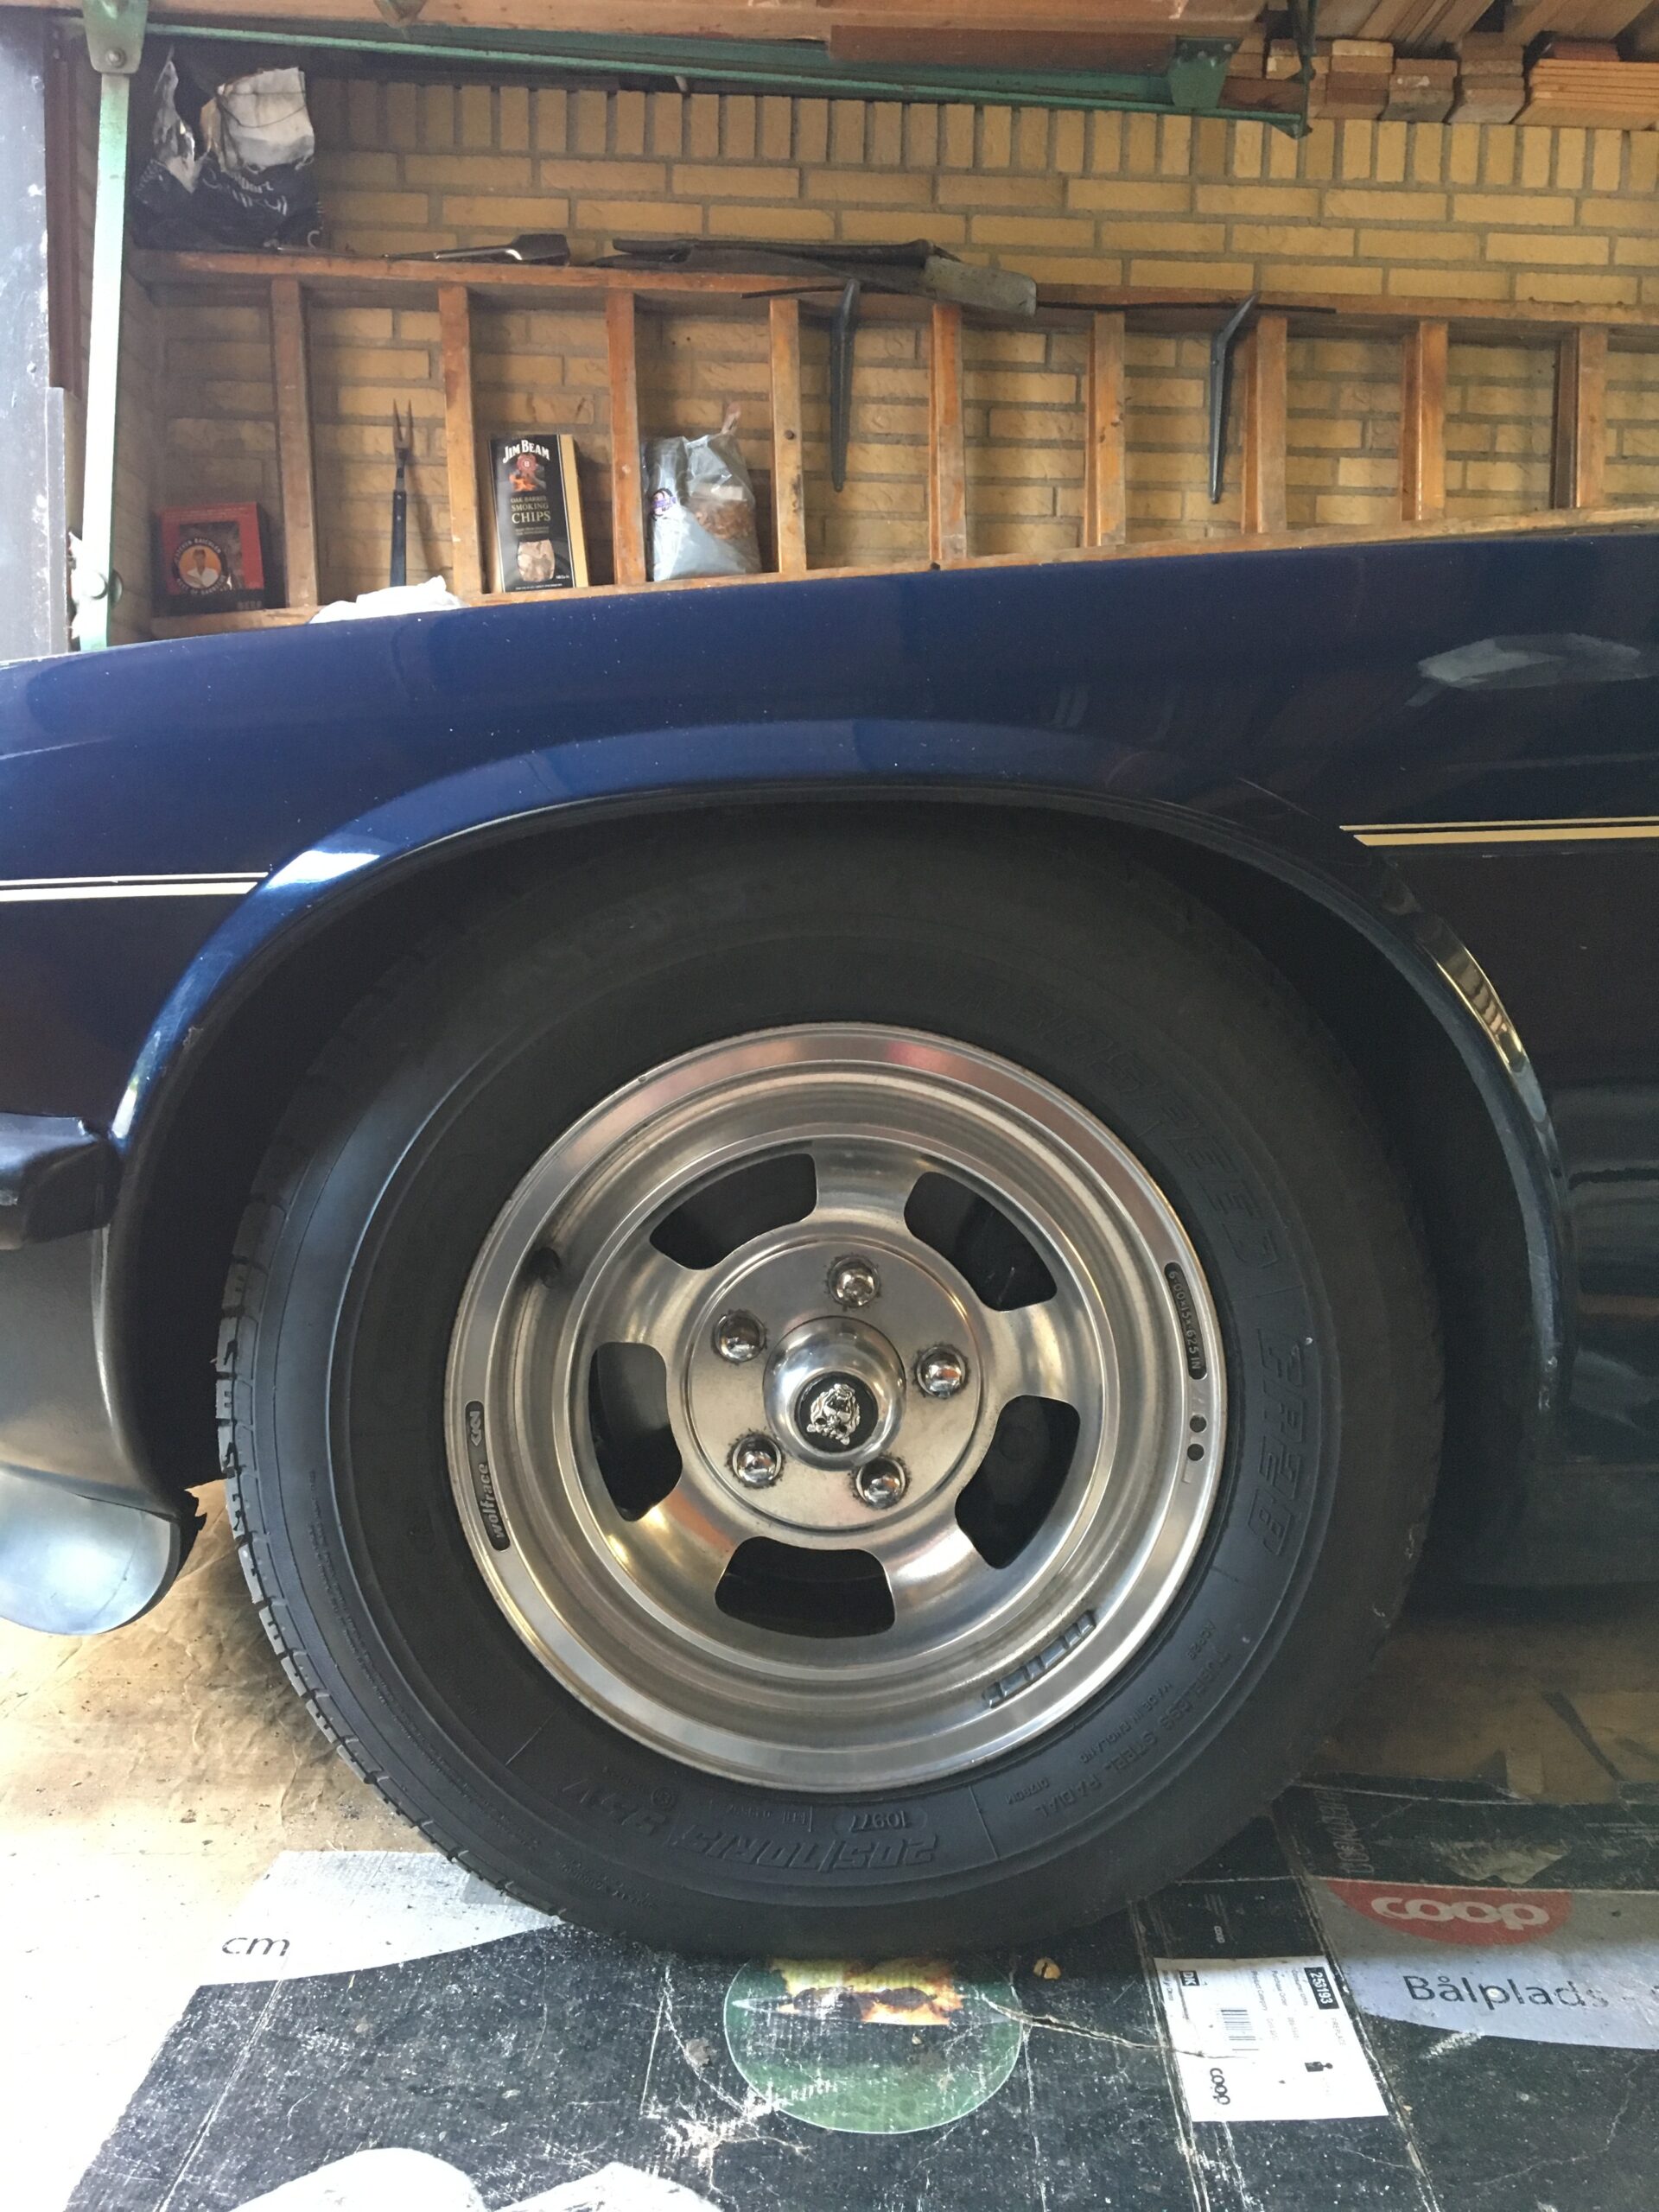
We had a set of new tyres mounted in UK: 205/70R15V Avon CR28
Aircon has lost its charge at return. It turns out the high pressure side hose is now ‘sweating’ oil and thereby also refrigerant.
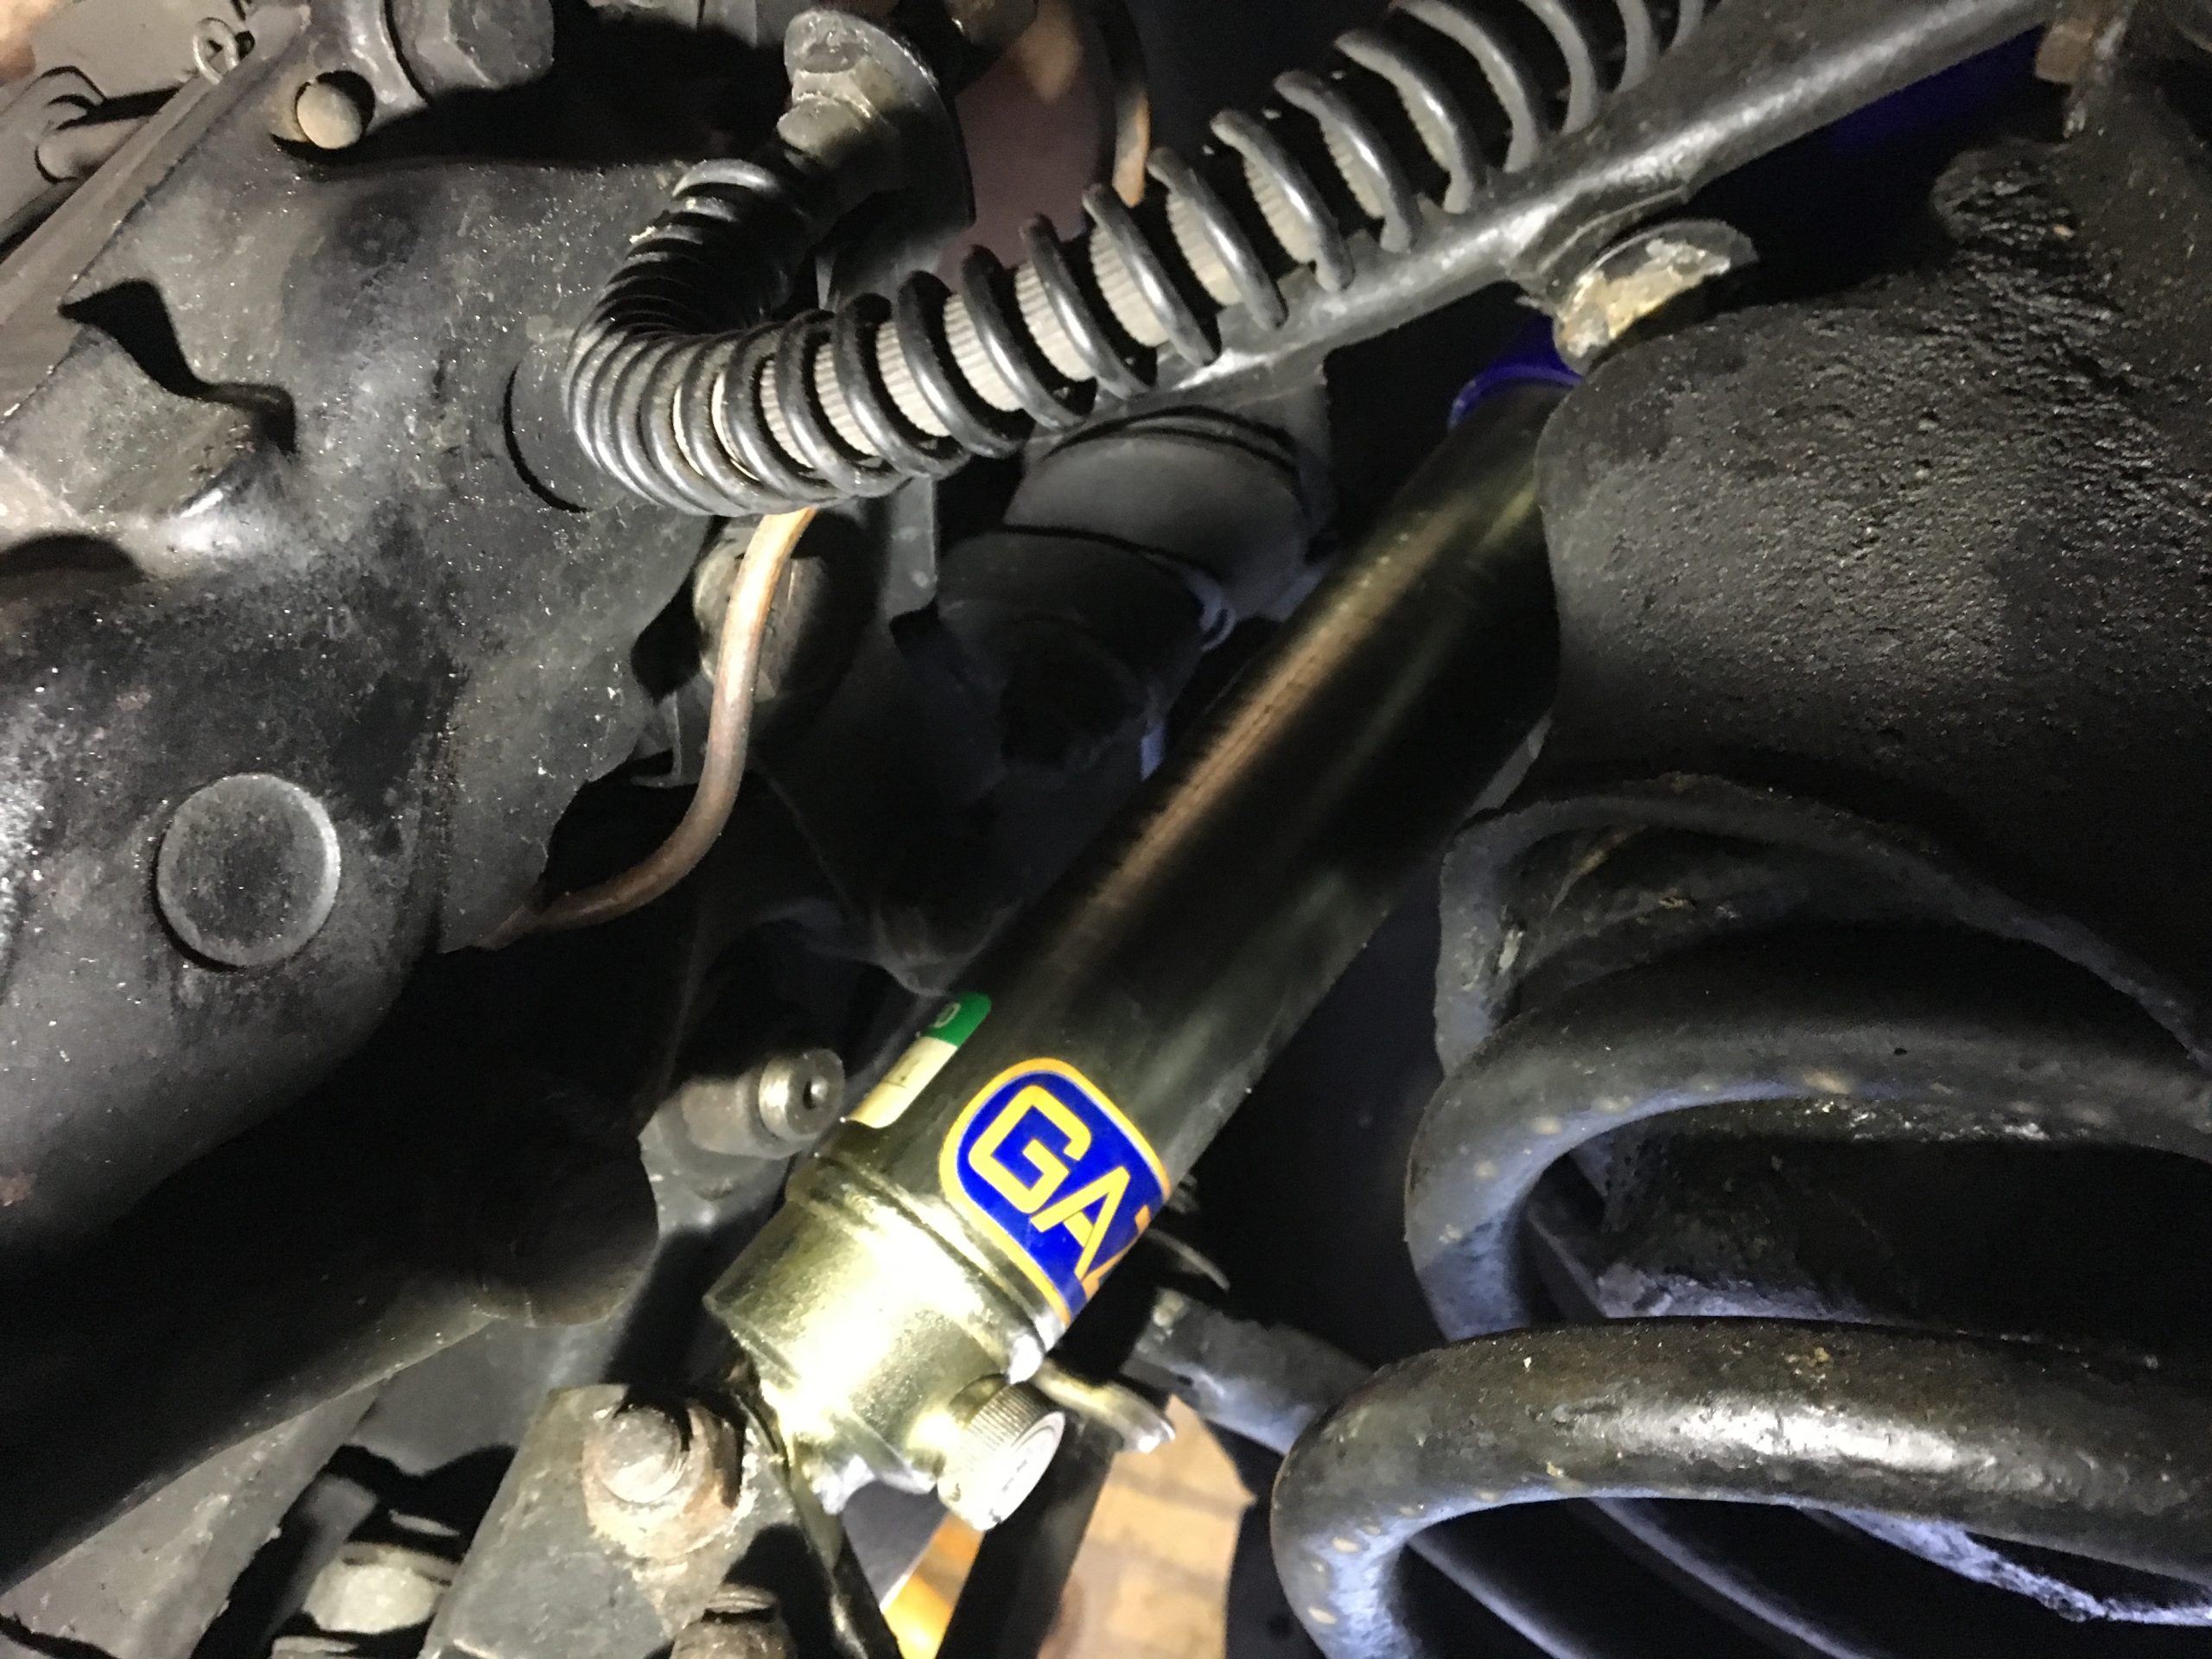
The front shocks ended up being very weak, so a set of new adjustable GAZ has been mounted August 31st.
Initial setting: 9 clicks from softest, but that turned out to be too stiff, especially for the first kilometers, where the shocks felt solid. After 5000+ km they are at 6 clicks.
The front springs did also suffer, and the front end was now too low to drive. Dimension from centre hub to wing edge was 32cm before mounting a set of new front springs September 5th.
3 packing rings were used with the old springs, so the low front end had been addressed before my ownership.
1 packing ring was used with the new springs, sourced from Berkshire Jag Components. Initial measurement from hub centre to wing lip was 38cm, settling to a more appropriate 36cm after 300 km of driving.

For the end of the season we did a few social drives. After an oil change the car was parked for winter hibernation November 11th at 10541 km. Tyre pressure increased from 1.9 bar to 2.5 bar to prevent flat spots
2020 season
 This year was the big Covid lock-down year, and there was not much going on on the classic car scene. I did a series of technical articles for Jaguar Club of Denmarks magazine on V12 maintenance to fill out the extra spare time…
In the end of May the driver seat diaphragm was replaced. Or rather, that was the intention, but as the original diaphragm is firmly glued to the seat foam base, the old one ended up not being left in place instead of being removed. The passenger seat diaphragm was in OK condition, so mounting of the new diaphragm for that seat was postponed.
The bearing in the A/C compressor has become increasingly noisy, and after investigating if the clutch was repairable, I ordered a bearing and the puller needed for both disassembly and pulling the clutch back into place.
missing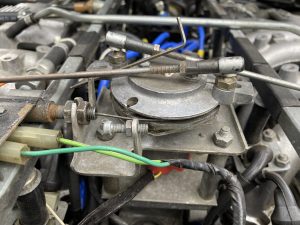
2021 season
missing
The car was parked for winter hibernation November 13th at 15600 km. Tyre pressure increased from 1.9 bar to 2.5 bar to prevent flat spots